18 Backyard Fire Pit Landscaping Ideas
A fire pit can bring people together. But a fire pit sitting alone in the yard can look plain, unfinished, or even unsafe.
The area around it matters just as much as the fire feature itself. You need stable ground, enough seating space, safe materials, clear paths, and a layout that works with your yard.
Some of the best backyard fire pit landscaping ideas combine simple flooring, comfortable chairs, careful planting, and soft lighting. You do not need a huge yard or a large budget. A small gravel pad with four chairs can work just as well as a built-in stone patio.
This guide covers ideas for small yards, sloped spaces, modern patios, rustic gardens, and low-cost projects. You will also learn how to plan the layout, choose safer materials, and avoid common mistakes.
Use one idea or mix several together. The goal is to create a backyard fire pit area that feels comfortable, practical, and easy to use.
What to Plan Before Landscaping Around a Fire Pit
A beautiful fire pit design can fail if the location is unsafe, uneven, or hard to reach.
Start by checking your local fire rules. Some cities limit where wood-burning fire pits can be placed. Other areas may have rules about size, fuel type, seasonal use, or permits.
Manufacturer instructions also matter. A portable gas fire pit may need different clearance than a permanent wood-burning pit.
Choose a level spot away from the house, fence, shed, trees, and low branches. Many fire safety sources suggest leaving at least 10 feet between a fire pit and anything that can burn. Your local rules may require more space.
Wind is another key factor. Stand in the yard on a normal evening and check which way the breeze moves. You do not want smoke blowing into your home, dining area, or neighbor’s yard.
Next, measure the full space. Do not measure the fire pit alone. You also need room for chairs, walking paths, and people moving behind the seats.
Ask yourself:
- How many people will use the area?
- Will the fire pit be permanent or portable?
- Do you need space for firewood?
- Does rainwater collect in this part of the yard?
- Will people walk across grass, gravel, or steps to reach it?
- Do you need privacy from nearby homes?
- Will children or pets use the yard?
Mark the layout with string, stakes, or outdoor paint. Place actual chairs in the space before buying materials. This simple test can stop you from building an area that feels too tight.
18 Backyard Fire Pit Landscaping Ideas for a Better Outdoor Space
You do not need to copy one full design. A gravel base, circular seating, privacy screen, and path lights can all work together.
Choose ideas based on your yard size, budget, style, and the type of fire pit you plan to use.
Build a Gravel Fire Pit Area for Better Drainage
Best for: Budget projects, casual yards, and DIY makeovers
Difficulty: Easy to moderate
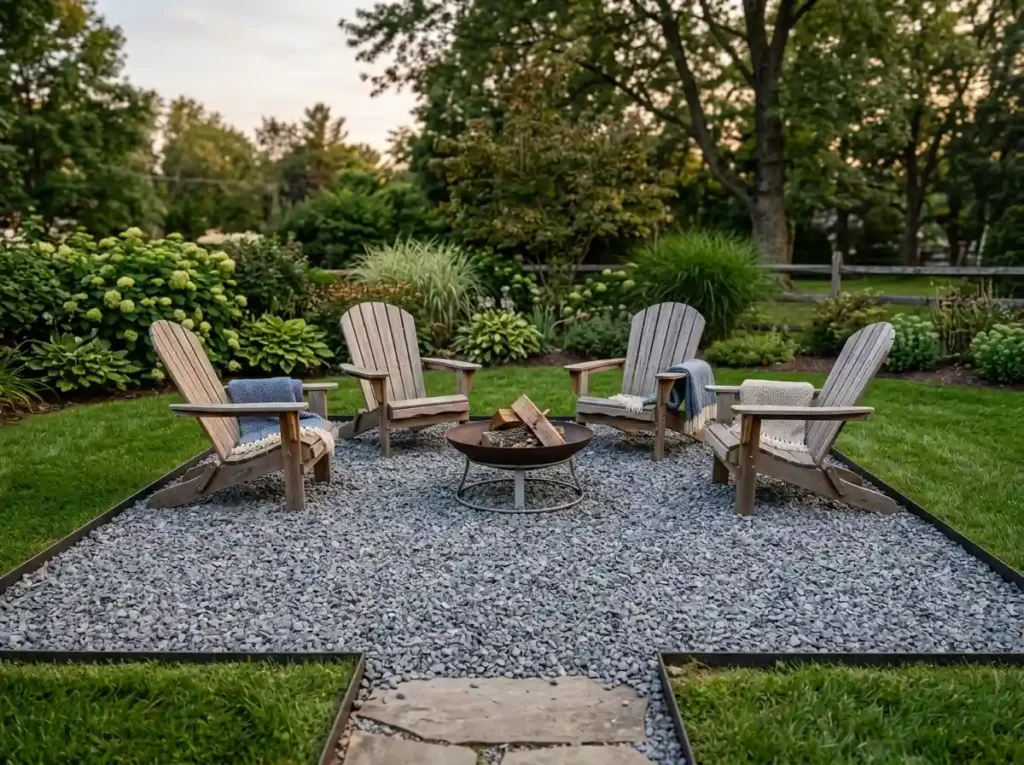
Gravel is one of the simplest materials for a fire pit area. It costs less than many patio surfaces and allows water to drain after rain.
Start with a level base. Remove grass and loose soil. Add compacted crushed stone below the top layer so the area stays firm.
Pea gravel feels smooth underfoot, but round stones can move under chairs. Angular gravel or crushed granite often stays in place better.
Add metal, stone, or concrete edging around the border. This keeps the gravel from spreading into the lawn.
A gravel fire pit area can look rustic or modern. Pair it with Adirondack chairs for a relaxed look. Use black metal chairs and straight edging for a cleaner style.
Keep dry leaves and plant debris out of the gravel. Even a low-cost setup still needs regular care.
Use Pavers to Create a Clean Fire Pit Patio
Best for: Neat layouts, built-in fire pits, and long-term use
Difficulty: Moderate
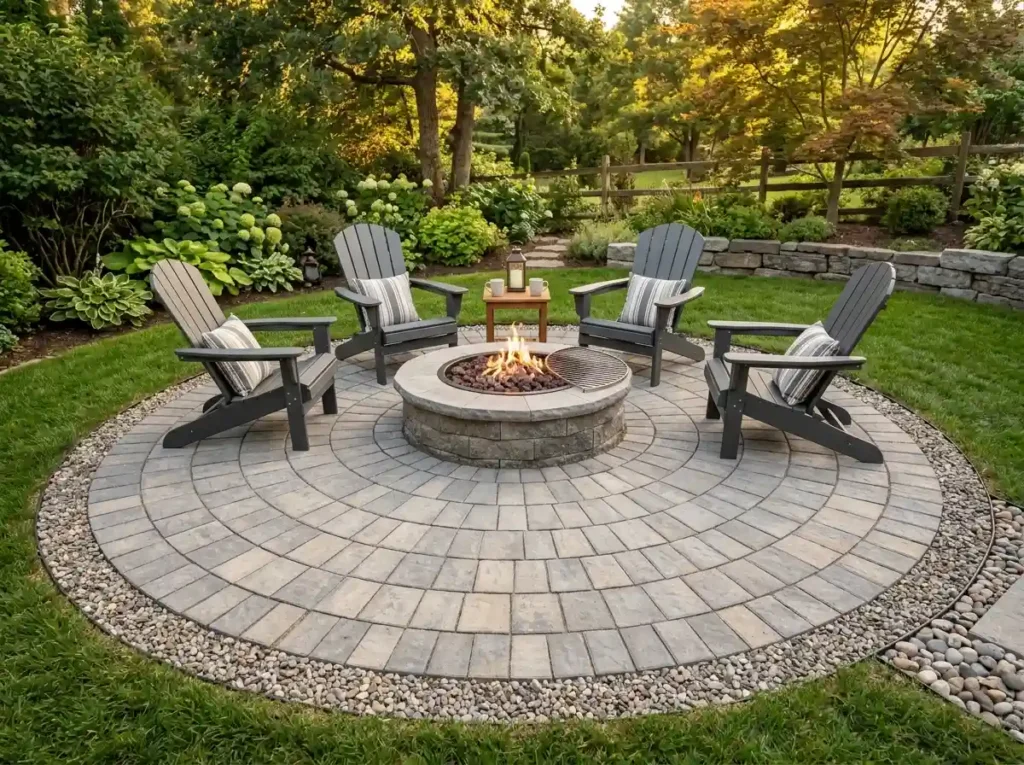
Pavers create a flat, stable surface for chairs and walking. They also make the fire pit feel like part of a finished patio.
You can choose concrete, brick, or natural stone pavers. The right option depends on your budget and backyard style.
A running bond pattern works well in simple spaces. Basket weave adds a more classic look. A circular pattern can help a round fire pit feel centered.
Make sure the base below the pavers is properly prepared. Poor installation can cause sinking, movement, and water problems.
One benefit of pavers is that damaged pieces can often be replaced without rebuilding the full area.
Choose outdoor products that are suitable for the location. Materials used close to high heat should follow the fire pit maker’s instructions.
For a lower-cost option, use pavers only under the seating area. Fill the outer border with gravel.
Create a Sunken Fire Pit Seating Area
Best for: Sloped yards, large spaces, and private outdoor rooms
Difficulty: Hard
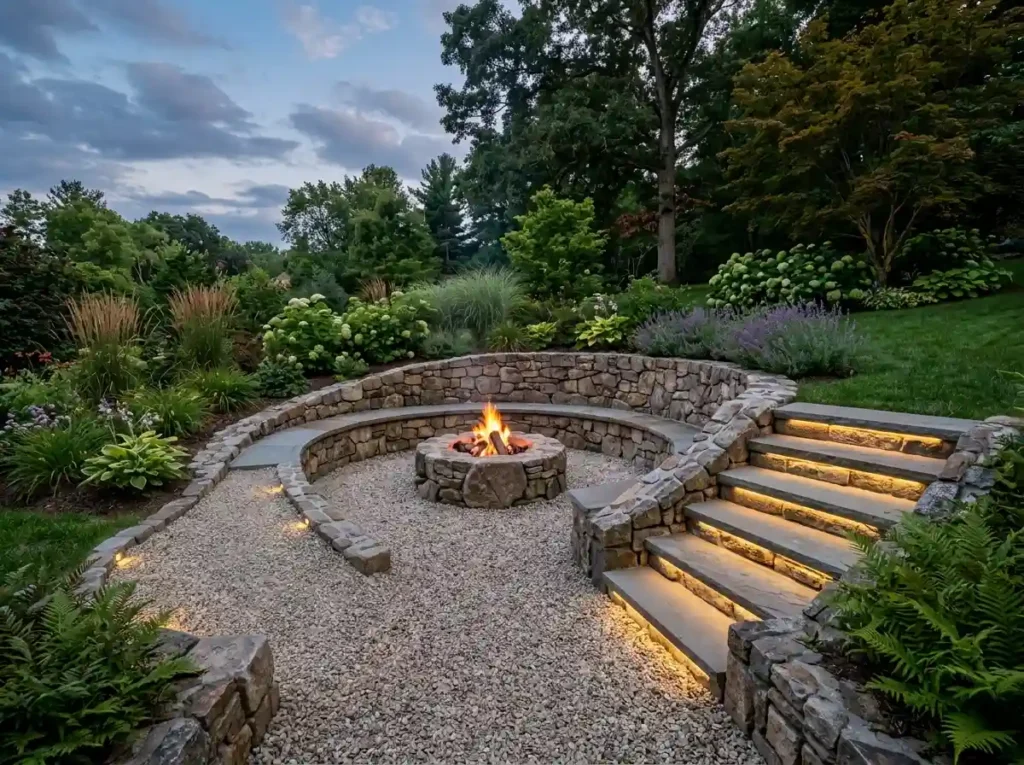
A sunken fire pit area feels separate from the rest of the yard. The lower level creates a cozy space without needing tall walls.
This design can work well on a natural slope. Low retaining walls can hold back soil and double as extra seating.
Drainage is the biggest concern. A sunken area can collect rainwater if the base and runoff plan are poor. Add proper drains before building walls or flooring.
Steps should be wide and easy to see. Add low step lights for safer use after dark. A handrail may also help on deeper layouts.
Leave open sections between walls or benches so people can enter and leave without climbing over seats.
This design costs more than a simple patio. For a cheaper version, create a shallow lower area with gravel instead of full stone flooring.
Professional help is often a smart choice for major digging, drainage, or retaining walls.
Add Circular Seating for Easier Conversation
Best for: Round fire pits and social gatherings
Difficulty: Easy
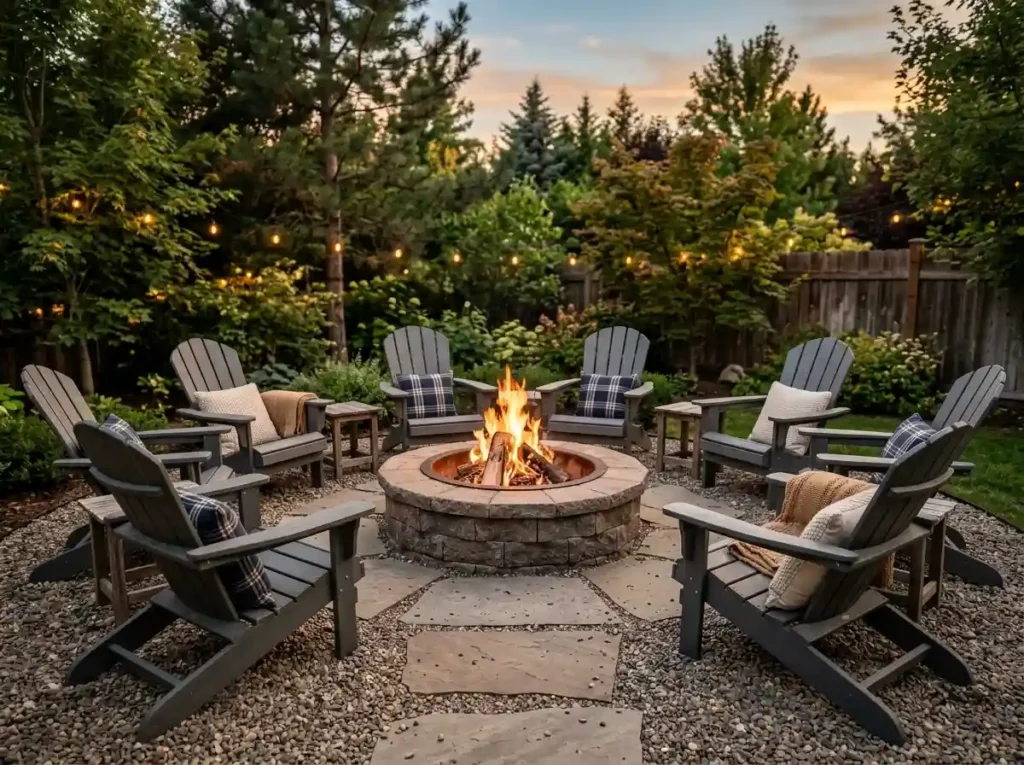
A circular seating layout helps everyone face the fire and each other. It also makes it easier to share heat around a round fire pit.
Use movable chairs if you want flexibility. Adirondack chairs create a classic look. Outdoor lounge chairs offer more comfort. A curved bench can save space.
Do not push seats too close to the flames. Follow the fire pit maker’s clearance advice and leave space behind each chair.
Mixed seating can make the area feel relaxed. Matching chairs create a cleaner and more planned look.
Test the circle before installing the base. Place chairs around a marked center and sit in each one. Check whether people can walk behind them without stepping into grass, plants, or a slope.
This is one of the easiest backyard fire pit ideas to copy in almost any yard.
Add Built-In Stone Benches to Save Space
Best for: Permanent patios and narrow seating areas
Difficulty: Moderate to hard
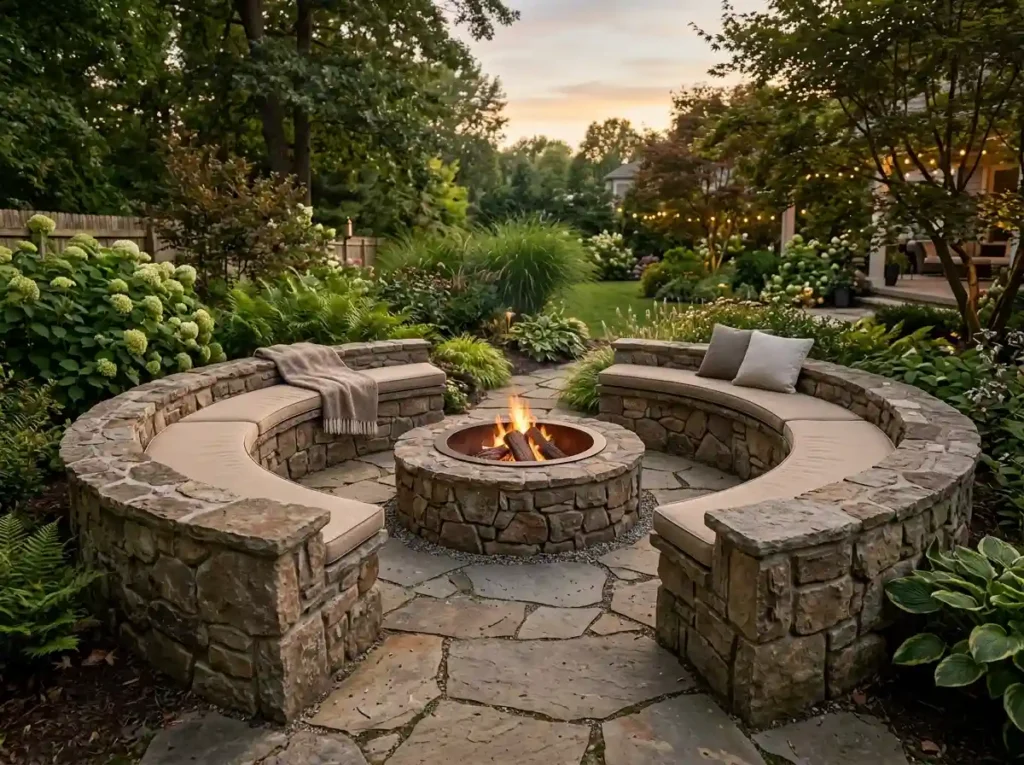
Built-in benches keep chairs from moving and make the fire pit area feel finished.
Stone, concrete block, or low retaining walls can be used as seating. Match the bench material to the fire pit for a more connected look.
Add weather-safe cushions for comfort. Store them indoors or in a deck box when they are not in use.
Do not build a full closed ring around the fire pit. Leave two or more open spaces for easy entry and exit.
Seat depth and height matter. A bench that is too high or too narrow will not feel comfortable. Test the size with temporary blocks before building.
Built-in seating can cost more at first, but it may reduce the need for several outdoor chairs.
A lower-cost option is to build one straight bench and use movable chairs on the other sides.
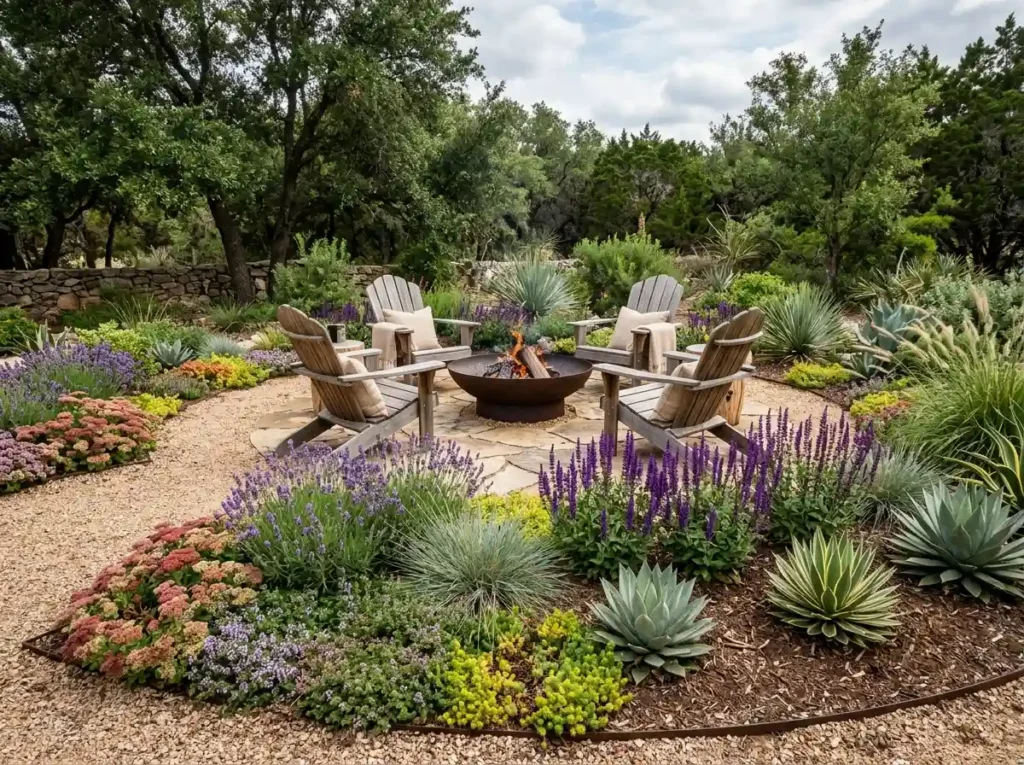
Add Low-Water Plants Around the Outer Edge
Best for: Dry climates and low-care yards
Difficulty: Easy to moderate
Plants can soften hard surfaces and make a fire pit area feel connected to the garden.
Keep all plants outside the main heat and spark zone. Leave a clear strip between the fire pit seating area and the planting beds.
Choose plants that do not drop large amounts of dry leaves, needles, bark, or seed heads. Remove dead growth often.
Depending on your climate, possible choices may include sedum, thyme, lavender, salvia, agave, and some ornamental grasses.
Be careful with tall grasses. Dry blades can burn quickly. Cut them back when needed and place them well away from open flames.
Low plants work well because they do not block views across the fire pit. They also keep the space from feeling closed in.
Check your plant hardiness zone before buying anything. A plant that works in a dry western yard may fail in a cold or wet climate.
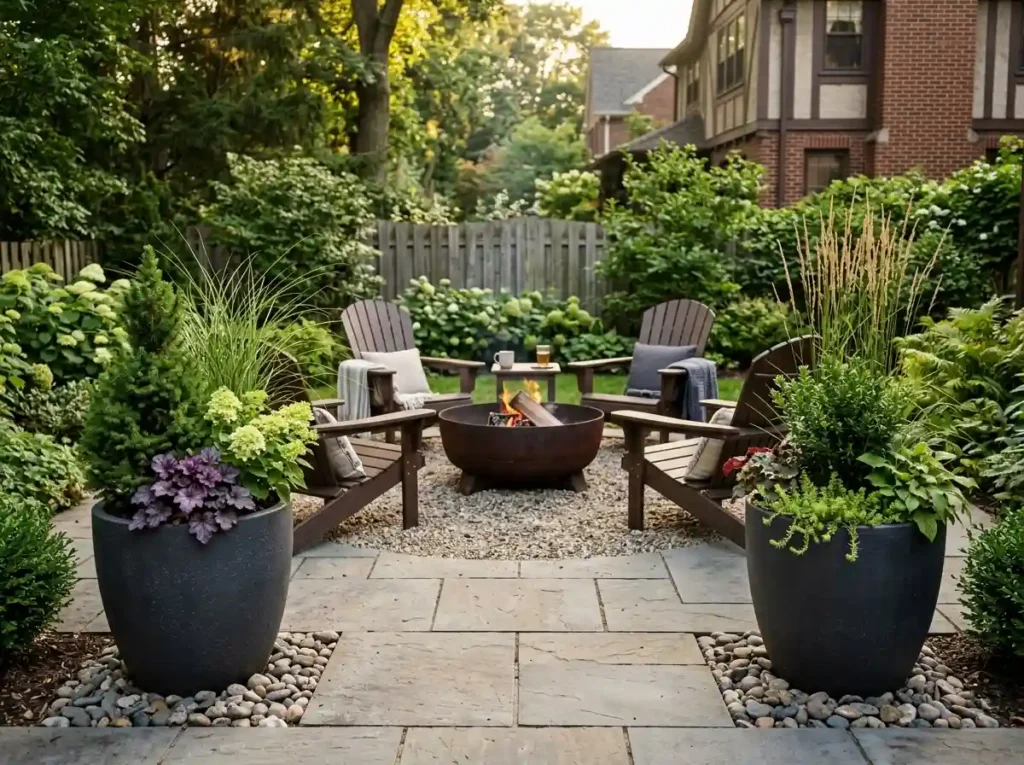
Use Large Planters Instead of Garden Beds
Best for: Renters, patios, and flexible layouts
Difficulty: Easy
Large planters help define the fire pit area without permanent garden beds.
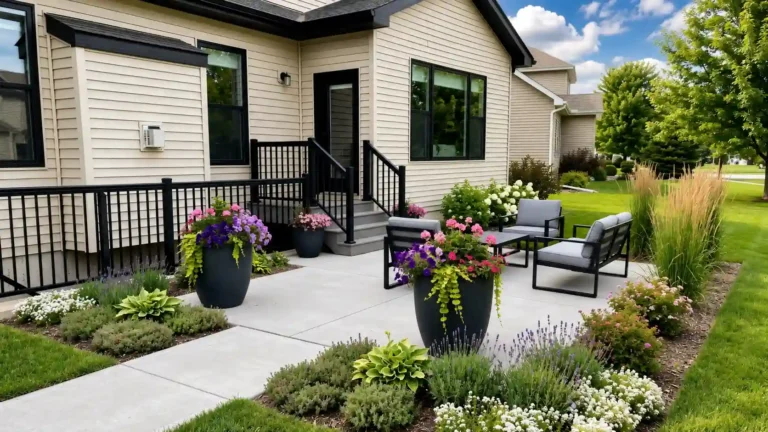
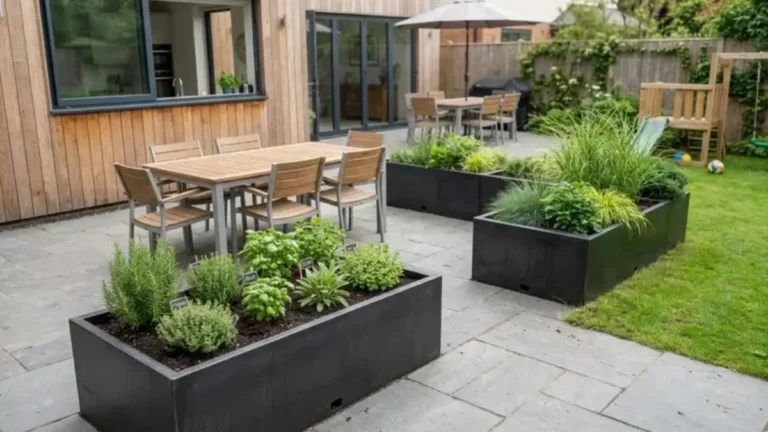
They can add height, color, and privacy. They also work well on gravel, concrete, or paver surfaces.
Use ceramic, metal, stone, or concrete containers that suit your yard style. Place them around the outer edge rather than close to the flames.
Tall pots can hold compact shrubs or upright plants. Lower containers can add flowers or herbs near seating areas.
One major benefit is flexibility. You can move the planters if smoke becomes a problem or if you change the seating layout.
Choose pots with drainage holes. Standing water can damage plants and create stains on the patio.
For a lower-cost setup, use two large planters at the entrance instead of surrounding the full area.
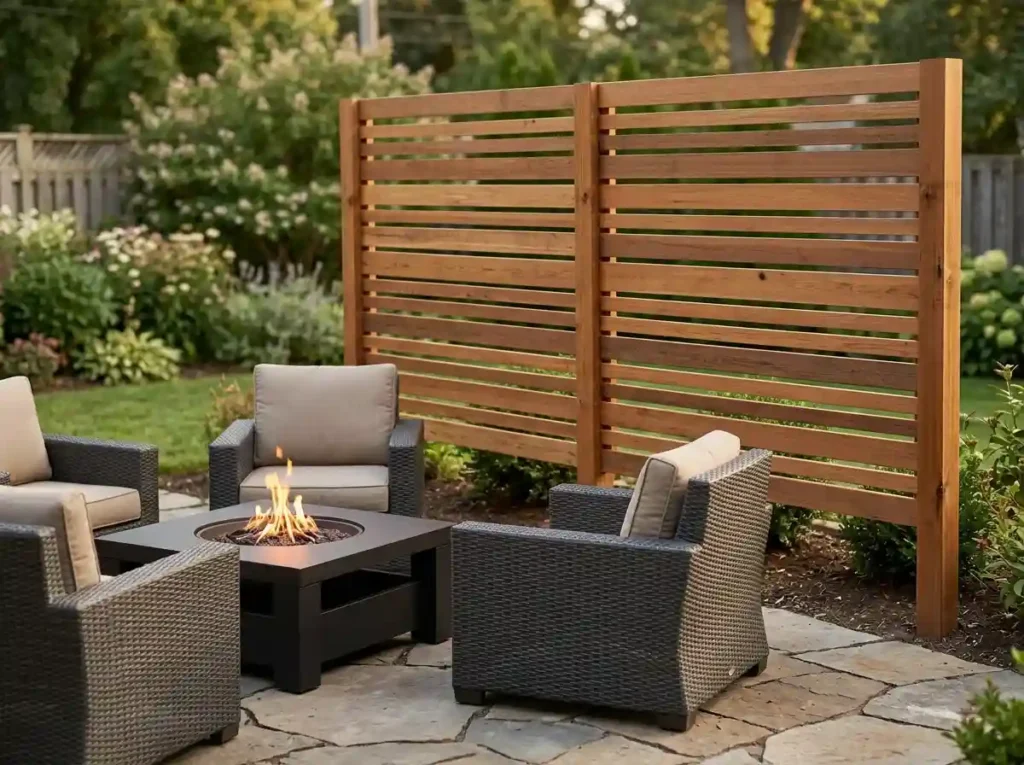
Add Privacy with a Slatted Screen or Wall
Best for: Small yards and homes with close neighbors
Difficulty: Moderate
A privacy screen can make the fire pit area feel calmer and more comfortable.
Horizontal wood slats create a warm look. Metal panels suit modern spaces. Masonry walls offer more privacy and can help block some views.
Do not place wood screens close to open flames. Follow local rules and fire pit instructions.
Leave gaps for airflow. A solid wall can affect how smoke moves, especially in a small yard.
Check the main wind direction before choosing the wall location. A screen placed on the wrong side may push smoke back into the seating area.
You can also use planters, fencing, or spaced shrubs along the outer edge.
For a quick and low-cost option, use a freestanding outdoor screen. Make sure it is stable and placed far from heat.
Add Soft Lighting Along Paths and Seats
Best for: Evening use and safer walking
Difficulty: Easy to moderate
Your fire gives off light, but it may not show steps, paths, or chair legs.
Use low lighting to guide people without making the space feel too bright. Path lights can mark the walkway. Step lights help on raised or sunken areas.
Low-voltage lights are a good long-term choice. Solar lights are easier to install, but their brightness can vary.
Lanterns can add light near the seating area. Choose stable, weather-safe models and keep them away from heat.
String lights can work nearby, but do not hang them low over an open fire. Keep cords away from walking areas and follow outdoor electrical rules.
Lighting should support the fire glow, not compete with it.
A simple setup may need only four path lights and one light near the entrance.
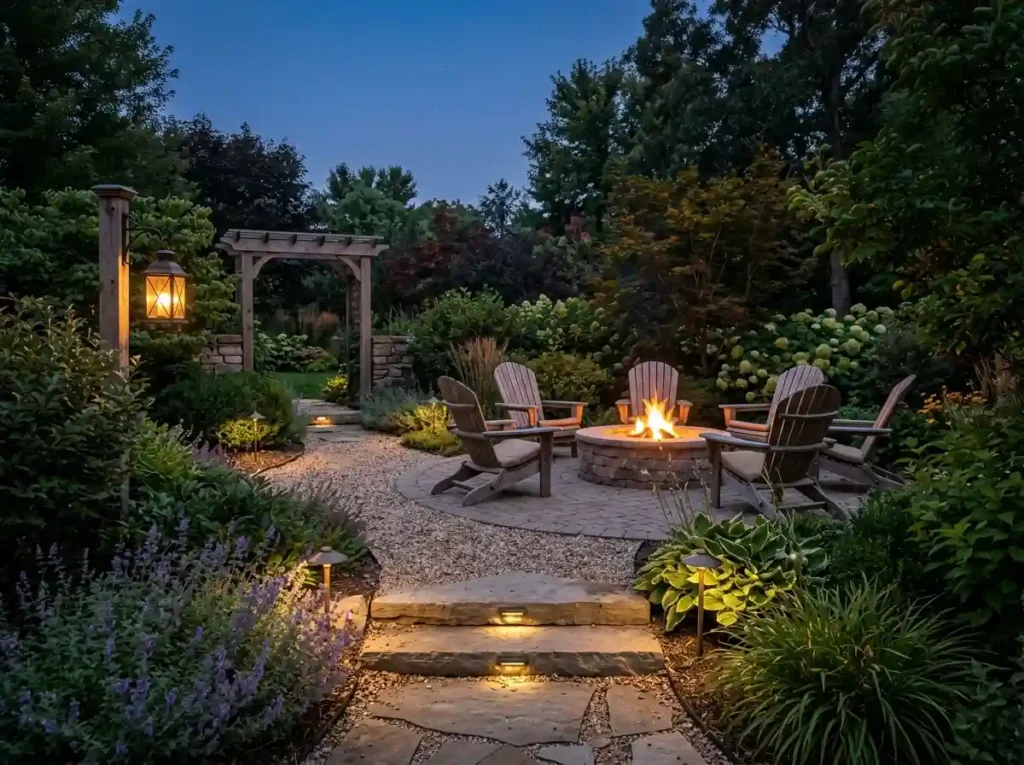
Connect the Fire Pit to the Patio with a Clear Path
Best for: Fire pits placed away from the house
Difficulty: Easy to moderate
A clear path makes the fire pit feel connected to the rest of the yard.
It also protects grass from heavy foot traffic. This matters when people carry food, drinks, firewood, or blankets after dark.
Stepping stones work well in casual gardens. Gravel paths cost less and drain well. Brick or concrete walkways create a more finished look.
Make the path wide enough for comfortable walking. Avoid sharp turns near the fire pit entrance.
Use the same material or color found on the main patio. This helps both areas feel like one design.
Add low path lights so edges stay visible at night.
A basic path can also help keep mud out of the seating area after rain.
Make a Fire Pit the Center of a Small Backyard
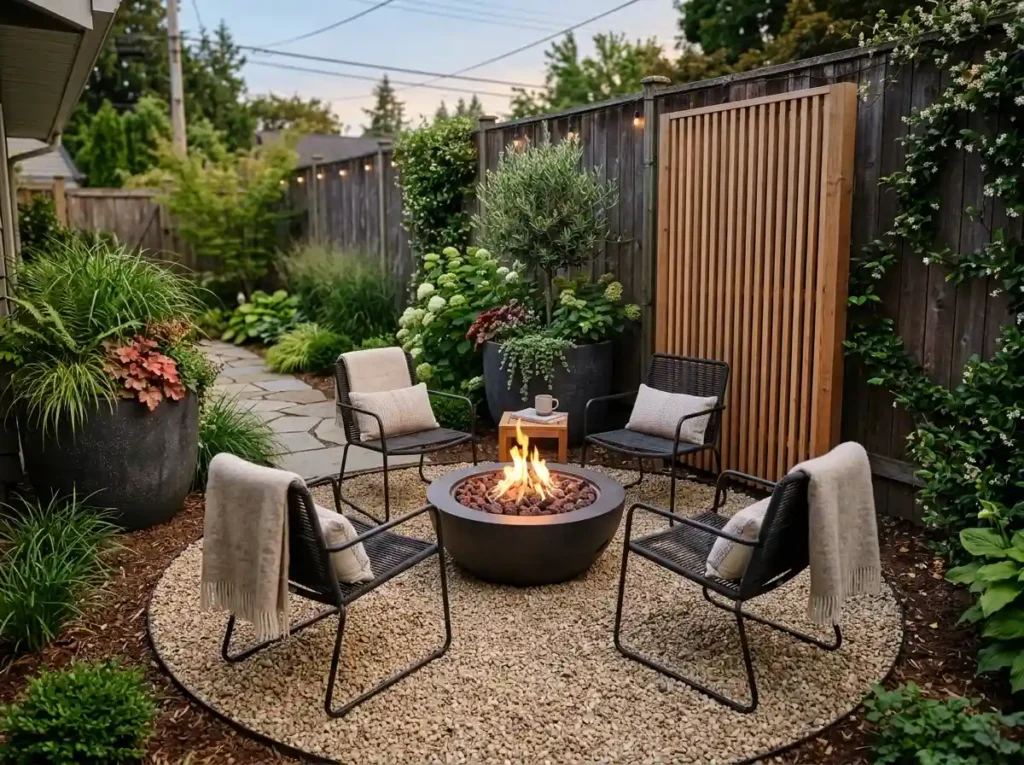
Best for: Compact urban yards and simple layouts
Difficulty: Easy
A small yard does not need several outdoor zones. The fire pit can become the main feature.
Choose a compact fire bowl or small gas fire pit. Use four movable chairs instead of large sofas.
A round gravel pad can help define the area without filling the full yard with hardscape. Add two large planters for color or privacy.
Use vertical features instead of wide planting beds. A slatted screen, narrow trellis, or tall container takes up less floor space.
Keep the layout simple. Too many materials can make a small yard feel crowded.
Folding chairs are useful when you need the yard for other activities. Store them when the fire pit is not in use.
This setup also works well for renters who cannot build a permanent patio.
Create a Safe Fire Pit Area on a Sloped Yard
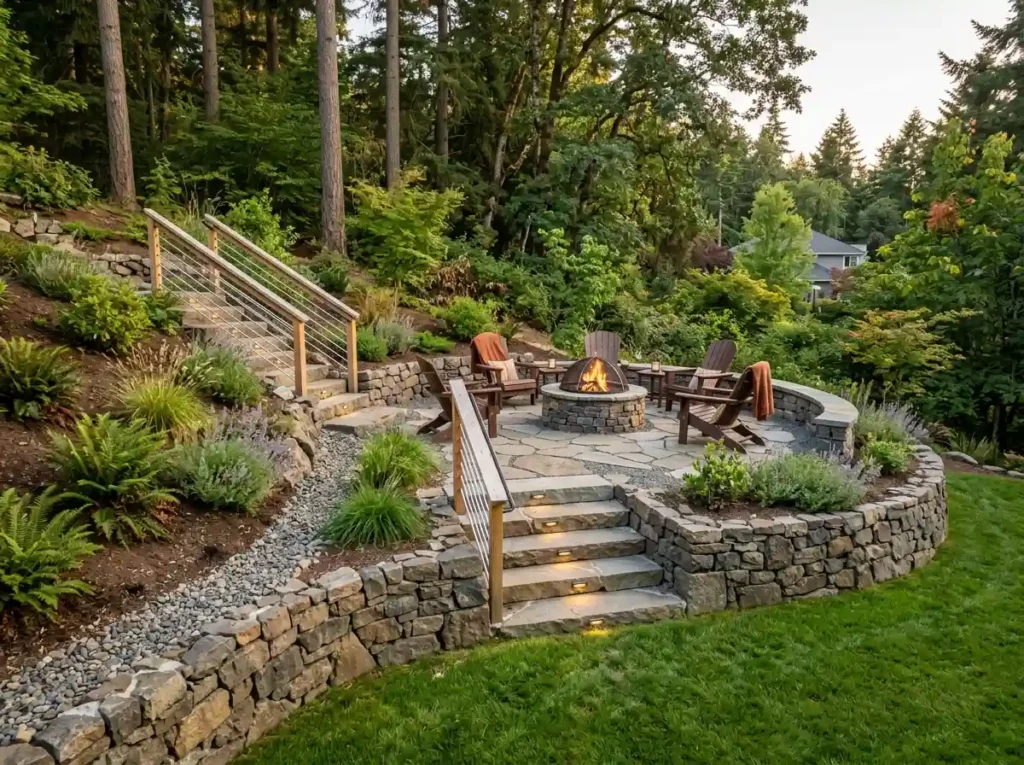
Best for: Hillside properties and uneven ground
Difficulty: Hard
A fire pit needs a level surface. Chairs placed on a slope can tip, slide, or feel uncomfortable.
Create a flat section through careful grading or a small terrace. Retaining walls may be needed to hold the soil in place.
Plan drainage before adding gravel, pavers, or concrete. Water should move away from the seating area instead of pooling around the fire pit.
Add steps where needed. Use handrails on steep access routes. Step lighting can reduce falls at night.
Do not place loose chairs near an open drop or steep edge.
A terraced design can connect the main patio to a lower fire pit area. Repeat the same stone or paver color in both spaces.
Large retaining walls and major excavation should be handled by a qualified contractor.
Create a Rustic Fire Pit Area with Natural Stone
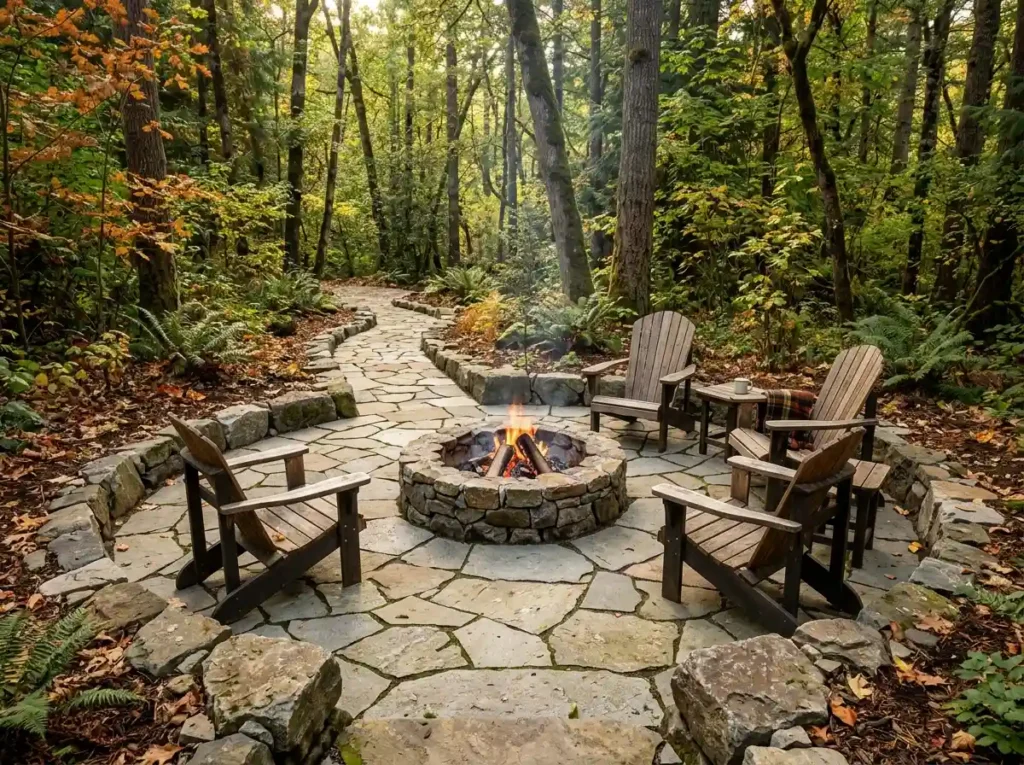
Best for: Wooded yards, country homes, and informal gardens
Difficulty: Moderate
Natural stone helps a fire pit blend into the landscape.
Flagstone can create a wide walking and seating surface. Fieldstone works well for borders and low walls. Local stone may help the area feel connected to the land.
Use irregular shapes for a relaxed look. Repeat the stone in the path, edging, or nearby garden beds.
Make sure the seating surface stays level. Large gaps between stones can catch chair legs or cause trips.
Use simple wood or metal chairs to complete the rustic style.
Not every stone is safe for direct heat. Decorative landscape rock should not be placed inside the fire pit unless it is approved for that use.
For a lower-cost option, use natural stone only as a border around a gravel pad.
Design a Modern Fire Pit with Concrete and Clean Lines
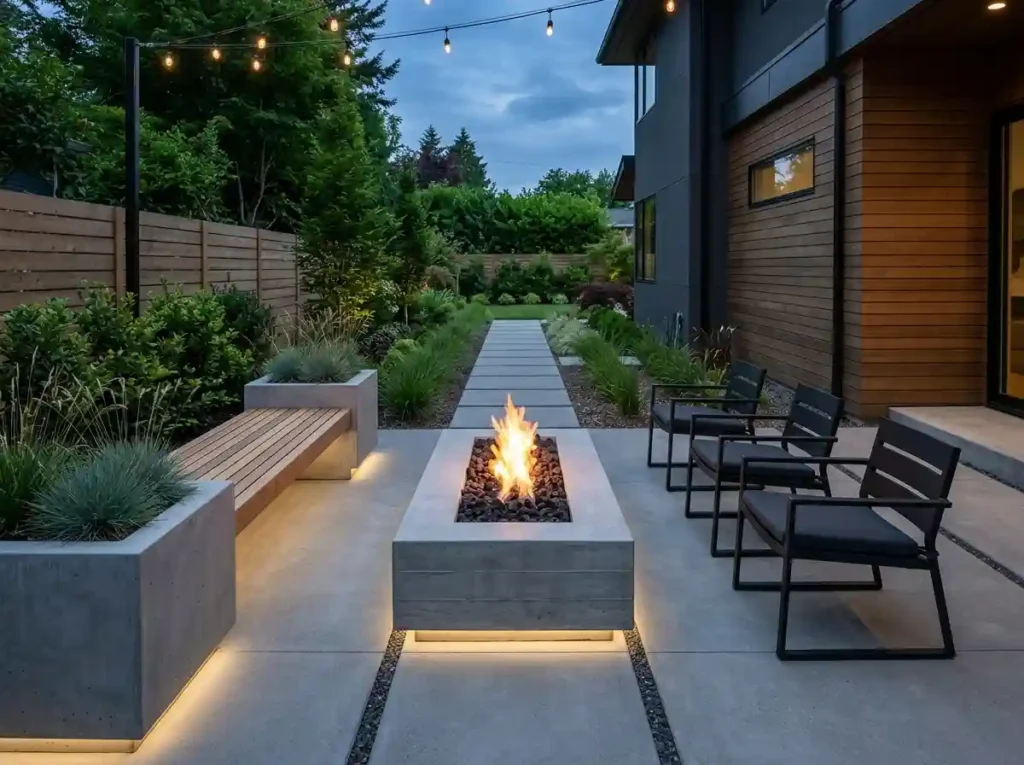
Best for: New patios and simple modern homes
Difficulty: Moderate
A modern fire pit area works best with simple shapes and a limited number of materials.
Choose a square or rectangular gas fire feature. Pair it with large concrete pavers, straight paths, and black metal chairs.
Repeat the same concrete finish in a bench, planter, or low wall. This creates a clear and connected look.
Keep planting simple. Low grasses, neat shrubs, and large containers suit the style better than crowded flower beds.
Use one or two main colors. Gray, black, tan, and natural wood often work well together.
Modern does not mean empty. Add cushions, a soft outdoor rug far from the fire, or warm lighting to keep the space comfortable.
Plan drainage and concrete joints before installation.
Place a Pergola Near the Fire Pit Area
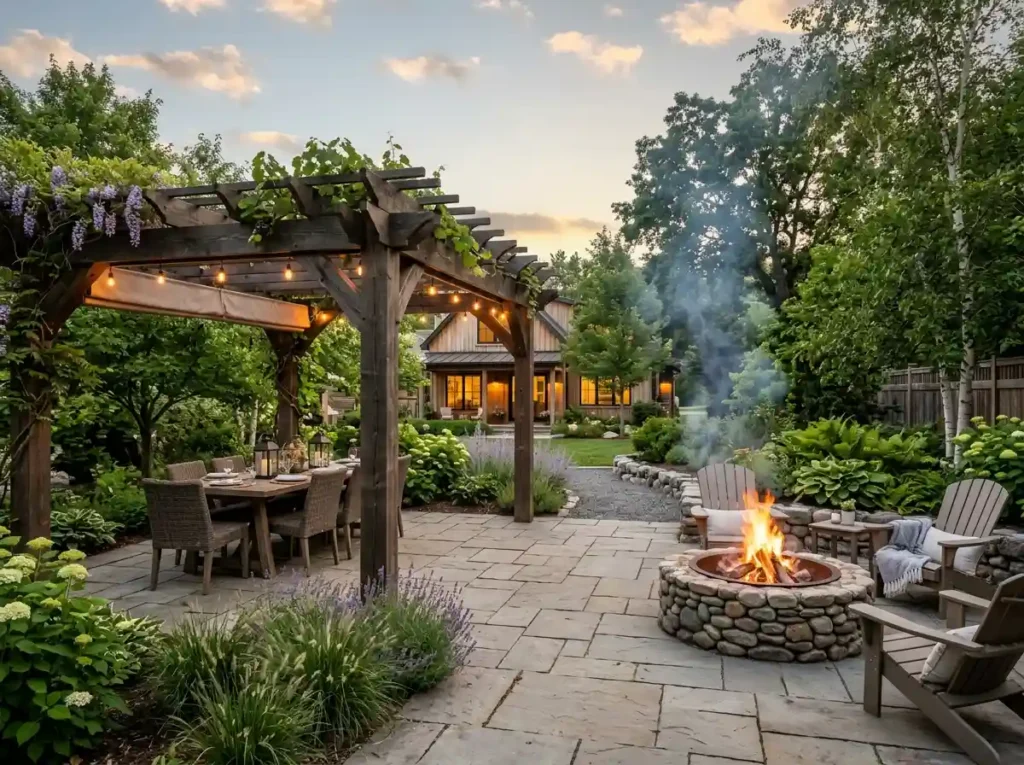
Best for: Larger yards and outdoor entertaining spaces
Difficulty: Moderate to hard
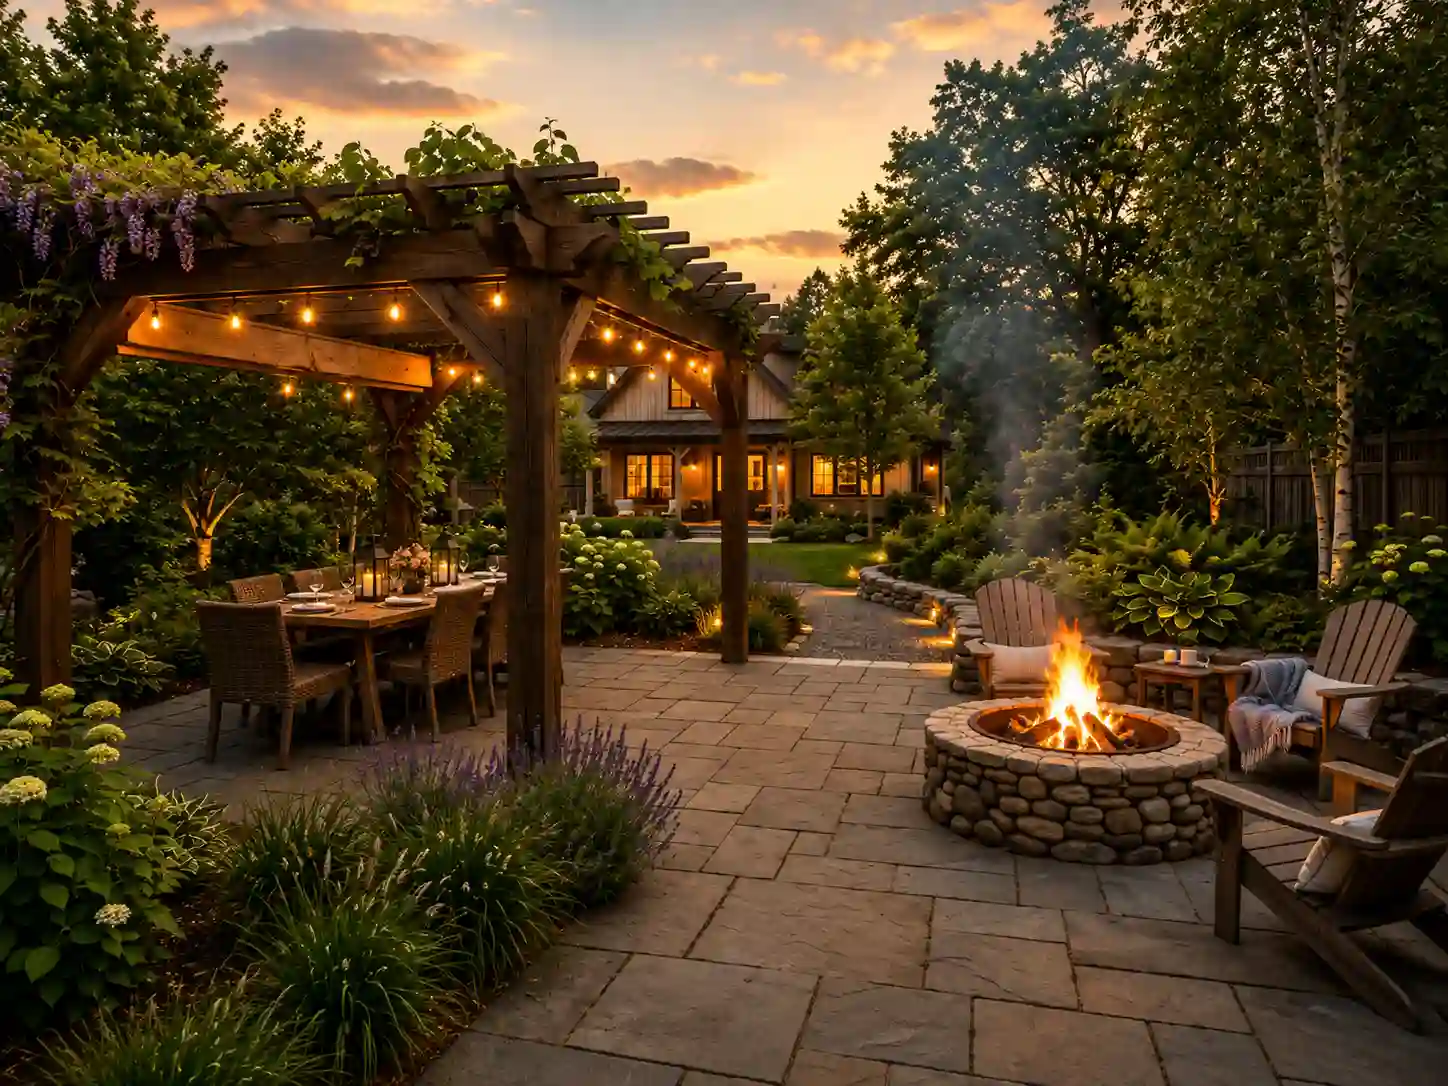
A pergola can define a seating area and add shade during the day.
It may also support string lights, curtains, or climbing plants. But open flames and overhead structures require careful planning.
A fire pit is often safer beside a pergola rather than directly below it. Smoke and heat need room to escape.
Wood-burning fires can create sparks. Gas fire features may offer more placement options, but clearances still apply.
Check local rules and the fire pit manufacturer’s instructions before building.
Keep fabric, vines, wood beams, and hanging lights far from heat.
One practical layout places dining furniture under the pergola and the fire pit on an open patio beside it. This gives you shade without trapping smoke.
Add Firewood Storage Without Creating a Hazard
Best for: Wood-burning fire pits
Difficulty: Easy
Firewood storage keeps logs dry and stops the area from looking messy.
Use a raised rack so air can move under the wood. A small roof or cover can help protect it from rain.
Do not stack firewood beside the flames. Sparks can land on dry logs and start a larger fire.
Place the main wood supply farther away. Keep only a small amount near the seating area during use.
Steel racks fit modern or rustic spaces. A built-in storage niche can work in a masonry wall. Make sure the storage area stays dry and open to airflow.
You can also use a covered wood shelter along a fence, as long as it meets local clearance rules.
Remove bark, leaves, and loose chips from the ground around the rack.
Connect the Fire Pit with an Outdoor Dining Area
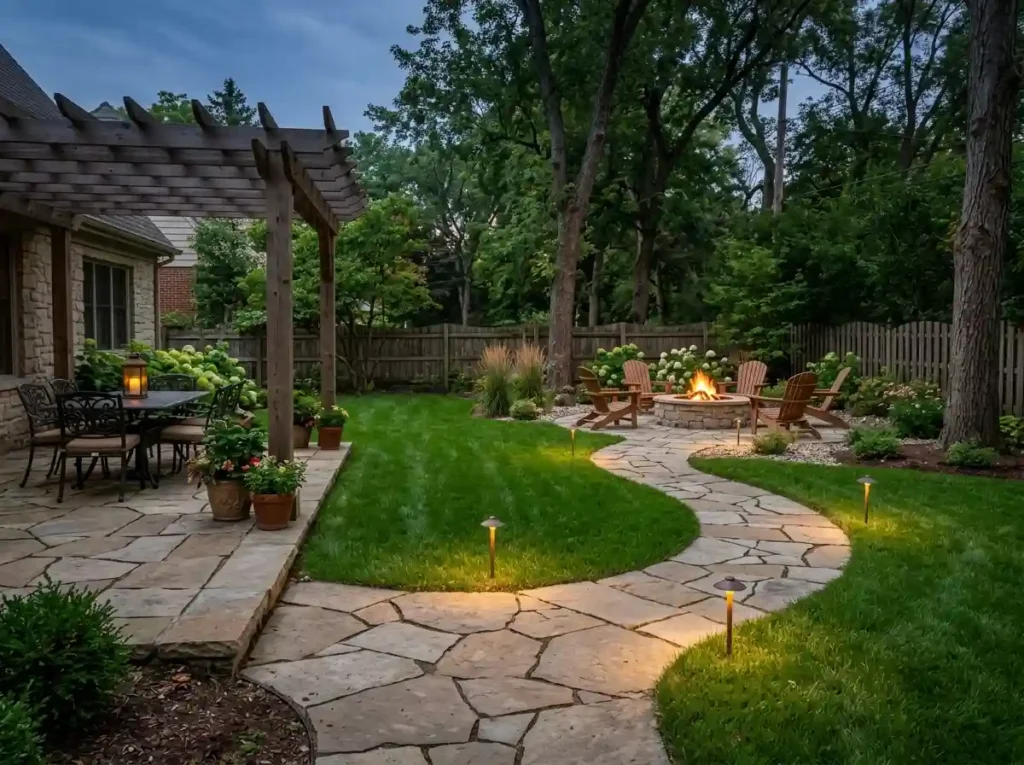
Best for: Entertaining and larger patios
Difficulty: Moderate
A dining area and fire pit can work well together when each space has a clear purpose.
Keep the dining table away from smoke. Check wind direction before choosing where to place each zone.
Use a change in flooring to separate them. For example, place the dining table on pavers and the fire pit on a lower gravel circle.
Planters, low walls, or a short path can also mark the change between spaces.
Leave enough room for people to pull out dining chairs and walk to the fire pit without bumping into furniture.
Repeat one material in both zones. Matching pavers, chairs, or planters can tie the design together.
This layout works well for families who eat outdoors and then move closer to the fire later in the evening.
Build a Budget Fire Pit Area with Reused Materials
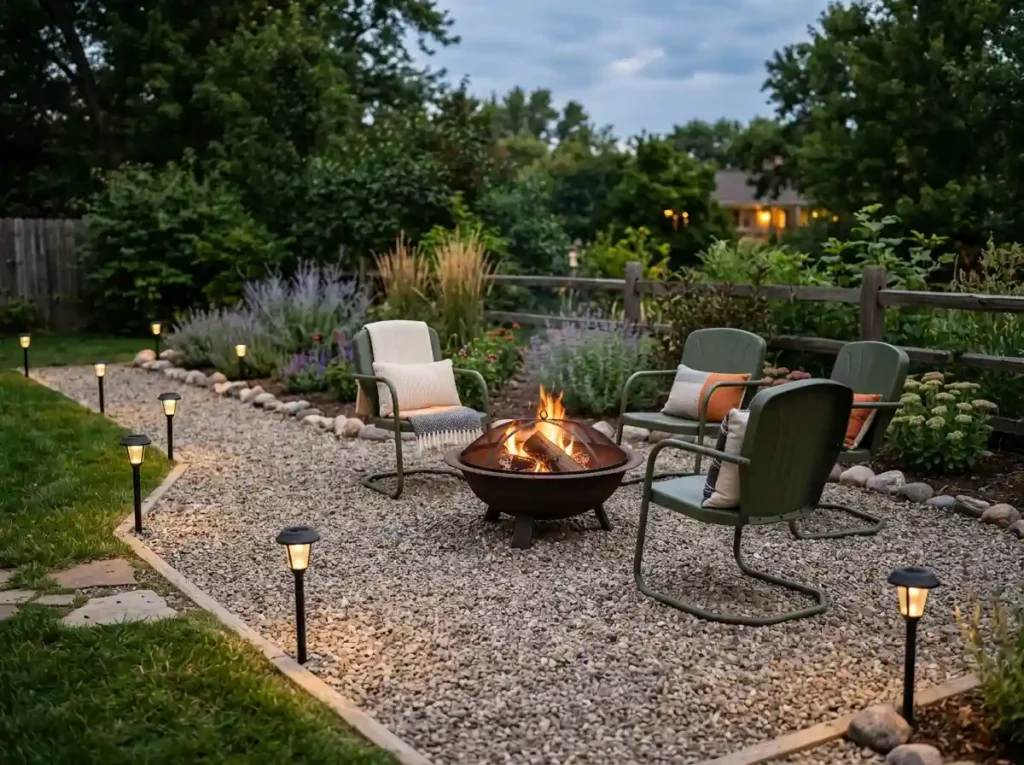
Best for: Low-cost projects and weekend makeovers
Difficulty: Easy
You do not need a full patio budget to create a useful fire pit area.
Start with the parts that affect safety and comfort. Build a level, stable base first. Add seating next. Decorative items can come later.
Reuse pavers or gravel if they are clean and suitable for outdoor use. Secondhand metal chairs can be washed and painted with outdoor paint.
A portable fire bowl often costs less than a built-in pit. Solar path lights can reduce wiring costs.
A simple budget setup may include:
- A portable fire bowl
- A compacted gravel pad
- Four secondhand metal chairs
- Solar path lights
- Mulch-free planting beds along the outer edge
Do not reuse cracked fire pit parts or unknown stones near direct heat. Saving money is helpful, but safety comes first.
How to Choose Safer Landscaping Materials Around a Fire Pit
The material around your fire pit needs to do more than look good. It should stay stable, handle weather, drain properly, and reduce fire risks.
Use noncombustible surfaces close to the fire feature. Gravel, concrete, brick, pavers, and flagstone are common choices.
Dry mulch should stay outside the spark zone. The same rule applies to dead leaves, pine needles, dry grass, and loose bark.
Choose materials based on their job. Decorative stones used in a flower bed may not be safe inside a fire pit. Some rocks can crack when exposed to strong heat or trapped moisture.
Always use the products named in the fire pit instructions.
| Material | Main Benefit | Best Use | Important Note |
| Gravel | Affordable and drains well | Casual seating areas | Add edging to stop spreading |
| Concrete pavers | Flat and easy to replace | Patios and seating zones | Check heat and installation guidance |
| Brick | Classic look | Traditional yards | Use outdoor-rated products |
| Flagstone | Natural style | Rustic landscapes | Keep the walking surface level |
| Concrete | Clean and durable | Modern designs | Plan drainage and joints |
| Dry mulch | Soft garden finish | Outer beds only | Keep far from sparks and flames |
The ground under chairs also matters. Loose pea gravel may shift under narrow chair legs. Compact the base or place flat pavers under the chairs.
Check the area often. Remove dry plant waste and replace damaged materials before using the fire pit.
How Much Space Do You Need Around a Backyard Fire Pit?
A fire pit area can feel crowded even when the yard itself is large.
Start with the size of the fire pit. Then add the space needed between the flames and the chairs. Finally, add room behind the chairs for walking.
A compact layout may include a three- to four-foot fire pit, several feet of open space around it, and extra room behind the seats. This is only an example. Your fire pit instructions and local rules should guide the final layout.
Permanent benches need open entry points. A full seating wall may trap people or make the space hard to enter.
Wood-burning fire pits often need more open space because of smoke and sparks. Gas fire features may create less smoke, but they still need safe clearance.
Before building, mark the full layout on the ground. Place the chairs in position. Sit down and check whether someone can walk behind you.
Also test the path into the area. People should not need to step over walls, squeeze between chairs, or walk close to flames.
A few minutes of testing can prevent an expensive layout mistake.
Common Backyard Fire Pit Landscaping Mistakes to Avoid
Most fire pit mistakes do not become clear until smoke reaches the seats, chairs begin to sink, or rainwater collects around the base.
Placing the fire pit too close to structures
Keep the fire pit away from the house, fence, shed, trees, and anything else that can burn. Check local rules before installation.
Using dry mulch near the flames
Mulch looks neat, but it can catch sparks. Use gravel, pavers, concrete, or another noncombustible surface near the fire.
Forgetting about wind
A fire pit may look perfect in one spot but send smoke into your home. Test the normal wind direction before building.
Ignoring drainage
Water can collect in sunken areas, under pavers, or around low walls. Plan where rainwater will go.
Leaving no space behind chairs
People need room to stand up and walk. Mark the chair positions before creating walls or planting beds.
Using loose ground under narrow chair legs
Problem: Chairs sink or tip in loose gravel.
Fix: Compact the base or place flat pavers under each seat.
Hanging lights too close to heat
String lights, fabric, and pergola parts should stay far from flames and sparks.
Choosing plants that create dry waste
Plants that drop dry leaves, needles, or bark can increase fire risk. Clean the area often.
Building before checking local rules
Rules can change by city, season, and fire pit type. Check before buying materials.
Check Before You Light the Fire
- Remove dry leaves and plant waste
- Check wind conditions
- Move flammable items away
- Keep water or an extinguisher nearby
- Make sure chairs are stable
- Watch children and pets
- Put the fire out fully before leaving
How to Choose the Best Fire Pit Landscaping Idea for Your Yard
You do not need the largest or most expensive design. You need one that fits how you use your yard.
Start with space. A small yard may work best with a compact gas bowl, four chairs, and a vertical privacy screen. A large yard can support built-in seating and separate dining zones.
Next, think about your budget. Gravel and movable chairs cost less than concrete patios and stone walls.
Your available time matters too. Gravel still needs raking. Plants need care. Pavers may need repairs. Built-in benches are harder to change later.
Choose materials that suit your climate. Heavy rain, frost, heat, and strong sun can all affect flooring, plants, and furniture.
| Your Main Need | Best Fire Pit Landscaping Direction |
| Low budget | Gravel pad with movable chairs |
| Small yard | Compact fire bowl and vertical privacy |
| Sloped yard | Level terrace with safe retaining walls |
| Modern style | Concrete pavers and a gas fire table |
| Rustic style | Natural stone and simple seating |
| Low maintenance | Hardscape with container plants |
| Entertaining | Wide seating circle with lighting |
| Flexible layout | Portable fire pit and movable furniture |
Three simple combinations can help you choose:
Small-yard setup: A compact gas bowl, four chairs, pavers, and a slatted screen.
Low-budget setup: A gravel pad, portable fire bowl, reused chairs, and solar lights.
Large entertaining setup: A built-in fire pit, curved seat wall, wide path, and separate dining area.
Measure the space and test the seating circle before buying anything.
Make Your Fire Pit Area Safe, Comfortable, and Easy to Use
The best backyard fire pit landscaping ideas solve real problems. They give you stable seating, safe walking paths, better drainage, more privacy, and enough space to relax.
Start with the location and base. These choices are harder to change later.
Then add chairs, lighting, plants, storage, and decorative details. You do not need to finish the full project at once.
Choose one idea that suits your yard and budget. Mark the area, place the chairs, and test how it feels.
A simple plan can turn an empty part of your yard into a comfortable place for quiet evenings, family time, and outdoor gatherings.