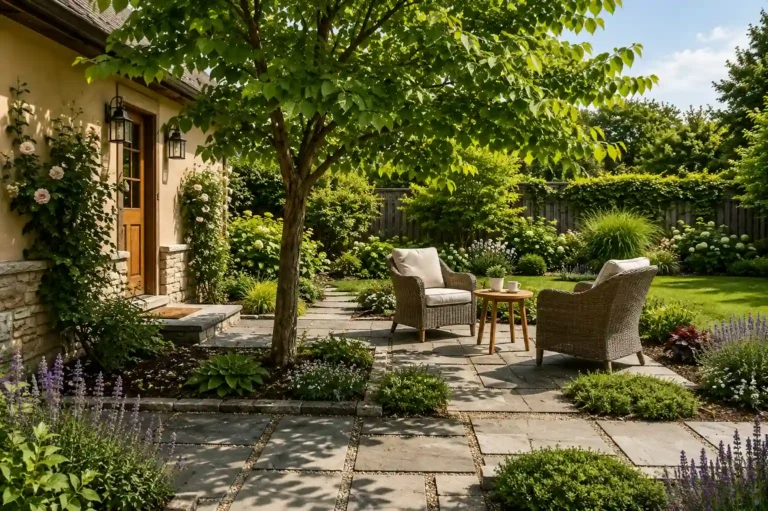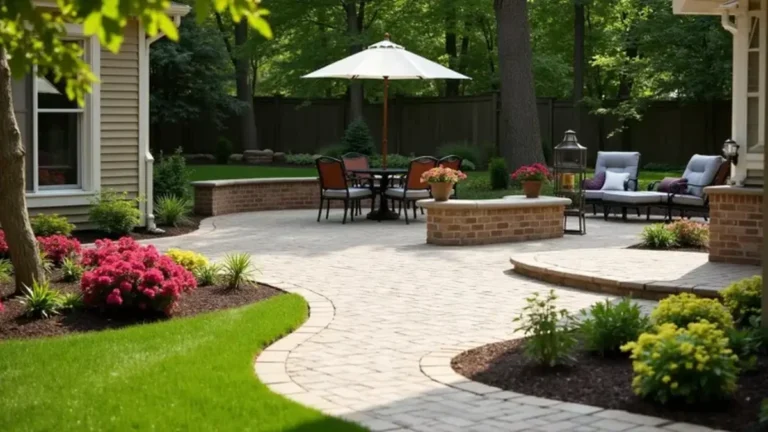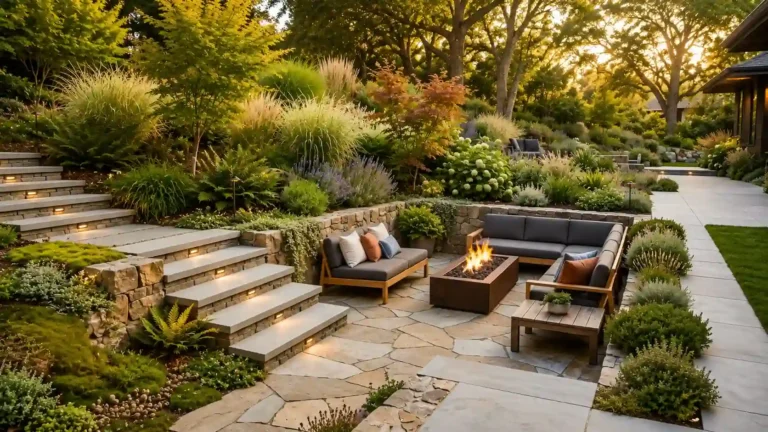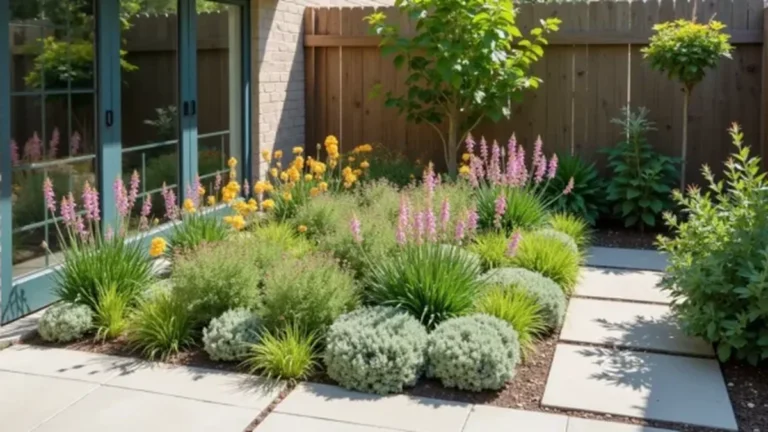
Easy Patio Landscaping Ideas on a Budget

19 Easy Patio Landscaping Ideas on a Budget

A bare patio can make your whole backyard feel unfinished. You may have a plain concrete slab, old chairs, little privacy, or no shade. Fixing all these problems at once can seem expensive.

The good news is that you do not need to rebuild the patio. A few smart changes can make it feel more private, useful, and welcoming.

These patio landscaping ideas on a budget use simple materials, secondhand finds, plants, paint, gravel, and outdoor lighting. Some projects cost very little. Others can be completed in stages as you save more money.

You will also find ideas for renters, small patios, sunny yards, and narrow outdoor spaces. Start with the problem that bothers you most. Then add other features when your time and budget allow.

Before you buy plants, pots, or decorations, take a closer look at the space.

How to Plan Patio Landscaping Ideas on a Budget

The easiest way to overspend is to shop without a plan. A few plants may look cheap at the store. However, the total cost can grow fast when you add pots, soil, tools, and decorations.

Start by measuring the patio. Write down its length and width. Measure the nearby flower beds, empty corners, walkways, and fence lines too.

Next, list the three biggest problems. Your list may include:

  • No shade
  • Little privacy
  • Poor seating
  • A dirty concrete floor
  • Empty patio edges
  • No evening lighting
  • Too many mismatched items

Fix safety problems first. Loose stones, deep cracks, poor drainage, and unstable steps should come before decorations.

After that, choose the change that will improve how you use the space. Shade may matter most on a hot patio. Seating may matter more if you enjoy family meals outside.

Set a total spending limit before shopping. Divide the money into simple groups, such as plants, surface materials, seating, privacy, and lighting.

For example, a $250 budget could include:

  • $80 for plants and pots
  • $60 for gravel, mulch, or edging
  • $50 for lighting
  • $60 for paint or secondhand furniture

These are sample amounts. Prices will differ based on your location, patio size, and chosen materials.

Check what you already own before buying anything. An old chair may only need paint. Extra bricks may work as edging. A storage tub may become a planter if it is clean and safe.

Write down your budget and choose one main project. This will help you avoid buying small items that do not solve a real problem.

5 Cheap Patio Ground and Border Ideas

The patio floor and edges create the base for the whole space. Improve these areas first, and your plants and furniture will look more planned.

Clean and Rearrange What You Already Have
19 Easy Patio Landscaping Ideas on a Budget

Best for: Every patio
Cost level: Very low
Time needed: One afternoon

Cleaning is one of the cheapest patio landscaping ideas. It can also create the fastest visible change.

Start by removing furniture, pots, toys, and decorations. Sweep away leaves and dirt. Pull weeds from cracks and along the patio edge.

Scrub the surface with water and a stiff outdoor brush. Use a cleaning product made for your patio material when plain water is not enough.

Check the area for broken pots, faded decorations, and items you no longer use. Removing clutter can make a small patio feel much larger.

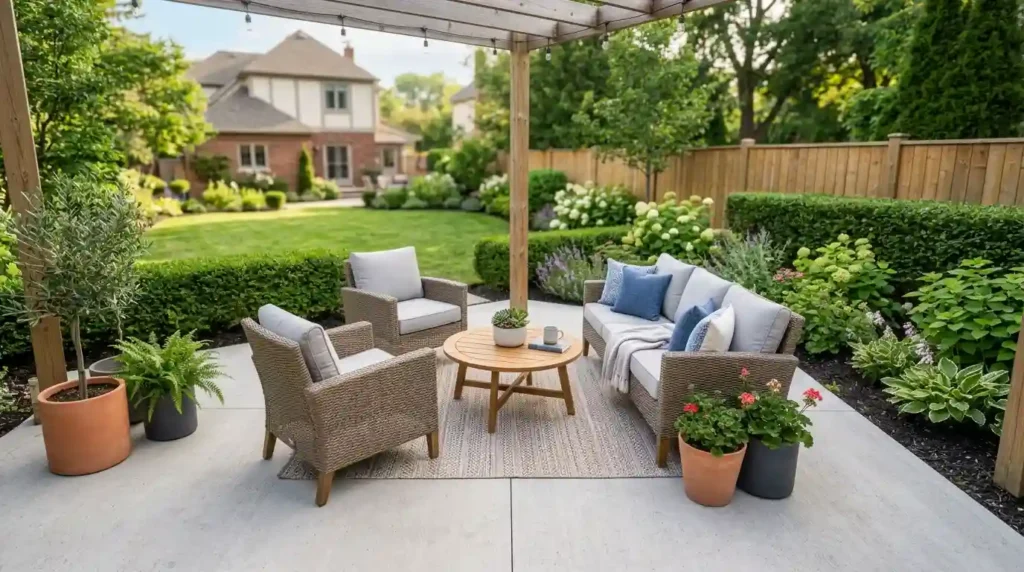
Now change the furniture layout. Place chairs across from each other to create a conversation area. Use an L-shaped layout if the patio is narrow.

Avoid lining every chair against the wall. This can make the center feel empty and awkward.

Cleaning does not fix serious cracks or drainage problems. Those issues may need repair. Still, a clean floor and simple layout give you a better starting point.

Create a Pea Gravel Seating Area
Create a Pea Gravel Seating Area

Best for: Patios that need more usable space
Cost level: Low to medium
Time needed: One weekend

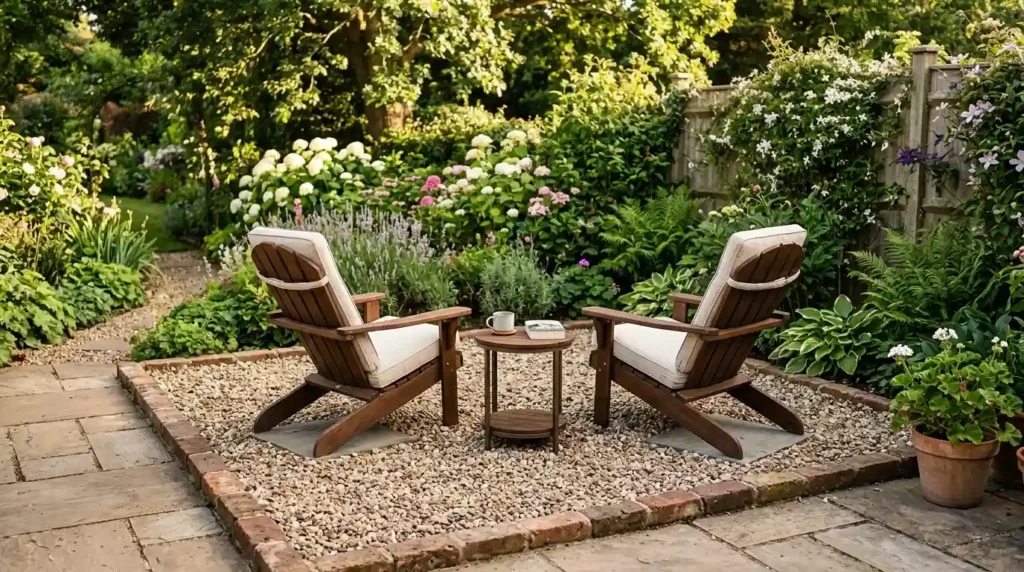
Pouring more concrete can cost a lot. Pea gravel can create extra seating space for less.

Choose a flat area beside the current patio. A 6-by-8-foot space may hold two chairs and a small table.

Remove weeds and loose plant growth. Level the soil as much as possible. Add edging around the area to keep the gravel in place.

Brick, metal, plastic, wood, or stone edging can work. Pick a material that matches something already in the yard.

Landscape fabric may help control weeds in some settings. However, it can also make future soil work harder. Check what works best for your soil and drainage.

Spread the gravel at a suitable depth. Rake it flat and test the surface before adding furniture.

Keep loose gravel away from doors. Small stones can get tracked into the house.

Gravel is not perfect for every home. Chairs with narrow legs may sink into it. A flat paver under each leg can help.

Paint or Stencil a Plain Concrete Patio
Paint or Stencil a Plain Concrete Patio

Best for: Dull concrete slabs
Cost level: Low to medium
Time needed: One weekend

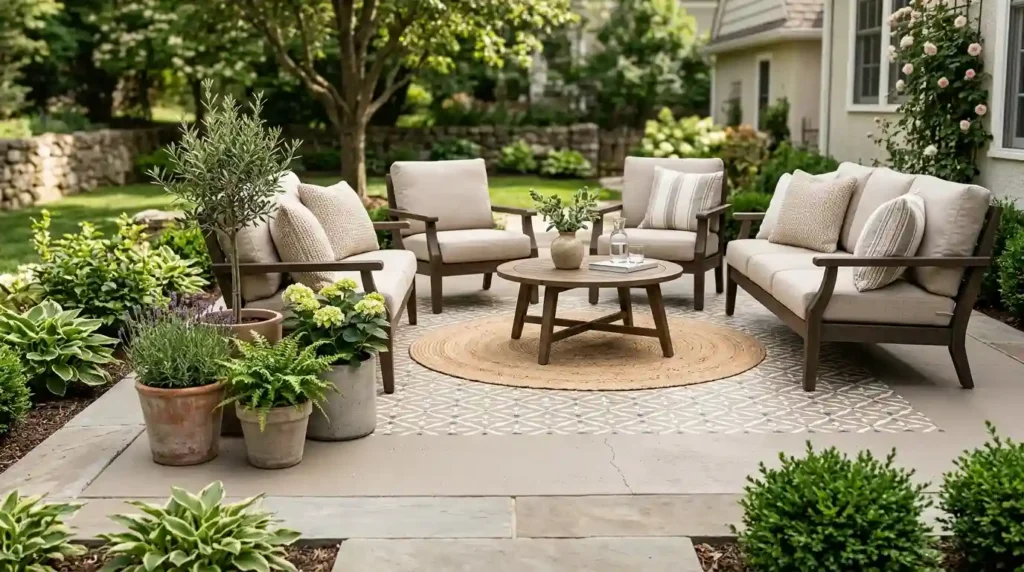
A plain concrete patio can look much better with paint or a simple stencil.

Clean the surface first. Remove dirt, grease, loose paint, and weeds. Repair small cracks before adding a new finish.

Use paint or coating made for outdoor concrete. Indoor wall paint will not handle rain, sun, and foot traffic.

Test the color in a small corner. Patio colors may look much brighter outside than they did on the sample card.

You do not need to paint the full slab. A large stencil around the seating area can create the look of outdoor tile. A simple border can also make the patio feel more finished.

Pick a pattern that will be easy to touch up later. Very detailed designs may take more time and show mistakes.

Check the product label for drying times and slip safety. Some smooth finishes may become slippery when wet.

This project needs careful surface prep. Skipping that step can cause the paint to peel early.

Add a Simple Stepping-Stone Path
Add a Simple Stepping-Stone Path

Best for: Patios that feel cut off from the yard
Cost level: Low to medium
Time needed: One day

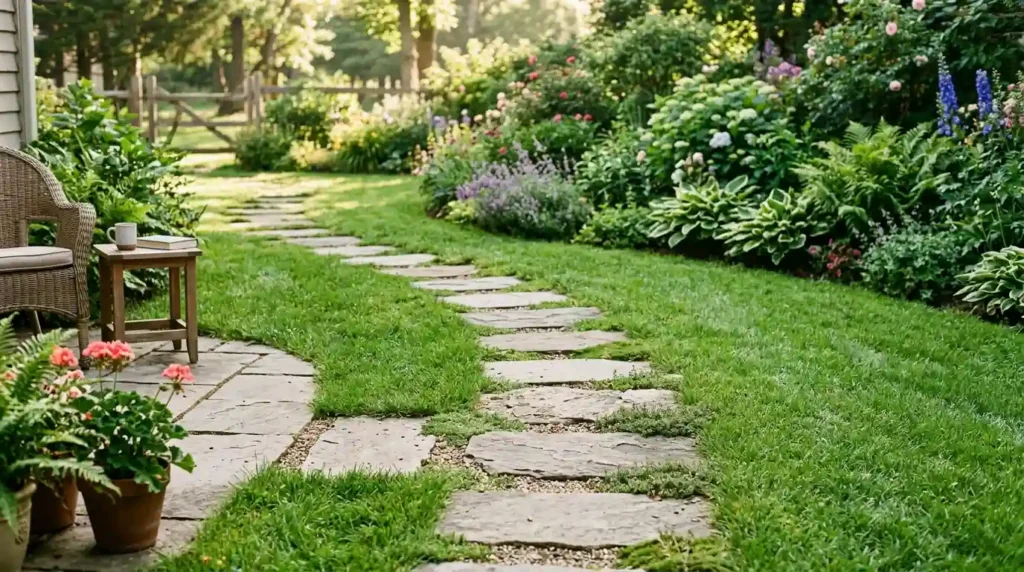
A stepping-stone path can connect your patio to a gate, garden bed, shed, or lawn area.

You do not need a full paved walkway. Six to eight spaced stones may be enough for a short path.

Place the stones on the ground before digging. Walk across them to test the spacing. Your steps should feel natural.

Dig a shallow space for each stone. Set every piece level with the soil or slightly above it. This lowers the risk of trips.

Fill the gaps with mulch, gravel, grass, or low-growing plants. Choose a filler that suits the amount of foot traffic.

Look for leftover pavers through local resale groups or building reuse stores. Mismatched stones can still look good when their spacing stays even.

Make the path wide enough for its use. A path to a garden can be narrow. A route used for bins or carts needs more room.

Edge the Patio With Reclaimed Brick or Stone
Edge the Patio With Reclaimed Brick or Stone

Best for: Patios with messy garden edges
Cost level: Low
Time needed: One afternoon

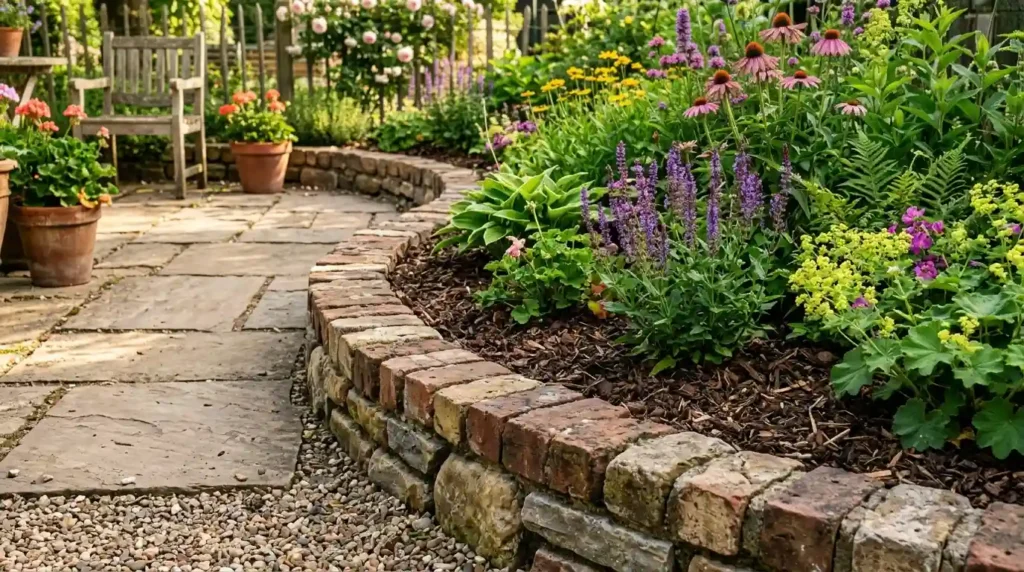
A clear border makes a patio look neat. It also keeps mulch, soil, and small stones from spreading onto the floor.

Reclaimed bricks, old pavers, and natural stones can all work as edging. Ask friends or family if they have leftover materials.

You can also check yard sales, reuse shops, salvage yards, and local giveaway groups.

Lay out the pieces before setting them into the soil. Try to repeat the same material in more than one area. This makes old or mixed pieces feel like part of a plan.

Set each piece firmly. Loose edging may move after rain or regular foot traffic.

Keep sharp or damaged materials away from walkways. Check old bricks for deep cracks before using them.

A strong edge gives the patio a clear shape. Once that shape is in place, plants can soften the hard surface and add color.

5 Budget-Friendly Patio Planting Ideas

Plants can hide bare corners, soften concrete, add scent, and create privacy. You do not need dozens of pots to make an impact.

Group Containers for a Fuller Look
Group Containers for a Fuller Look

Best for: Small patios and renters
Cost level: Low
Time needed: One to two hours

Scattered pots can make a patio feel messy. Grouping them creates a stronger display with fewer plants.

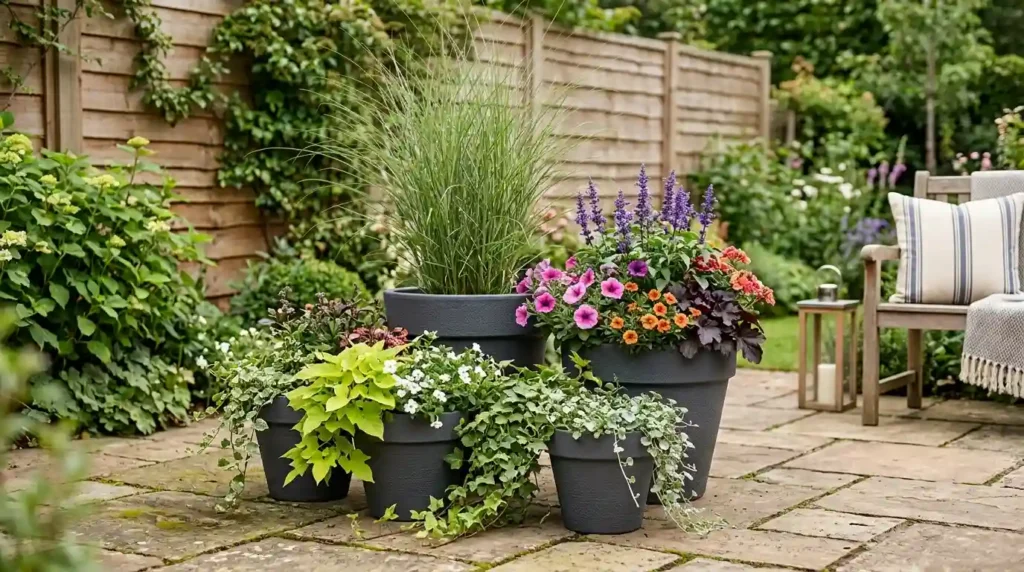
Use groups of three or five. Place the tallest pot at the back. Add a medium plant beside it. Finish with a low or trailing plant near the front.

A simple group could include:

  • One tall grass
  • One flowering plant
  • One trailing plant

Repeat one color or pot material. This will help different containers look connected.

You can place smaller plastic nursery pots inside larger decorative pots. This makes it easier to move and replace plants.

Do not fill a deep pot with soil when the plant has shallow roots. A safe lightweight filler can reduce the amount of soil needed. Make sure the pot still drains and stays stable.

Three well-placed containers often look better than ten small pots spread around the patio.

Turn Everyday Items Into Planters
A bare patio can make your whole backyard feel unfinished. You may have a plain concrete slab, old chairs, little privacy, or no shade. Fixing all these problems at once can seem expensive.

The good news is that you do not need to rebuild the patio. A few smart changes can make it feel more private, useful, and welcoming.

These patio landscaping ideas on a budget use simple materials, secondhand finds, plants, paint, gravel, and outdoor lighting. Some projects cost very little. Others can be completed in stages as you save more money.

You will also find ideas for renters, small patios, sunny yards, and narrow outdoor spaces. Start with the problem that bothers you most. Then add other features when your time and budget allow.

Before you buy plants, pots, or decorations, take a closer look at the space.

How to Plan Patio Landscaping Ideas on a Budget

The easiest way to overspend is to shop without a plan. A few plants may look cheap at the store. However, the total cost can grow fast when you add pots, soil, tools, and decorations.

Start by measuring the patio. Write down its length and width. Measure the nearby flower beds, empty corners, walkways, and fence lines too.

Next, list the three biggest problems. Your list may include:

No shade

Little privacy

Poor seating

A dirty concrete floor

Empty patio edges

No evening lighting

Too many mismatched items

Fix safety problems first. Loose stones, deep cracks, poor drainage, and unstable steps should come before decorations.

After that, choose the change that will improve how you use the space. Shade may matter most on a hot patio. Seating may matter more if you enjoy family meals outside.

Set a total spending limit before shopping. Divide the money into simple groups, such as plants, surface materials, seating, privacy, and lighting.

For example, a $250 budget could include:

$80 for plants and pots

$60 for gravel, mulch, or edging

$50 for lighting

$60 for paint or secondhand furniture

These are sample amounts. Prices will differ based on your location, patio size, and chosen materials.

Check what you already own before buying anything. An old chair may only need paint. Extra bricks may work as edging. A storage tub may become a planter if it is clean and safe.

Write down your budget and choose one main project. This will help you avoid buying small items that do not solve a real problem.

5 Cheap Patio Ground and Border Ideas

The patio floor and edges create the base for the whole space. Improve these areas first, and your plants and furniture will look more planned.

Clean and Rearrange What You Already Have

Best for: Every patio
Cost level: Very low
Time needed: One afternoon

Cleaning is one of the cheapest patio landscaping ideas. It can also create the fastest visible change.

Start by removing furniture, pots, toys, and decorations. Sweep away leaves and dirt. Pull weeds from cracks and along the patio edge.

Scrub the surface with water and a stiff outdoor brush. Use a cleaning product made for your patio material when plain water is not enough.

Check the area for broken pots, faded decorations, and items you no longer use. Removing clutter can make a small patio feel much larger.

Now change the furniture layout. Place chairs across from each other to create a conversation area. Use an L-shaped layout if the patio is narrow.

Avoid lining every chair against the wall. This can make the center feel empty and awkward.

Cleaning does not fix serious cracks or drainage problems. Those issues may need repair. Still, a clean floor and simple layout give you a better starting point.

Create a Pea Gravel Seating Area

Best for: Patios that need more usable space
Cost level: Low to medium
Time needed: One weekend

Pouring more concrete can cost a lot. Pea gravel can create extra seating space for less.

Choose a flat area beside the current patio. A 6-by-8-foot space may hold two chairs and a small table.

Remove weeds and loose plant growth. Level the soil as much as possible. Add edging around the area to keep the gravel in place.

Brick, metal, plastic, wood, or stone edging can work. Pick a material that matches something already in the yard.

Landscape fabric may help control weeds in some settings. However, it can also make future soil work harder. Check what works best for your soil and drainage.

Spread the gravel at a suitable depth. Rake it flat and test the surface before adding furniture.

Keep loose gravel away from doors. Small stones can get tracked into the house.

Gravel is not perfect for every home. Chairs with narrow legs may sink into it. A flat paver under each leg can help.

Paint or Stencil a Plain Concrete Patio

Best for: Dull concrete slabs
Cost level: Low to medium
Time needed: One weekend

A plain concrete patio can look much better with paint or a simple stencil.

Clean the surface first. Remove dirt, grease, loose paint, and weeds. Repair small cracks before adding a new finish.

Use paint or coating made for outdoor concrete. Indoor wall paint will not handle rain, sun, and foot traffic.

Test the color in a small corner. Patio colors may look much brighter outside than they did on the sample card.

You do not need to paint the full slab. A large stencil around the seating area can create the look of outdoor tile. A simple border can also make the patio feel more finished.

Pick a pattern that will be easy to touch up later. Very detailed designs may take more time and show mistakes.

Check the product label for drying times and slip safety. Some smooth finishes may become slippery when wet.

This project needs careful surface prep. Skipping that step can cause the paint to peel early.

Add a Simple Stepping-Stone Path

Best for: Patios that feel cut off from the yard
Cost level: Low to medium
Time needed: One day

A stepping-stone path can connect your patio to a gate, garden bed, shed, or lawn area.

You do not need a full paved walkway. Six to eight spaced stones may be enough for a short path.

Place the stones on the ground before digging. Walk across them to test the spacing. Your steps should feel natural.

Dig a shallow space for each stone. Set every piece level with the soil or slightly above it. This lowers the risk of trips.

Fill the gaps with mulch, gravel, grass, or low-growing plants. Choose a filler that suits the amount of foot traffic.

Look for leftover pavers through local resale groups or building reuse stores. Mismatched stones can still look good when their spacing stays even.

Make the path wide enough for its use. A path to a garden can be narrow. A route used for bins or carts needs more room.

Edge the Patio With Reclaimed Brick or Stone

Best for: Patios with messy garden edges
Cost level: Low
Time needed: One afternoon

A clear border makes a patio look neat. It also keeps mulch, soil, and small stones from spreading onto the floor.

Reclaimed bricks, old pavers, and natural stones can all work as edging. Ask friends or family if they have leftover materials.

You can also check yard sales, reuse shops, salvage yards, and local giveaway groups.

Lay out the pieces before setting them into the soil. Try to repeat the same material in more than one area. This makes old or mixed pieces feel like part of a plan.

Set each piece firmly. Loose edging may move after rain or regular foot traffic.

Keep sharp or damaged materials away from walkways. Check old bricks for deep cracks before using them.

A strong edge gives the patio a clear shape. Once that shape is in place, plants can soften the hard surface and add color.

5 Budget-Friendly Patio Planting Ideas

Plants can hide bare corners, soften concrete, add scent, and create privacy. You do not need dozens of pots to make an impact.

Group Containers for a Fuller Look

Best for: Small patios and renters
Cost level: Low
Time needed: One to two hours

Scattered pots can make a patio feel messy. Grouping them creates a stronger display with fewer plants.

Use groups of three or five. Place the tallest pot at the back. Add a medium plant beside it. Finish with a low or trailing plant near the front.

A simple group could include:

One tall grass

One flowering plant

One trailing plant

Repeat one color or pot material. This will help different containers look connected.

You can place smaller plastic nursery pots inside larger decorative pots. This makes it easier to move and replace plants.

Do not fill a deep pot with soil when the plant has shallow roots. A safe lightweight filler can reduce the amount of soil needed. Make sure the pot still drains and stays stable.

Three well-placed containers often look better than ten small pots spread around the patio.

Turn Everyday Items Into Planters

Best for: DIY patio landscaping
Cost level: Very low
Time needed: One afternoon

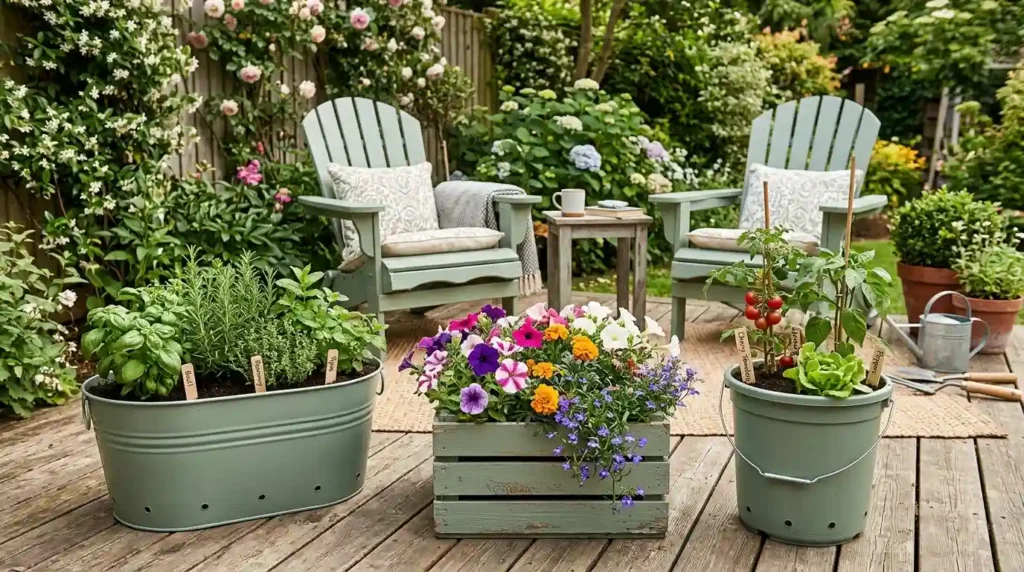
You may already own items that can become outdoor planters.

Clean buckets, wooden crates, metal tubs, and sturdy baskets may work. The container must be strong enough to hold wet soil.

Add drainage holes before planting. Water trapped around the roots can cause rot.

Never use a container that held fuel, strong cleaners, pesticides, or other unsafe chemicals.

Wooden boxes may need a liner. Leave drainage openings at the bottom. Paint or seal the outside with an outdoor-safe product.

You can paint mismatched containers in one or two colors. This creates a cleaner look without buying a full matching set.

Good options include:

A metal tub for herbs

A wooden crate for flowers

A food-safe bucket for vegetables

A large ceramic pot as a focal point

Place heavy containers where you want them before filling them. Wet soil can make them hard to move.

8. Divide Perennials Instead of Buying More Plants

Best for: Homeowners with existing garden beds
Cost level: Free to very low
Time needed: A few hours

Mature perennials can sometimes be split into smaller plants. This gives you more greenery without buying more.

A perennial is a plant that returns for several growing seasons. Many types slowly form larger clumps.

Check whether your plant can be divided. Some plants respond well. Others do not.

Choose the correct season for that plant. Dig carefully and separate the root clump into healthy sections. Replant each section at the right depth.

You can use the new plants along the patio edge. Repeating the same plant in three places can make the yard feel connected.

Plant swaps are another useful option. Neighbors may have extra plants from their own beds. You may be able to trade something you already grow.

Free plants still need the right light, soil, and water. Do not accept a plant just because it costs nothing.

9. Choose Native or Drought-Tolerant Plants

Best for: Lower water and care costs
Cost level: Low to medium
Time needed: Varies

A cheap plant is not a good deal when it dies after one hot season.

Choose plants that suit your local weather, soil, and sunlight. They are more likely to stay healthy with less extra care.

Native plants grow naturally in your area. They may also provide food or shelter for local birds and insects.

Drought-tolerant plants can handle dry periods once their roots are established. They still need regular water when first planted.

Possible plant types include:

Ornamental grasses

Salvia

Lavender in suitable dry areas

Sedum

Coneflowers

Catmint

Ferns for shaded spots

Heuchera for part shade

These examples will not suit every climate. Ask a local garden center or plant service which options work near you.

Check the mature size before planting. A small nursery plant may become too wide for a narrow patio bed.

Avoid fast-spreading plants near walls and paths. A low price does not help when the plant later becomes hard to control.

10. Create a Small Patio Herb Corner

Best for: Patios near a kitchen or grill
Cost level: Low
Time needed: One afternoon

Herbs add color, scent, and food to a patio. They also fit well in small containers.

Place them near the kitchen door or outdoor cooking area. You will use them more often when they are easy to reach.

Try:

Basil in a sunny pot

Parsley and chives in a window box

Rosemary in a warm, bright spot

Mint in its own container

Mint spreads fast. Keeping it in a pot helps control its roots.

Choose herbs based on the sunlight you receive. Some need full sun. Others can handle a little shade.

Add plant labels if several herbs look alike. You can make simple labels from wood scraps, stones, or old spoons.

Mix herbs with flowers when they have similar care needs. This makes the display useful and attractive.

Choose every patio plant for a clear reason. It should add color, scent, privacy, food, or softness.

5 Affordable Patio Privacy and Shade Ideas

A patio will not feel relaxing when neighbors can see every seat or the midday sun makes the floor too hot.

Some privacy and shade options work right away. Plants may need more time to grow.

11. Build a Vertical Garden

Best for: Small patios with empty walls
Cost level: Low
Time needed: One day

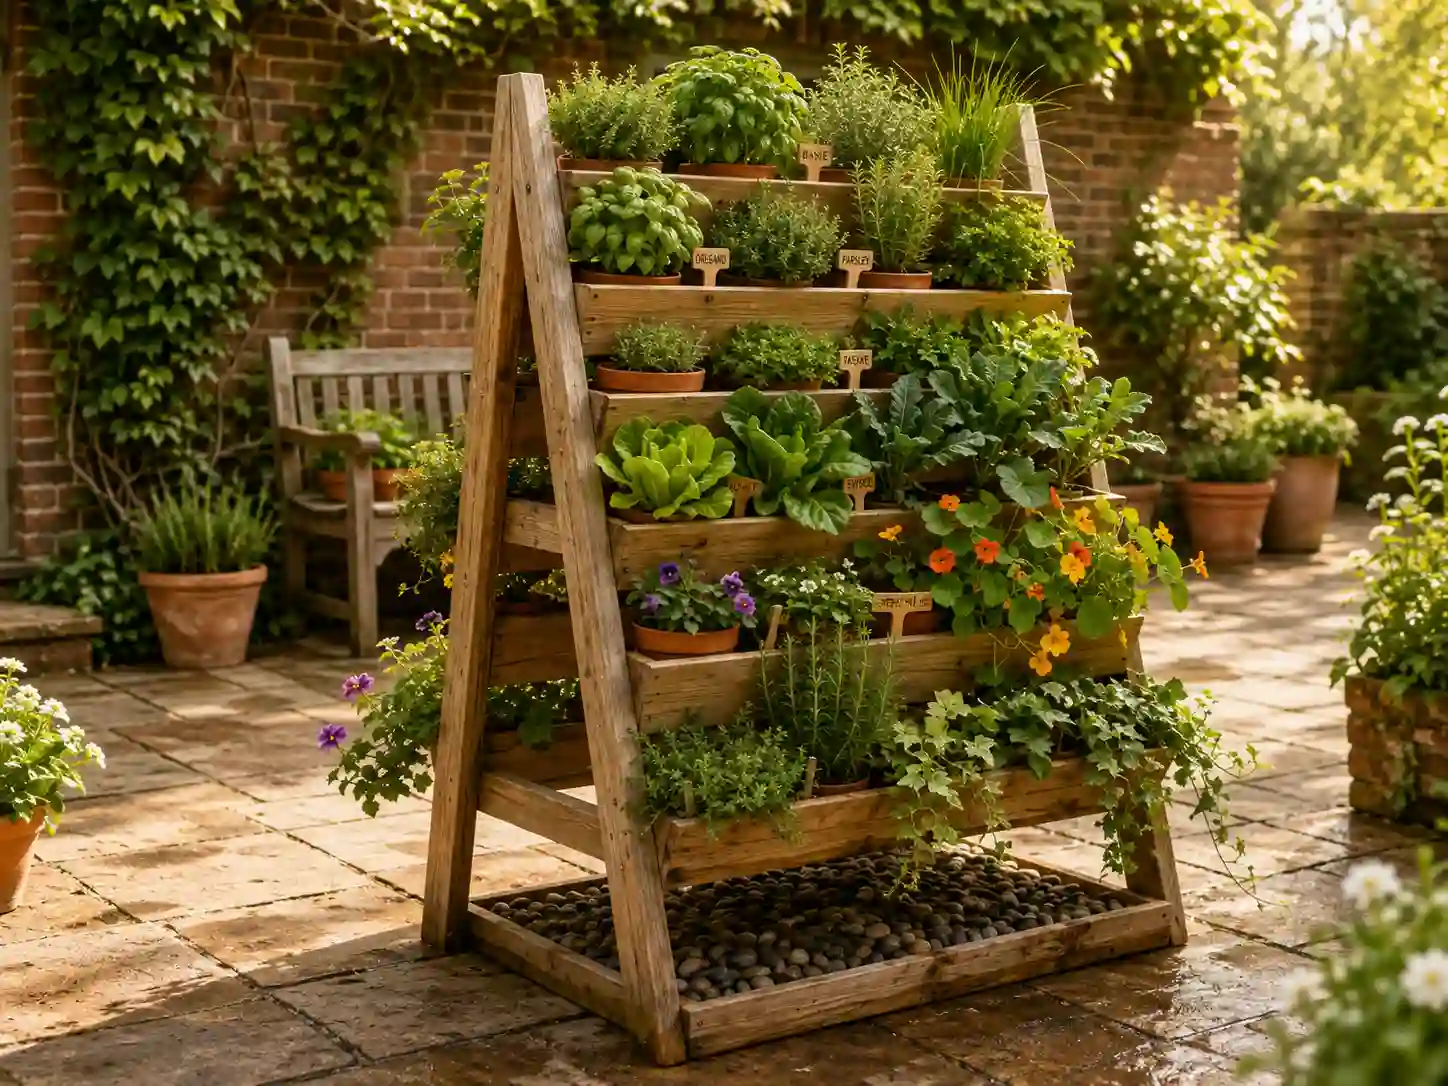
A vertical garden adds plants without using much floor space.

You can use a purpose-built frame or a clean wooden pallet. Check reclaimed wood before bringing it home.

Avoid wood with an unknown history. It may have held chemicals or unsafe materials. Look for clear treatment marks and use only wood that is suitable for your project.

Sand rough edges. Secure the frame so it cannot tip forward.

Add lightweight pots, small shelves, or planter pockets. Leave space around each plant for airflow and watering.

A freestanding frame works well for renters because it may not require drilling into the wall.

Use small herbs, trailing flowers, or compact leafy plants. Large pots can make the frame too heavy.

Place a tray or gravel below the garden if dripping water may stain the patio.

12. Train Climbing Plants on a Trellis

Best for: Long-term natural privacy
Cost level: Low to medium
Time needed: One afternoon for setup

A climbing plant can turn a bare wall or fence into a green backdrop.

Use lattice, wire, wood strips, or a ready-made trellis. Make sure it can support the mature plant.

Place one or two narrow trellises behind a bench. This creates a clear seating area while adding height.

Choose a vine that suits your weather. Check how fast it grows and how large it may become.

Some vines grip walls on their own. Others need to be tied to the support.

Keep aggressive vines away from siding, gutters, roofs, and weak fences. Roots and stems can enter small gaps or become too heavy.

Container-grown vines need enough room for their roots. Small pots may dry out quickly and limit growth.

This idea takes patience. A screen or curtain is better when you need privacy right away.

13. Add a Reed or Bamboo-Style Screen

Best for: Fast privacy
Cost level: Low
Time needed: One to two hours

A roll-up screen can cover an open railing or an unattractive fence.

Measure the area before buying. A screen that is too short may look unfinished.

Secure both the top and bottom. Wind can pull at loose material and damage the ties.

Use weather-safe fasteners. Check them during stormy seasons.

Place a few plants in front of the screen. This softens the flat surface and makes the space feel less closed.

Natural reed and bamboo-style screens may fade or break down over time. They often cost less than a permanent fence, but they may need replacing sooner.

Renters should check building rules before attaching anything to a railing or fence.

14. Hang Outdoor Curtains

Best for: Covered patios and pergolas
Cost level: Low
Time needed: One afternoon

Outdoor curtains can add privacy and soft shade without building a wall.

Hang them only on the side that needs coverage. Two panels may be enough to block the view from a nearby home.

Use fabric made for outdoor spaces. Indoor curtains may hold water, fade, or grow mold.

Choose a light color if the patio is small. Dark fabric can make a tight area feel closed.

Add tiebacks so you can open the curtains on calm days.

Keep all fabric far from grills, heaters, candles, and open flames.

The hanging frame must be secure. Do not attach heavy rods to weak trim or loose wood.

Curtains can move in strong wind. Take them down during severe weather when needed.

15. Install a Small Shade Sail

Best for: Hot, open patios
Cost level: Medium
Time needed: Several hours

A shade sail can cover a seating area without the cost of a full roof.

Measure the area and choose a sail that leaves room for proper tension. A loose sail may sag or collect water.

Use strong attachment points. Weak fencing, thin trim, and unstable posts may fail under pressure.

Set the sail at a slight angle so rain can run off. Follow the maker’s setup guide for spacing and tension.

Check local rules before adding new posts or attaching a structure to the house.

Remove the sail during severe weather when the product guide says to do so.

A shade sail can provide fast relief from harsh sun. However, it needs safe support. Do not treat it like a simple decoration.

Pick one strong privacy or shade feature. Too many screens, curtains, and tall plants can make a small patio feel crowded.

4 Low-Cost Patio Seating, Lighting, and Decor Ideas

A patio starts feeling useful when you have a comfortable seat and enough light to enjoy the area after sunset.

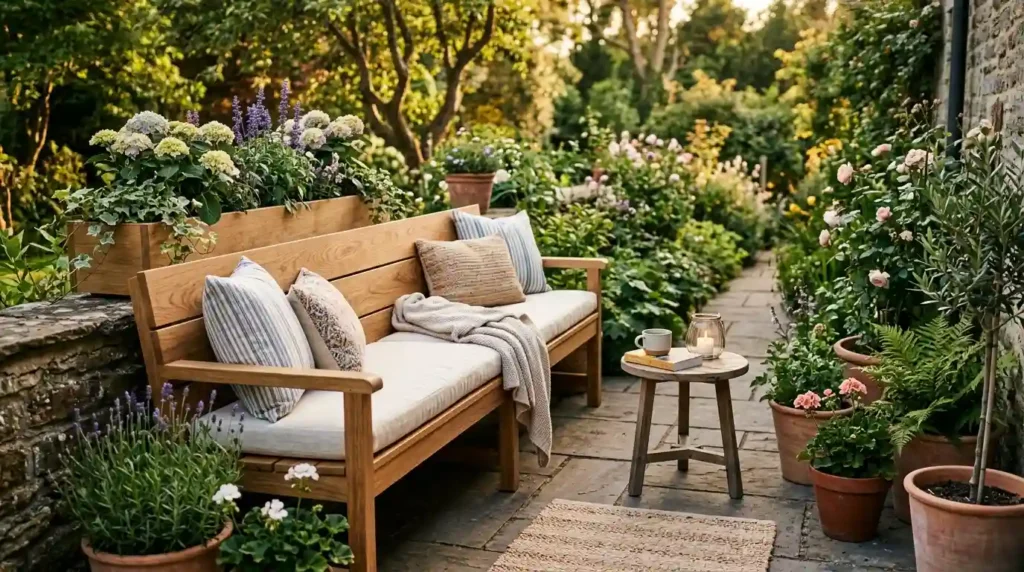
16. Build a Simple Outdoor Bench

Best for: Narrow patios
Cost level: Low to medium
Time needed: One weekend

A straight bench can seat more people than several separate chairs. It also uses less floor space.

Some DIY benches use outdoor lumber, concrete blocks, or strong crates. Follow a tested building plan for the exact materials you choose.

Place the bench on a level surface. Test every support before sitting on it.

Sand all wood. Seal it with an outdoor-safe finish. This helps protect it from sun and moisture.

Keep the seat at a comfortable height. A bench that is too low may be hard to use.

Add washable cushions for comfort. Store them during heavy rain or cold weather.

Do not use weak crates, cracked blocks, or untreated indoor boards. A cheap bench is not worth the risk if it cannot hold weight safely.

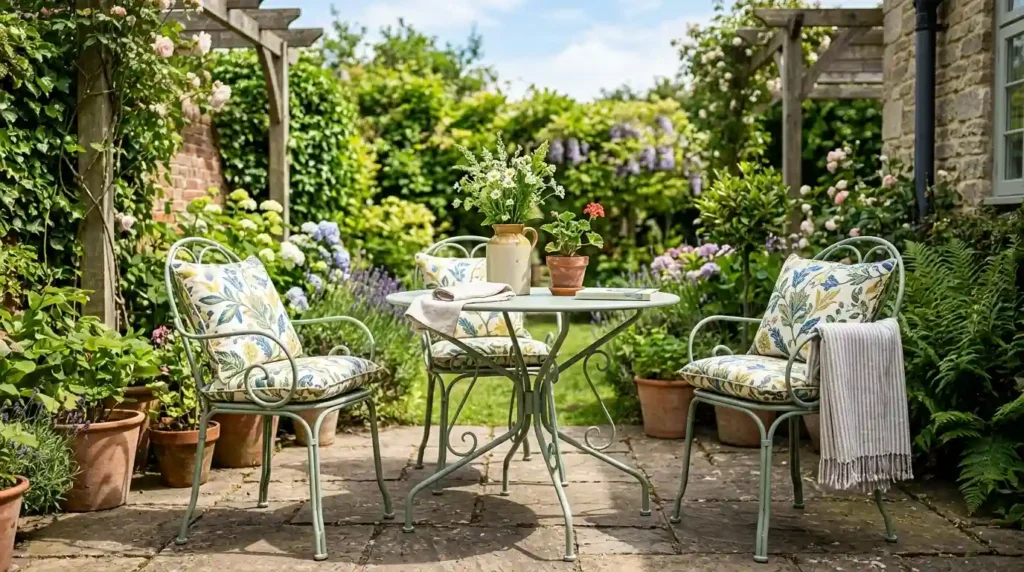
17. Refresh Secondhand Outdoor Furniture

Best for: Patios with a mixed furniture set
Cost level: Low
Time needed: One weekend

Secondhand furniture can save money, but inspect it before buying.

Check the legs, frame, seat, screws, and joints. Avoid chairs with cracked supports or deep rust.

Surface rust may be cleaned and painted. Rust that has eaten through the metal can make the frame unsafe.

Wash the furniture first. Remove loose paint before adding a new finish.

Use paint or sealer made for the furniture material. Metal, wood, and plastic need different products.

You can make two different chairs look like a set by painting them the same color. Add matching cushions to complete the look.

Look for used furniture through:

Local resale sites

Yard sales

Charity shops

Reuse stores

Community giveaway groups

Measure your patio before bringing furniture home. A low price is not helpful when the table blocks the walkway.

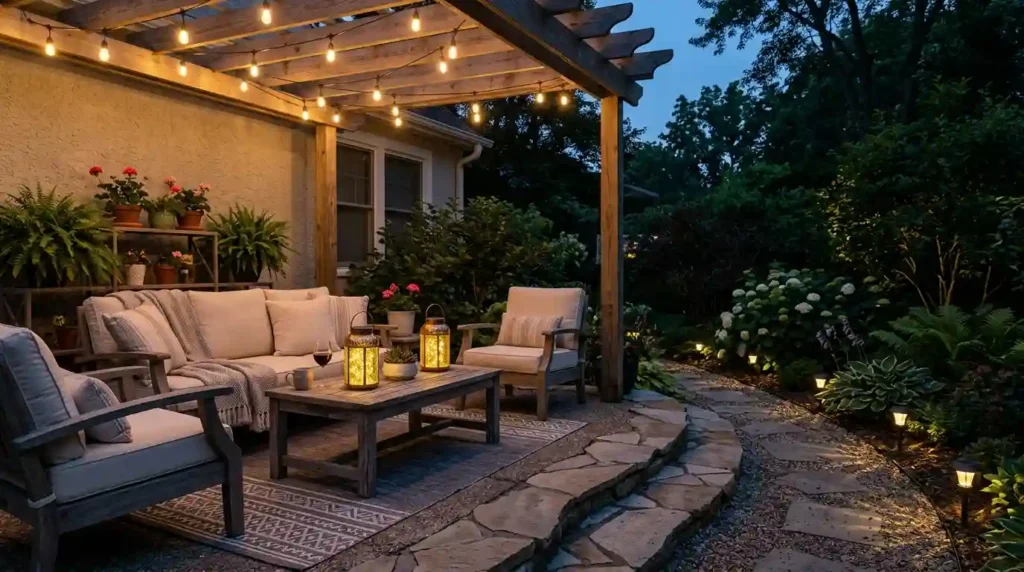
18. Add Solar and String Lights in Layers

Best for: Patios used at night
Cost level: Low
Time needed: Under two hours

One bright light can feel harsh. Several softer lights make the patio feel warmer and safer.

Use three simple lighting levels:

Safety lights near steps and paths

General light around the seating area

Small accent lights on tables or near plants

Solar path lights are easy to install. Place their panels where they receive enough direct sun.

String lights can mark the seating zone. Use products rated for outdoor use.

Secure the lights to strong hooks or supports. Do not hang them from weak branches or loose nails.

Keep electrical plugs and connections away from standing water. Use outdoor-rated cords and follow the product safety guide.

Solar lanterns work well on tables. They can also be moved when you change the furniture layout.

Avoid adding too many lights. You should still be able to enjoy the night sky and nearby plants.

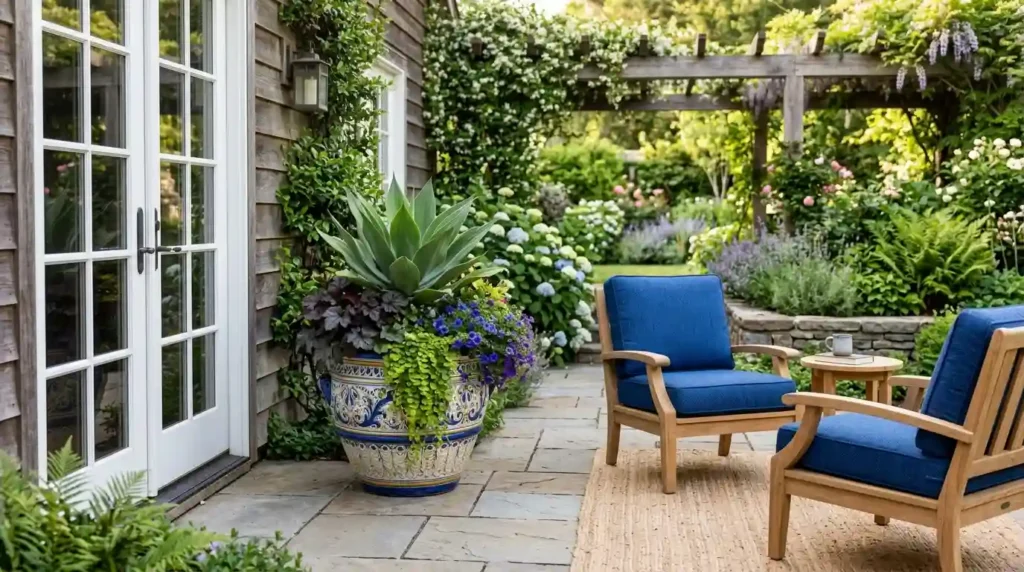
19. Create One Low-Cost Focal Point

Best for: Patios that feel plain or cluttered
Cost level: Low
Time needed: One afternoon

A focal point gives your eyes one main place to rest.

Choose one item, such as:

A large painted planter

A simple birdbath

A wall panel

A garden sculpture

A small water bowl

A tall plant in a bold pot

Place it where you can see it from the patio entrance or inside the house.

Keep the size in balance with the space. A tiny item may disappear on a large wall. A huge planter can block a narrow path.

Repeat one color from the focal point in two other places. For example, match a blue planter with two blue cushions.

Avoid buying many small decorations. Ten low-cost items may cost more than one strong feature. They can also create clutter.

A defined floor, grouped plants, useful seating, and soft lighting can make a basic patio feel complete.

Patio Landscaping Ideas on a Budget by Price

A “small budget” means different things to different people. These sample plans show how you could divide $100, $250, or $500.

Local prices may be higher or lower. Use these amounts as planning examples rather than fixed project quotes.

The $100 Patio Refresh

This plan works well for renters, tiny patios, and people who already own chairs.

A sample budget could include:

Cleaning supplies: $15

Paint for one planter or small feature: $25

Two or three plants: $30

Solar lights: $20

A thrifted decoration: $10

Start by cleaning the floor and removing clutter. Rearrange the furniture you already own.

Group two or three plants in one corner. Paint an old pot to create a focal point. Add solar lights near the path or seating area.

The goal is to make one small zone feel finished.

The $250 Patio Makeover

This plan works for a plain patio that needs color and privacy.

A sample budget could include:

Gravel, mulch, or edging: $70

Plants and containers: $80

A privacy screen or outdoor curtains: $50

Lighting: $30

Paint or cushions: $20

Use edging or gravel to define the patio. Add three grouped pots near the seating area.

Install privacy on the most exposed side. Finish with soft lighting and one repeated color.

Do not spread the money across every part of the yard. Complete the patio first.

The $500 Patio Upgrade

This plan works for a larger space or a project completed over several weekends.

A sample budget could include:

Ground and border materials: $130

Plants and containers: $140

Seating improvements: $100

Shade or privacy: $80

Lighting and a focal feature: $50

Start with repairs and surface work. Add seating next. Then bring in plants, shade, and lighting.

You may still need to reuse some materials or buy secondhand items. A $500 budget can disappear fast when buying everything new.

Finish one full zone before starting another. This creates a usable result even when the rest of the yard must wait.

9 Budget Patio Landscaping Mistakes to Avoid

A low price does not save money when the item breaks, dies, fades, or needs replacing after one season.

1. Buying Plants Before Checking the Sun

Watch the patio for a full day. Note which areas get morning sun, afternoon sun, full shade, or reflected heat.

A shade plant may burn beside hot concrete. A sun-loving plant may become weak in a dark corner.

2. Ignoring Drainage

Water should move away from the house and seating area.

Do not cover a drainage problem with gravel, rugs, or pots. Fix the cause before adding decorations.

3. Using Indoor Products Outside

Indoor rugs, lights, paint, and fabric may fail in wet weather.

Choose items made for outdoor use. Read the labels before buying.

4. Buying Too Many Small Decorations

Small lanterns, signs, pots, and ornaments may seem cheap. Together, they can cost more than one useful item.

Choose one focal point instead.

5. Forgetting the Mature Plant Size

Plants look small at the garden center. Some become wide, tall, or fast-spreading.

Check the plant label before placing it beside a path or wall.

6. Building Without Checking the Rules

Rentals, homeowner groups, and local areas may have rules for screens, sails, fences, and attached items.

Check before drilling holes or adding posts.

7. Buying Furniture That Cannot Be Repaired

A weak chair is not a bargain.

Check frames, joints, screws, and supports before paying.

8. Mixing Too Many Materials

Five colors, several wood tones, bright plastic pots, and mixed metals can make the patio feel busy.

Repeat two or three main materials for a calmer look.

9. Ignoring Future Care Costs

A low-cost plant may need frequent water. A cheap screen may need regular replacement.

Think about care, repairs, and storage before buying.

The goal is not to buy the cheapest items. Spend carefully on features that fit the space and last.

How to Maintain Your Patio for Less

The most affordable patio is one that does not need the same items replaced every year.

Sweep the surface often. Leaves and dirt can hold moisture and stain the floor.

Pull weeds while they are small. Large weeds can widen cracks and become harder to remove.

Group pots with similar water needs. This makes plant care faster and lowers the risk of giving too much water.

Check furniture joints once a month. Tighten loose screws before the frame starts moving.

Clean solar panels and outdoor lights. Dirt can block sunlight and make solar lights weaker.

Store cushions during heavy rain and winter. Washable covers are easier to care for than fixed fabric.

Touch up painted areas when small chips appear. Waiting can allow water to reach the material below.

Check screens, curtains, trellises, and shade supports after strong wind.

Divide healthy perennials when they become crowded. Use the new plants in other patio beds or trade them with neighbors.

A simple monthly routine may include:

Sweep the patio

Remove weeds

Check furniture

Clean lights

Trim dead plant growth

Inspect privacy and shade features

Move pots when seasonal sunlight changes

Short, regular care can stop small problems from turning into expensive repairs.

Start With One Affordable Patio Project

You do not need to change everything at once. Start with the problem that keeps you from using the patio.

Clean and define the floor first. Add plants to soften hard edges. Use a screen, curtain, or shade sail when the space feels exposed or too hot.

Comfortable seating and soft lighting will help you use the patio more often. One clear focal point will pull the full design together.

Measure the space today. Set a spending limit and choose one project for this weekend.

These patio landscaping ideas on a budget can help you create a useful outdoor space without a full rebuild. Small changes can add up to a patio that feels calm, comfortable, and complete.

Best for: DIY patio landscaping
Cost level: Very low
Time needed: One afternoon

You may already own items that can become outdoor planters.

Clean buckets, wooden crates, metal tubs, and sturdy baskets may work. The container must be strong enough to hold wet soil.

Add drainage holes before planting. Water trapped around the roots can cause rot.

Never use a container that held fuel, strong cleaners, pesticides, or other unsafe chemicals.

Wooden boxes may need a liner. Leave drainage openings at the bottom. Paint or seal the outside with an outdoor-safe product.

You can paint mismatched containers in one or two colors. This creates a cleaner look without buying a full matching set.

Good options include:

  • A metal tub for herbs
  • A wooden crate for flowers
  • A food-safe bucket for vegetables
  • A large ceramic pot as a focal point

Place heavy containers where you want them before filling them. Wet soil can make them hard to move.

Divide Perennials Instead of Buying More Plants
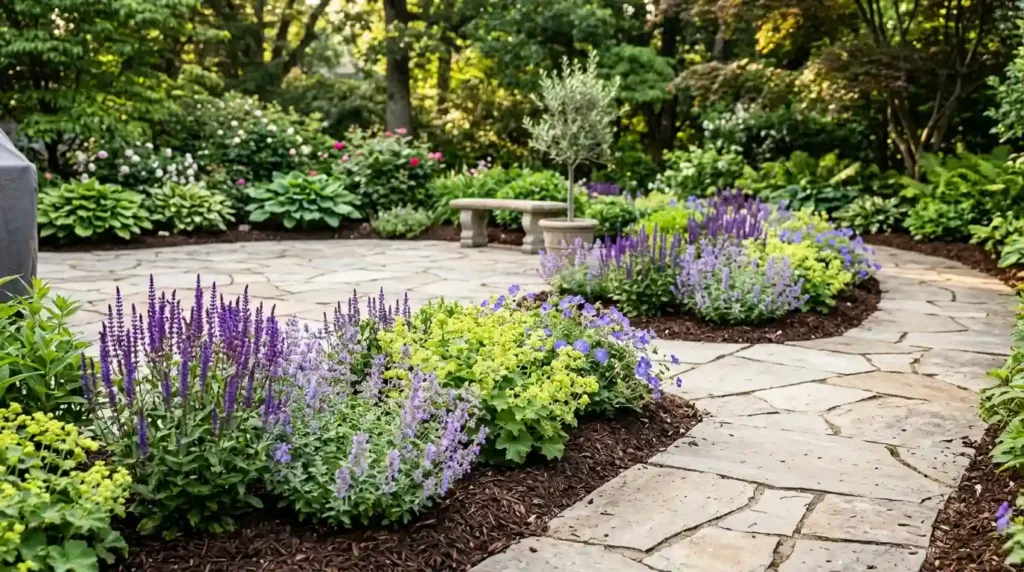
Divide Perennials Instead of Buying More Plants

Best for: Homeowners with existing garden beds
Cost level: Free to very low
Time needed: A few hours

Mature perennials can sometimes be split into smaller plants. This gives you more greenery without buying more.

A perennial is a plant that returns for several growing seasons. Many types slowly form larger clumps.

Check whether your plant can be divided. Some plants respond well. Others do not.

Choose the correct season for that plant. Dig carefully and separate the root clump into healthy sections. Replant each section at the right depth.

You can use the new plants along the patio edge. Repeating the same plant in three places can make the yard feel connected.

Plant swaps are another useful option. Neighbors may have extra plants from their own beds. You may be able to trade something you already grow.

Free plants still need the right light, soil, and water. Do not accept a plant just because it costs nothing.

Choose Native or Drought-Tolerant Plants
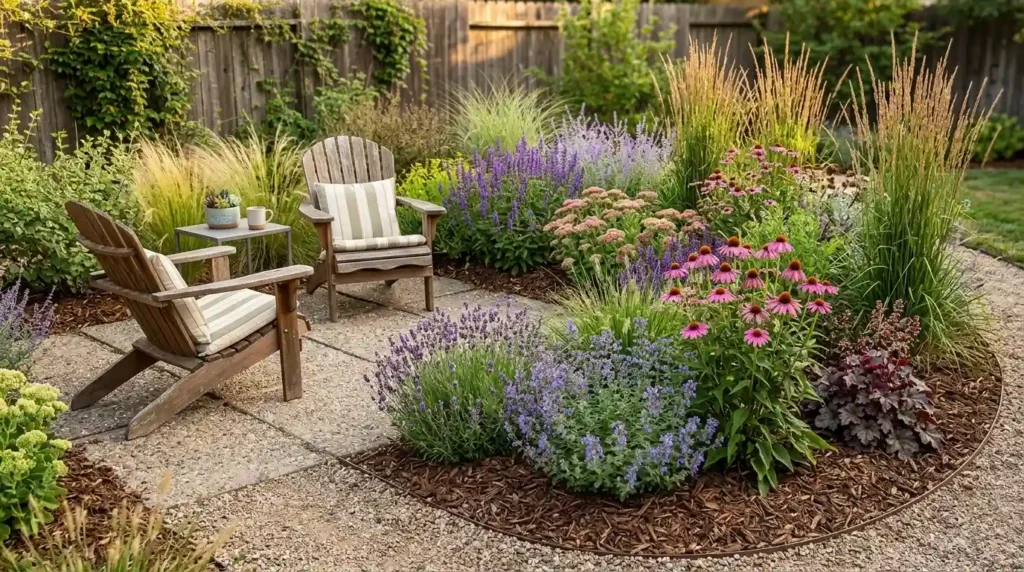
Choose Native or Drought-Tolerant Plants

Best for: Lower water and care costs
Cost level: Low to medium
Time needed: Varies

A cheap plant is not a good deal when it dies after one hot season.

Choose plants that suit your local weather, soil, and sunlight. They are more likely to stay healthy with less extra care.

Native plants grow naturally in your area. They may also provide food or shelter for local birds and insects.

Drought-tolerant plants can handle dry periods once their roots are established. They still need regular water when first planted.

Possible plant types include:

  • Ornamental grasses
  • Salvia
  • Lavender in suitable dry areas
  • Sedum
  • Coneflowers
  • Catmint
  • Ferns for shaded spots
  • Heuchera for part shade

These examples will not suit every climate. Ask a local garden center or plant service which options work near you.

Check the mature size before planting. A small nursery plant may become too wide for a narrow patio bed.

Avoid fast-spreading plants near walls and paths. A low price does not help when the plant later becomes hard to control.

Create a Small Patio Herb Corner
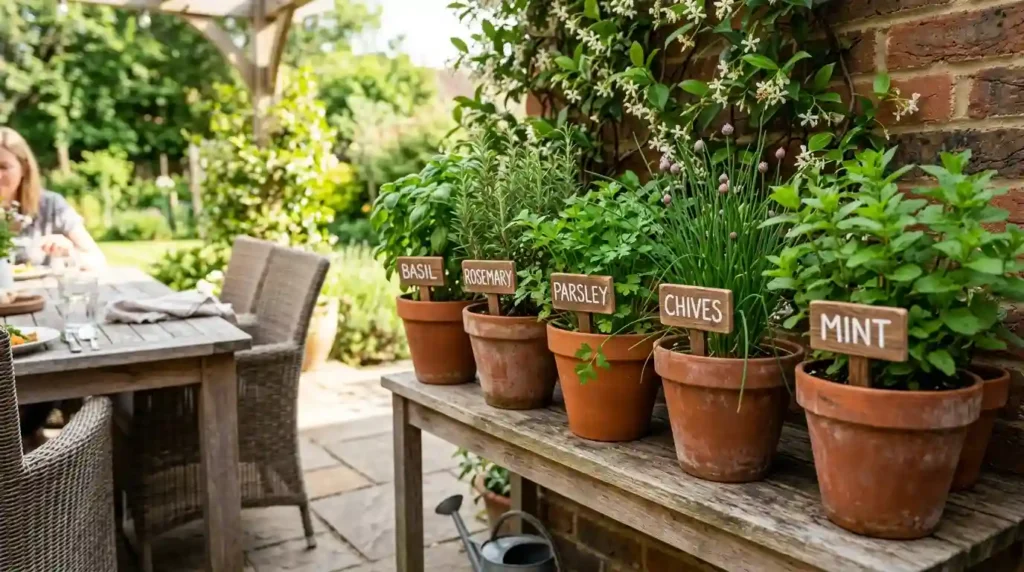
Create a Small Patio Herb Corner

Best for: Patios near a kitchen or grill
Cost level: Low
Time needed: One afternoon

Herbs add color, scent, and food to a patio. They also fit well in small containers.

Place them near the kitchen door or outdoor cooking area. You will use them more often when they are easy to reach.

Try:

  • Basil in a sunny pot
  • Parsley and chives in a window box
  • Rosemary in a warm, bright spot
  • Mint in its own container

Mint spreads fast. Keeping it in a pot helps control its roots.

Choose herbs based on the sunlight you receive. Some need full sun. Others can handle a little shade.

Add plant labels if several herbs look alike. You can make simple labels from wood scraps, stones, or old spoons.

Mix herbs with flowers when they have similar care needs. This makes the display useful and attractive.

Choose every patio plant for a clear reason. It should add color, scent, privacy, food, or softness.

5 Affordable Patio Privacy and Shade Ideas

A patio will not feel relaxing when neighbors can see every seat or the midday sun makes the floor too hot.

Some privacy and shade options work right away. Plants may need more time to grow.

Build a Vertical Garden
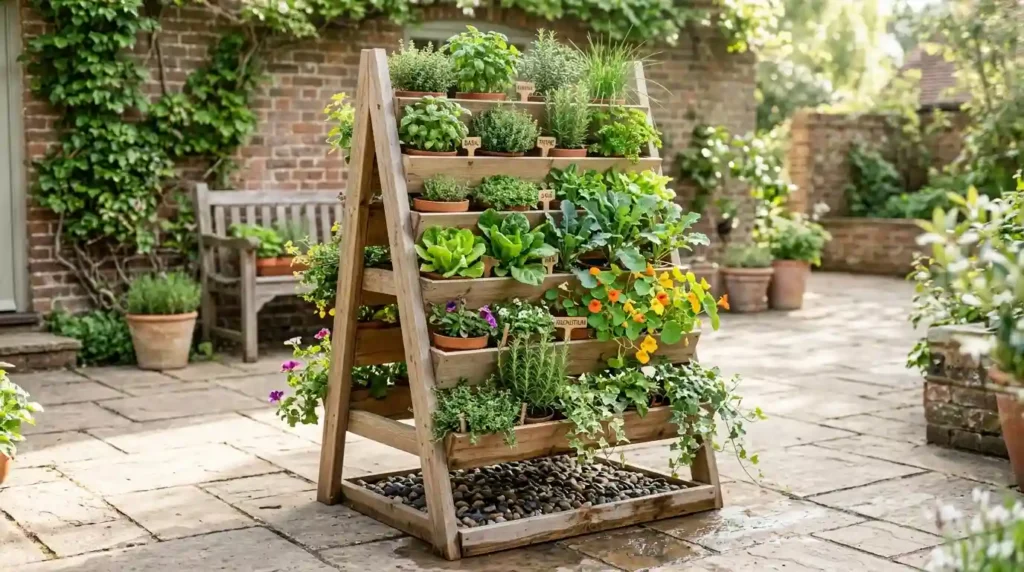
Build a Vertical Garden

Best for: Small patios with empty walls
Cost level: Low
Time needed: One day

A vertical garden adds plants without using much floor space.

You can use a purpose-built frame or a clean wooden pallet. Check reclaimed wood before bringing it home.

Avoid wood with an unknown history. It may have held chemicals or unsafe materials. Look for clear treatment marks and use only wood that is suitable for your project.

Sand rough edges. Secure the frame so it cannot tip forward.

Add lightweight pots, small shelves, or planter pockets. Leave space around each plant for airflow and watering.

A freestanding frame works well for renters because it may not require drilling into the wall.

Use small herbs, trailing flowers, or compact leafy plants. Large pots can make the frame too heavy.

Place a tray or gravel below the garden if dripping water may stain the patio.

Train Climbing Plants on a Trellis
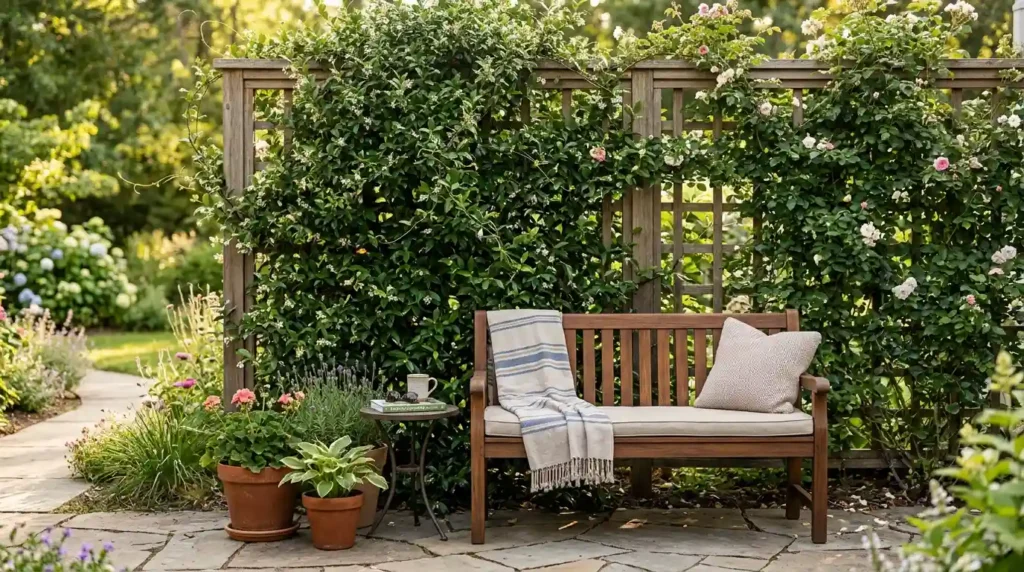
Train Climbing Plants on a Trellis

Best for: Long-term natural privacy
Cost level: Low to medium
Time needed: One afternoon for setup

A climbing plant can turn a bare wall or fence into a green backdrop.

Use lattice, wire, wood strips, or a ready-made trellis. Make sure it can support the mature plant.

Place one or two narrow trellises behind a bench. This creates a clear seating area while adding height.

Choose a vine that suits your weather. Check how fast it grows and how large it may become.

Some vines grip walls on their own. Others need to be tied to the support.

Keep aggressive vines away from siding, gutters, roofs, and weak fences. Roots and stems can enter small gaps or become too heavy.

Container-grown vines need enough room for their roots. Small pots may dry out quickly and limit growth.

This idea takes patience. A screen or curtain is better when you need privacy right away.

Add a Reed or Bamboo-Style Screen
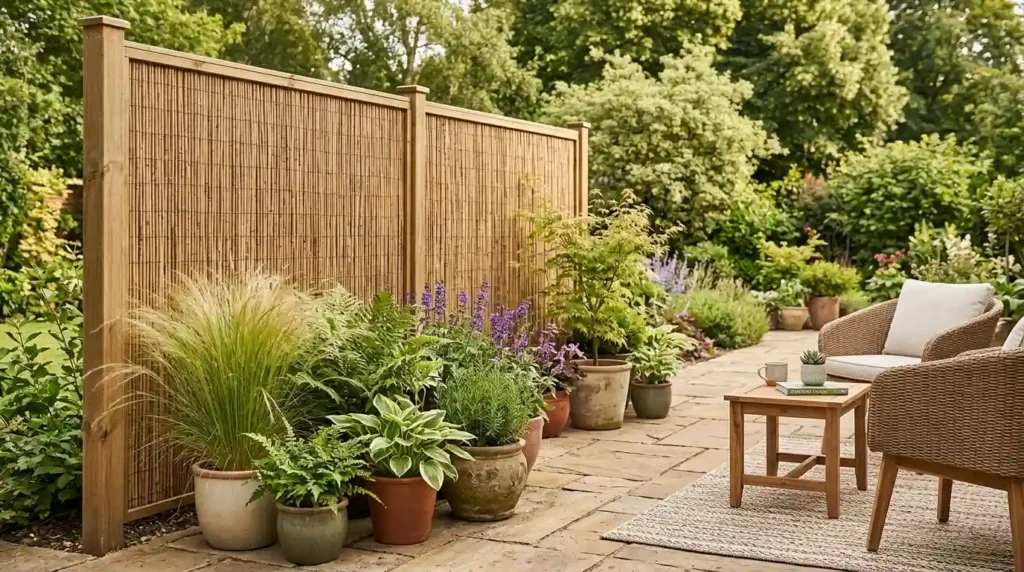
Add a Reed or Bamboo-Style Screen

Best for: Fast privacy
Cost level: Low
Time needed: One to two hours

A roll-up screen can cover an open railing or an unattractive fence.

Measure the area before buying. A screen that is too short may look unfinished.

Secure both the top and bottom. Wind can pull at loose material and damage the ties.

Use weather-safe fasteners. Check them during stormy seasons.

Place a few plants in front of the screen. This softens the flat surface and makes the space feel less closed.

Natural reed and bamboo-style screens may fade or break down over time. They often cost less than a permanent fence, but they may need replacing sooner.

Renters should check building rules before attaching anything to a railing or fence.

Hang Outdoor Curtains
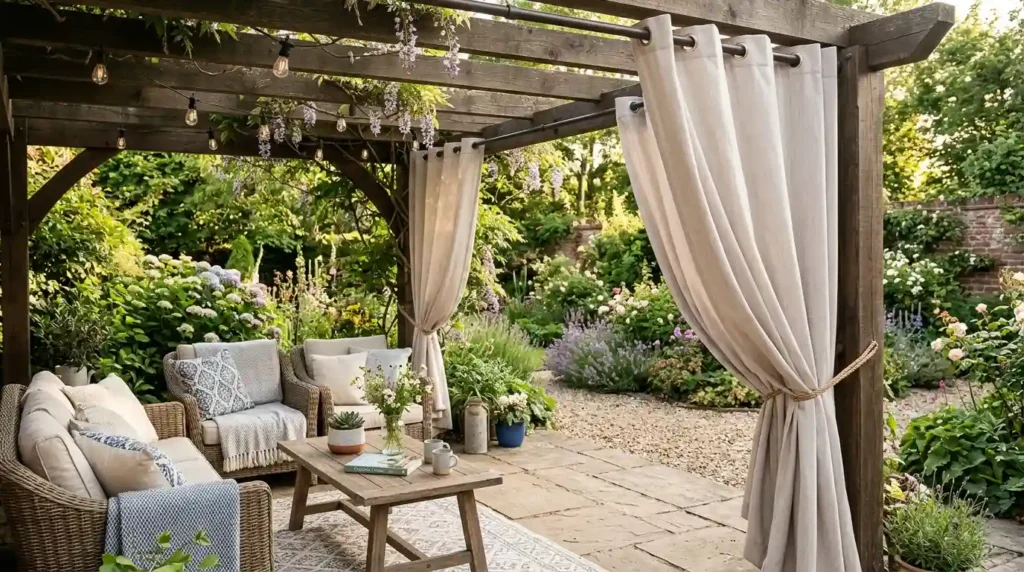
Hang Outdoor Curtains

Best for: Covered patios and pergolas
Cost level: Low
Time needed: One afternoon

Outdoor curtains can add privacy and soft shade without building a wall.

Hang them only on the side that needs coverage. Two panels may be enough to block the view from a nearby home.

Use fabric made for outdoor spaces. Indoor curtains may hold water, fade, or grow mold.

Choose a light color if the patio is small. Dark fabric can make a tight area feel closed.

Add tiebacks so you can open the curtains on calm days.

Keep all fabric far from grills, heaters, candles, and open flames.

The hanging frame must be secure. Do not attach heavy rods to weak trim or loose wood.

Curtains can move in strong wind. Take them down during severe weather when needed.

Install a Small Shade Sail
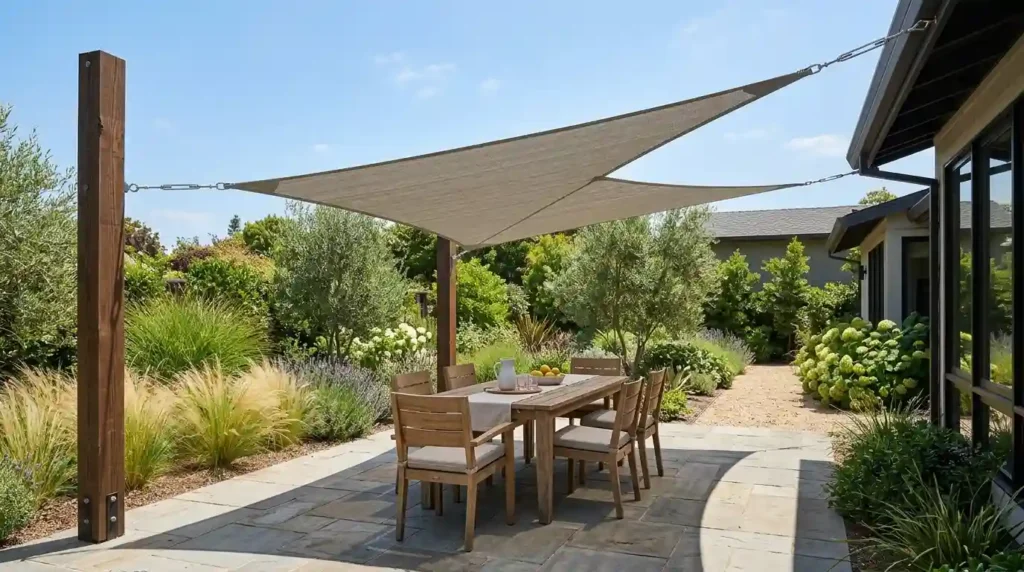
Install a Small Shade Sail

Best for: Hot, open patios
Cost level: Medium
Time needed: Several hours

A shade sail can cover a seating area without the cost of a full roof.

Measure the area and choose a sail that leaves room for proper tension. A loose sail may sag or collect water.

Use strong attachment points. Weak fencing, thin trim, and unstable posts may fail under pressure.

Set the sail at a slight angle so rain can run off. Follow the maker’s setup guide for spacing and tension.

Check local rules before adding new posts or attaching a structure to the house.

Remove the sail during severe weather when the product guide says to do so.

A shade sail can provide fast relief from harsh sun. However, it needs safe support. Do not treat it like a simple decoration.

Pick one strong privacy or shade feature. Too many screens, curtains, and tall plants can make a small patio feel crowded.

4 Low-Cost Patio Seating, Lighting, and Decor Ideas

A patio starts feeling useful when you have a comfortable seat and enough light to enjoy the area after sunset.

Build a Simple Outdoor Bench
Build a Simple Outdoor Bench

Best for: Narrow patios
Cost level: Low to medium
Time needed: One weekend

A straight bench can seat more people than several separate chairs. It also uses less floor space.

Some DIY benches use outdoor lumber, concrete blocks, or strong crates. Follow a tested building plan for the exact materials you choose.

Place the bench on a level surface. Test every support before sitting on it.

Sand all wood. Seal it with an outdoor-safe finish. This helps protect it from sun and moisture.

Keep the seat at a comfortable height. A bench that is too low may be hard to use.

Add washable cushions for comfort. Store them during heavy rain or cold weather.

Do not use weak crates, cracked blocks, or untreated indoor boards. A cheap bench is not worth the risk if it cannot hold weight safely.

Refresh Secondhand Outdoor Furniture
Refresh Secondhand Outdoor Furniture

Best for: Patios with a mixed furniture set
Cost level: Low
Time needed: One weekend

Secondhand furniture can save money, but inspect it before buying.

Check the legs, frame, seat, screws, and joints. Avoid chairs with cracked supports or deep rust.

Surface rust may be cleaned and painted. Rust that has eaten through the metal can make the frame unsafe.

Wash the furniture first. Remove loose paint before adding a new finish.

Use paint or sealer made for the furniture material. Metal, wood, and plastic need different products.

You can make two different chairs look like a set by painting them the same color. Add matching cushions to complete the look.

Look for used furniture through:

  • Local resale sites
  • Yard sales
  • Charity shops
  • Reuse stores
  • Community giveaway groups

Measure your patio before bringing furniture home. A low price is not helpful when the table blocks the walkway.

Add Solar and String Lights in Layers
Add Solar and String Lights in Layers

Best for: Patios used at night
Cost level: Low
Time needed: Under two hours

One bright light can feel harsh. Several softer lights make the patio feel warmer and safer.

Use three simple lighting levels:

  1. Safety lights near steps and paths
  2. General light around the seating area
  3. Small accent lights on tables or near plants

Solar path lights are easy to install. Place their panels where they receive enough direct sun.

String lights can mark the seating zone. Use products rated for outdoor use.

Secure the lights to strong hooks or supports. Do not hang them from weak branches or loose nails.

Keep electrical plugs and connections away from standing water. Use outdoor-rated cords and follow the product safety guide.

Solar lanterns work well on tables. They can also be moved when you change the furniture layout.

Avoid adding too many lights. You should still be able to enjoy the night sky and nearby plants.

Create One Low-Cost Focal Point
Create One Low-Cost Focal Point

Best for: Patios that feel plain or cluttered
Cost level: Low
Time needed: One afternoon

A focal point gives your eyes one main place to rest.

Choose one item, such as:

  • A large painted planter
  • A simple birdbath
  • A wall panel
  • A garden sculpture
  • A small water bowl
  • A tall plant in a bold pot

Place it where you can see it from the patio entrance or inside the house.

Keep the size in balance with the space. A tiny item may disappear on a large wall. A huge planter can block a narrow path.

Repeat one color from the focal point in two other places. For example, match a blue planter with two blue cushions.

Avoid buying many small decorations. Ten low-cost items may cost more than one strong feature. They can also create clutter.

A defined floor, grouped plants, useful seating, and soft lighting can make a basic patio feel complete.

Patio Landscaping Ideas on a Budget by Price

A “small budget” means different things to different people. These sample plans show how you could divide $100, $250, or $500.

Local prices may be higher or lower. Use these amounts as planning examples rather than fixed project quotes.

The $100 Patio Refresh

This plan works well for renters, tiny patios, and people who already own chairs.

A sample budget could include:

  • Cleaning supplies: $15
  • Paint for one planter or small feature: $25
  • Two or three plants: $30
  • Solar lights: $20
  • A thrifted decoration: $10

Start by cleaning the floor and removing clutter. Rearrange the furniture you already own.

Group two or three plants in one corner. Paint an old pot to create a focal point. Add solar lights near the path or seating area.

The goal is to make one small zone feel finished.

The $250 Patio Makeover

This plan works for a plain patio that needs color and privacy.

A sample budget could include:

  • Gravel, mulch, or edging: $70
  • Plants and containers: $80
  • A privacy screen or outdoor curtains: $50
  • Lighting: $30
  • Paint or cushions: $20

Use edging or gravel to define the patio. Add three grouped pots near the seating area.

Install privacy on the most exposed side. Finish with soft lighting and one repeated color.

Do not spread the money across every part of the yard. Complete the patio first.

The $500 Patio Upgrade

This plan works for a larger space or a project completed over several weekends.

A sample budget could include:

  • Ground and border materials: $130
  • Plants and containers: $140
  • Seating improvements: $100
  • Shade or privacy: $80
  • Lighting and a focal feature: $50

Start with repairs and surface work. Add seating next. Then bring in plants, shade, and lighting.

You may still need to reuse some materials or buy secondhand items. A $500 budget can disappear fast when buying everything new.

Finish one full zone before starting another. This creates a usable result even when the rest of the yard must wait.

9 Budget Patio Landscaping Mistakes to Avoid

A low price does not save money when the item breaks, dies, fades, or needs replacing after one season.

1. Buying Plants Before Checking the Sun

Watch the patio for a full day. Note which areas get morning sun, afternoon sun, full shade, or reflected heat.

A shade plant may burn beside hot concrete. A sun-loving plant may become weak in a dark corner.

2. Ignoring Drainage

Water should move away from the house and seating area.

Do not cover a drainage problem with gravel, rugs, or pots. Fix the cause before adding decorations.

3. Using Indoor Products Outside

Indoor rugs, lights, paint, and fabric may fail in wet weather.

Choose items made for outdoor use. Read the labels before buying.

4. Buying Too Many Small Decorations

Small lanterns, signs, pots, and ornaments may seem cheap. Together, they can cost more than one useful item.

Choose one focal point instead.

5. Forgetting the Mature Plant Size

Plants look small at the garden center. Some become wide, tall, or fast-spreading.

Check the plant label before placing it beside a path or wall.

6. Building Without Checking the Rules

Rentals, homeowner groups, and local areas may have rules for screens, sails, fences, and attached items.

Check before drilling holes or adding posts.

7. Buying Furniture That Cannot Be Repaired

A weak chair is not a bargain.

Check frames, joints, screws, and supports before paying.

8. Mixing Too Many Materials

Five colors, several wood tones, bright plastic pots, and mixed metals can make the patio feel busy.

Repeat two or three main materials for a calmer look.

9. Ignoring Future Care Costs

A low-cost plant may need frequent water. A cheap screen may need regular replacement.

Think about care, repairs, and storage before buying.

The goal is not to buy the cheapest items. Spend carefully on features that fit the space and last.

How to Maintain Your Patio for Less

The most affordable patio is one that does not need the same items replaced every year.

Sweep the surface often. Leaves and dirt can hold moisture and stain the floor.

Pull weeds while they are small. Large weeds can widen cracks and become harder to remove.

Group pots with similar water needs. This makes plant care faster and lowers the risk of giving too much water.

Check furniture joints once a month. Tighten loose screws before the frame starts moving.

Clean solar panels and outdoor lights. Dirt can block sunlight and make solar lights weaker.

Store cushions during heavy rain and winter. Washable covers are easier to care for than fixed fabric.

Touch up painted areas when small chips appear. Waiting can allow water to reach the material below.

Check screens, curtains, trellises, and shade supports after strong wind.

Divide healthy perennials when they become crowded. Use the new plants in other patio beds or trade them with neighbors.

A simple monthly routine may include:

  • Sweep the patio
  • Remove weeds
  • Check furniture
  • Clean lights
  • Trim dead plant growth
  • Inspect privacy and shade features
  • Move pots when seasonal sunlight changes

Short, regular care can stop small problems from turning into expensive repairs.

Start With One Affordable Patio Project

You do not need to change everything at once. Start with the problem that keeps you from using the patio.

Clean and define the floor first. Add plants to soften hard edges. Use a screen, curtain, or shade sail when the space feels exposed or too hot.

Comfortable seating and soft lighting will help you use the patio more often. One clear focal point will pull the full design together.

Measure the space today. Set a spending limit and choose one project for this weekend.

These patio landscaping ideas on a budget can help you create a useful outdoor space without a full rebuild. Small changes can add up to a patio that feels calm, comfortable, and complete.
Similar Posts

Leave a Reply

Your email address will not be published. Required fields are marked *