17 Outdoor Kitchen Ideas for Every Backyard
An outdoor kitchen can make summer meals easier. But a poor layout can leave you with too little counter space, too much smoke, or costly appliances you rarely use.
The best outdoor kitchen ideas start with one simple question: How do you plan to use the space?
You may need a small grill station for family dinners. You may want a covered cooking area for weekend parties. Or you may need a full kitchen with a sink, fridge, storage, and bar seating.
Your patio size matters. Your local weather matters too. You also need to think about shade, utilities, cleaning, and the path between your house and grill.
The ideas below cover small patios, large backyards, tight budgets, and permanent builds. Each one explains what works, who it suits, and what you should check before you start.
Build a Simple Grill-and-Counter Station
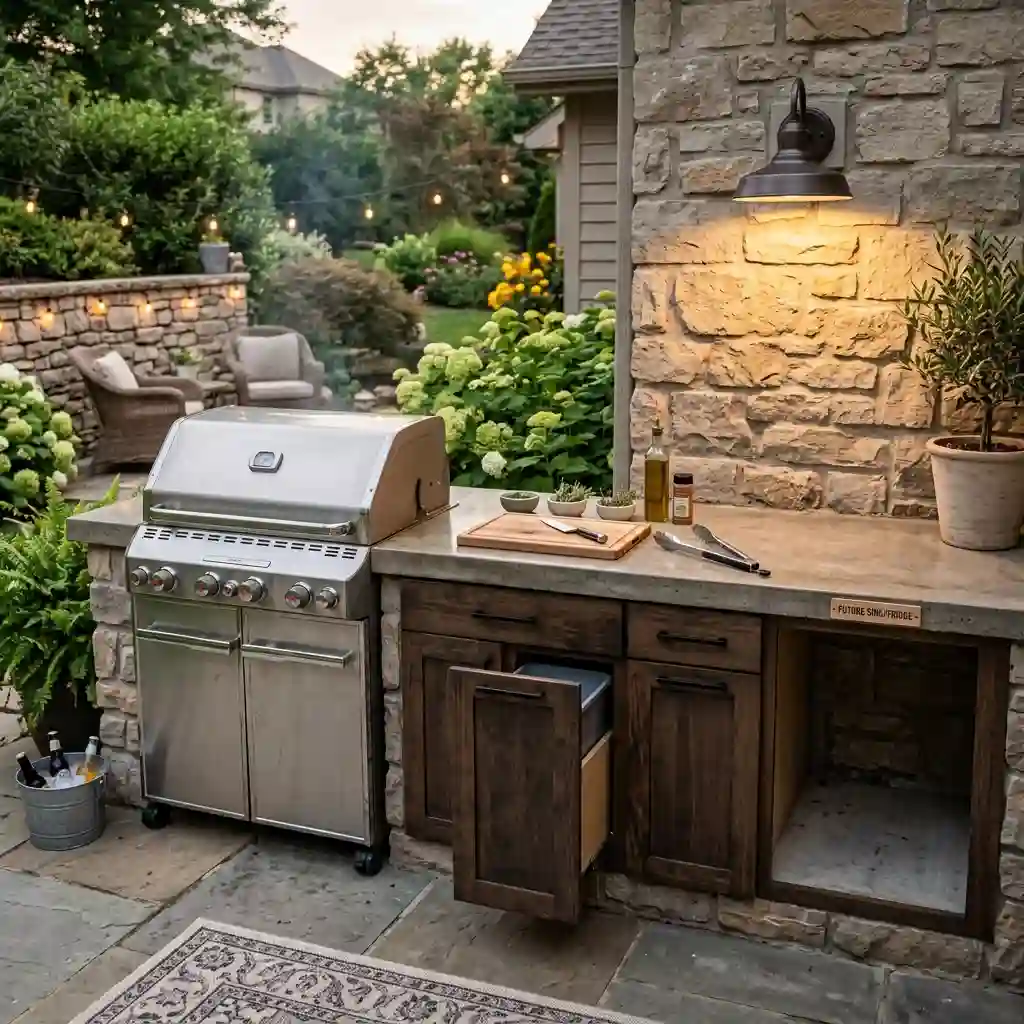
A grill-and-counter station gives you the basics without the cost of a full kitchen.
Place a heat-safe counter beside your grill. This gives you space for raw food, trays, seasonings, and cooked meals. Add closed storage below the counter for tools and serving items.
A six-to-eight-foot counter run may work for many patios. Your final size will depend on the grill, available space, and appliance instructions.
You can use a freestanding grill instead of buying a built-in model. This keeps the first stage more affordable. It also makes future repairs or replacement easier.
Add a small trash pullout if space allows. A weather-rated light above the counter will help with evening cooking.
Leave an open section at one end. You can use it later for a sink, fridge, or extra cabinet.
Use a Rolling Cart to Keep Costs Low
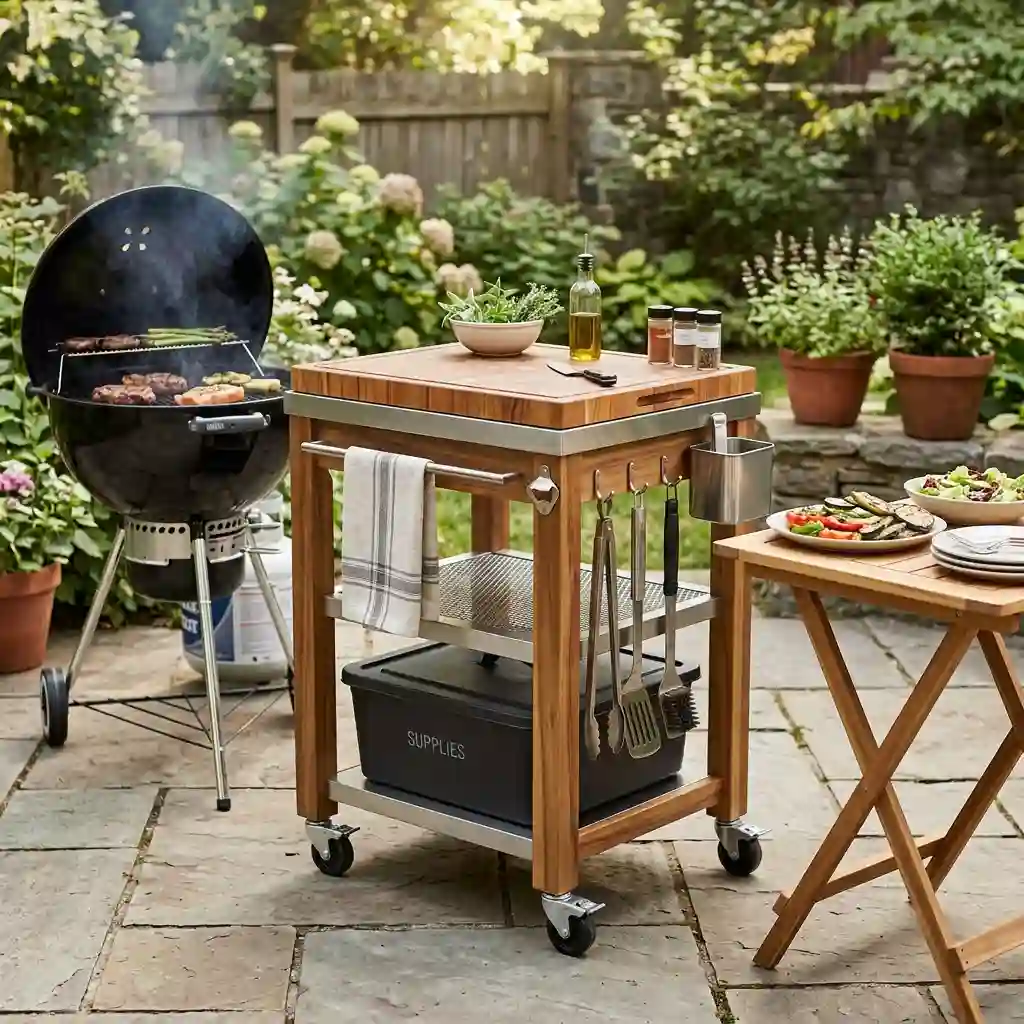
A rolling cart is one of the easiest DIY outdoor kitchen ideas.
You get extra preparation space without building cabinets or running new utility lines. It works well for renters, small patios, and homes where outdoor cooking is seasonal.
Choose a cart made from stainless steel, sealed wood, or another weather-resistant material. Locking wheels will stop it from moving while you cut food or place hot trays on top.
Look for useful features such as:
- Shelves for bowls and plates
- Hooks for cooking tools
- A covered bin for dry supplies
- A towel rail
- A removable cutting board
Pair the cart with a freestanding grill and folding serving table. You can move each item when you need more floor space.
A portable setup is flexible, but it still needs care. Store the cart inside or cover it during heavy rain, snow, or strong winds.
Create a One-Wall Kitchen for a Narrow Patio
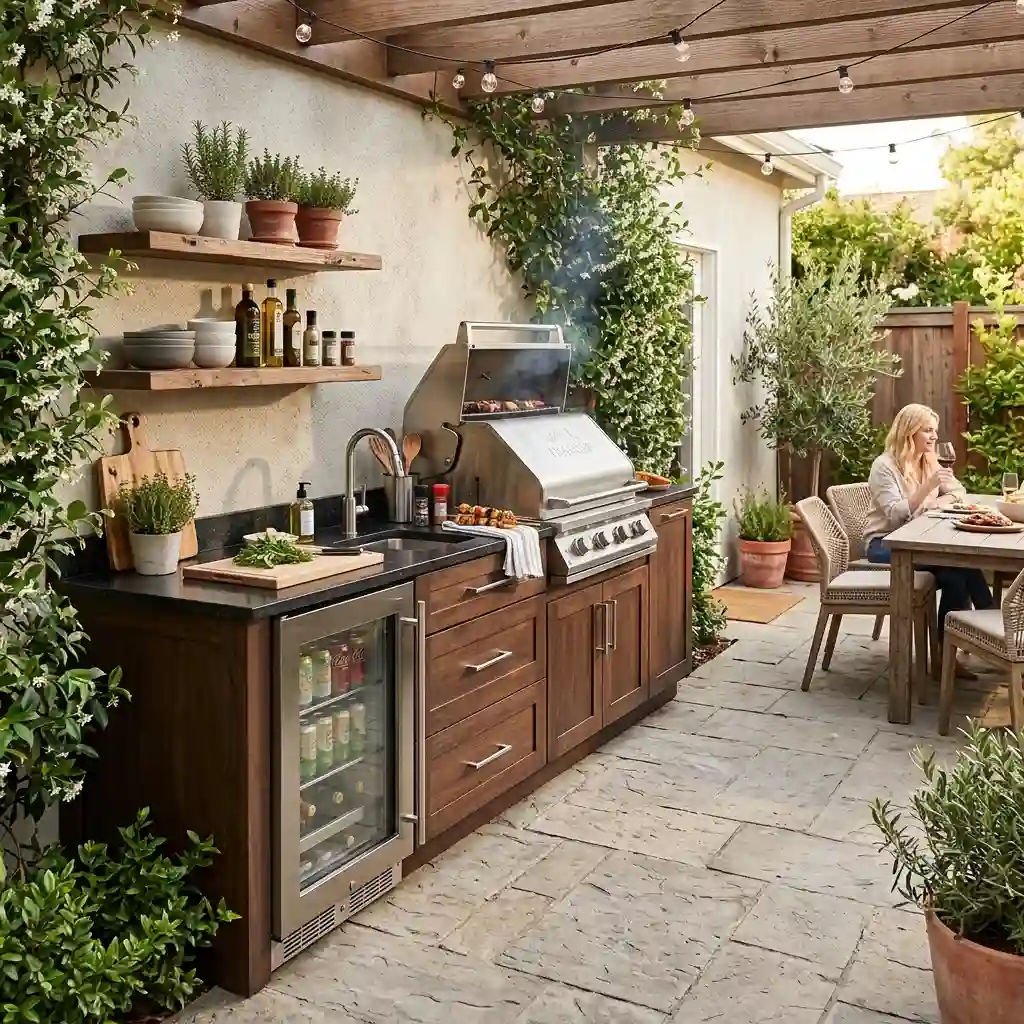
A one-wall layout keeps your kitchen compact and easy to use.
All appliances, counters, and cabinets sit along one straight line. This leaves the rest of the patio open for a dining table, walkway, or lounge chairs.
A useful order may look like this:
- Outdoor fridge
- Food preparation counter
- Grill
- Heat-safe landing space
Place the grill at the safer outer end when possible. Keep it away from doors, open windows, roof edges, and items that may burn.
Use the wall above cooler parts of the kitchen for shelves or utensil rails. Do not hang items over the grill.
These small outdoor kitchen ideas work best when every item has a clear job. Avoid filling the counter with appliances you may use once or twice a year.
Closed cabinets below the counter will keep the narrow space looking neat.
Choose Modular Cabinets for Easier Changes
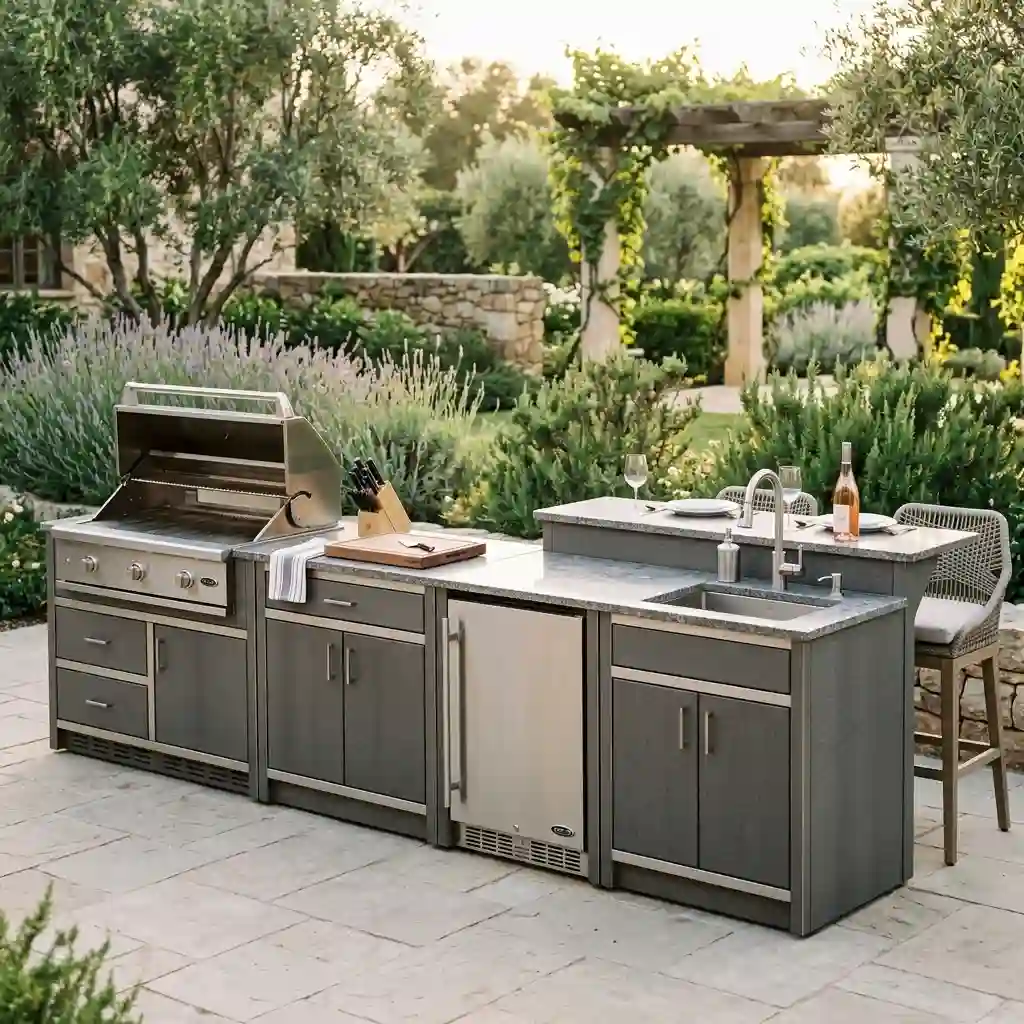
Modular cabinets let you build your outdoor kitchen in stages.
You can begin with one grill cabinet and one preparation unit. Later, you can add a refrigerator, sink, corner piece, or beverage station.
This approach helps when your full project is outside your current budget. It also gives you time to learn which features you use most.
A simple three-stage plan could be:
- Stage one: Grill and heat-safe counter
- Stage two: Storage and food preparation area
- Stage three: Fridge, sink, or serving bar
Choose cabinets made for outdoor use. Indoor cabinets can swell, rust, fade, or break down when exposed to water and changing temperatures.
Measure every appliance before ordering a cabinet. Check the width, depth, ventilation needs, and required openings.
Modular units are easier to change than fixed stonework. However, they may not give you the same custom look as a fully built-in kitchen.
Fit an L-Shaped Kitchen Into a Patio Corner
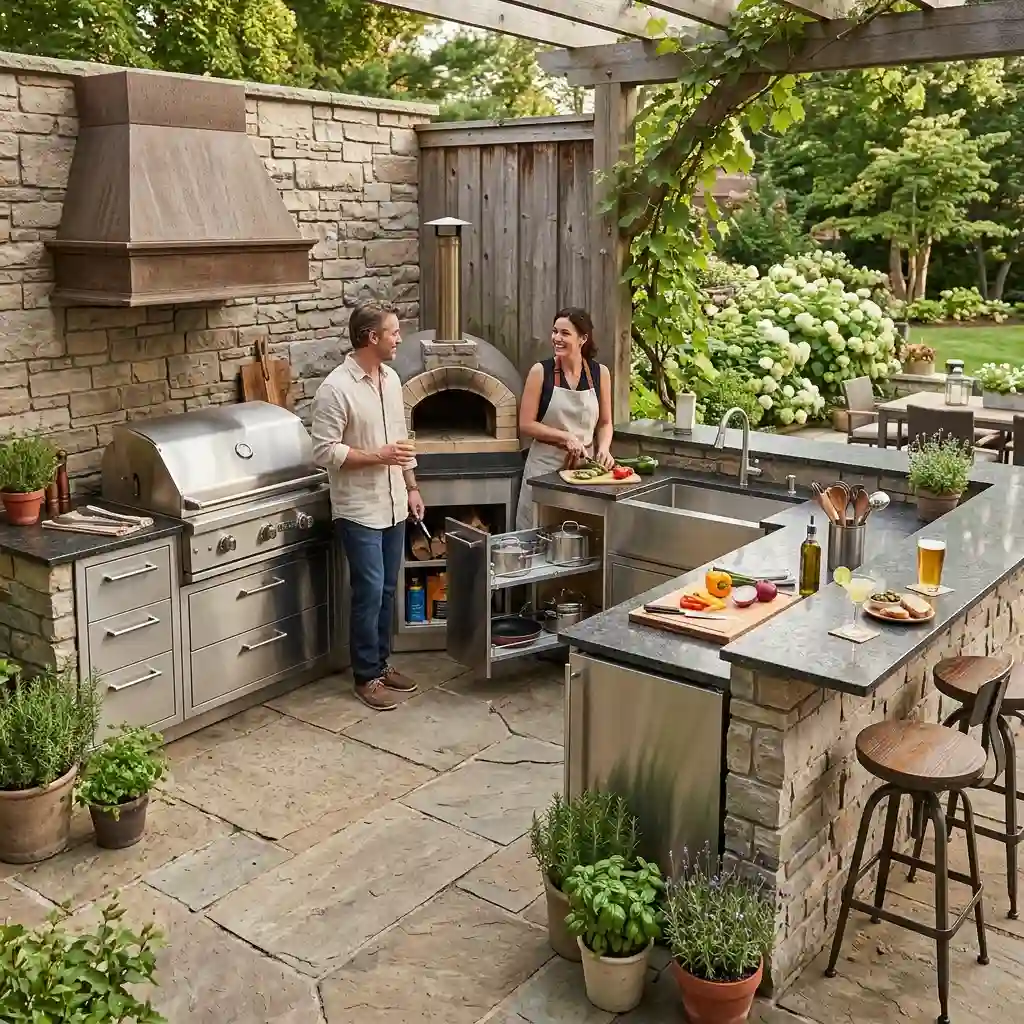
An L-shaped kitchen gives you two work areas without taking over the whole patio.
Use the longer side for the grill and other hot appliances. The shorter side can hold the sink, preparation counter, or serving bar.
This layout can also create a natural line between the cook and guests. Add stools to the outside of the short counter so people can sit without entering the cooking area.
Corner storage can be hard to reach. Use wide doors, pullout shelves, or large drawers instead of a narrow cabinet opening.
Do not push the grill into a tight corner with poor airflow. Smoke and heat need a safe path away from the house and sitting area.
An L-shaped outdoor kitchen works well for families who need more counter space but do not have room for a large island.
Keep the center floor area open so two people can move without bumping into each other.
Add a U-Shaped Layout for Full Outdoor Meals
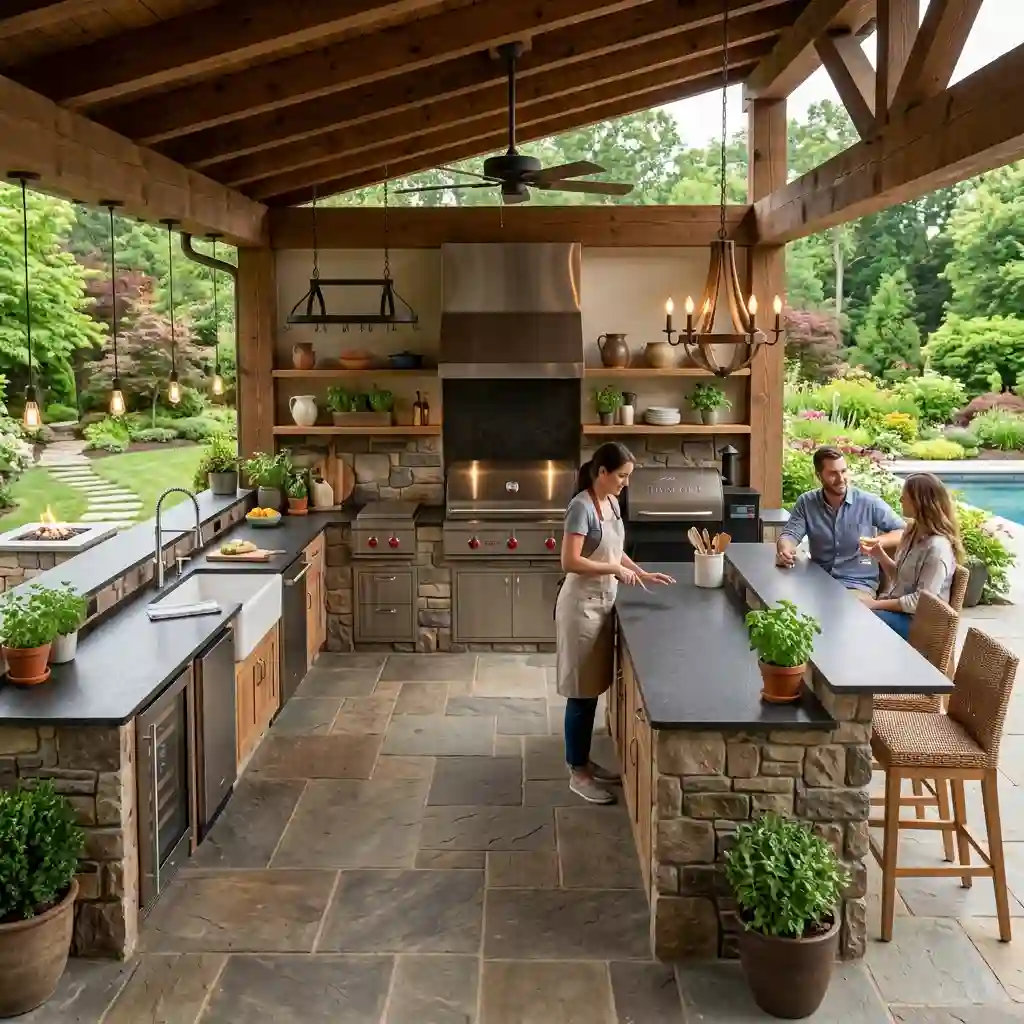
A U-shaped kitchen gives you room to cook, prepare, clean, and serve in one area.
It works best in a large backyard or wide covered patio. It may be too bulky for a narrow space.
Give each side a clear job. For example:
- Back section: Grill, smoker, or cooktop
- First side: Sink, fridge, and food storage
- Second side: Preparation counter and guest seating
This setup keeps most items within a few steps. You can prepare full meals without making constant trips inside.
Keep guests outside the main work area. Place bar seats on the outer edge rather than beside the grill or sink.
More counter space can be helpful, but you do not need to fill every gap with an appliance. Empty counter space often becomes the most useful part of the kitchen.
Before building, mark the full layout with painter’s tape. Walk through it while carrying a large tray.
Use an Island for Cooking and Seating
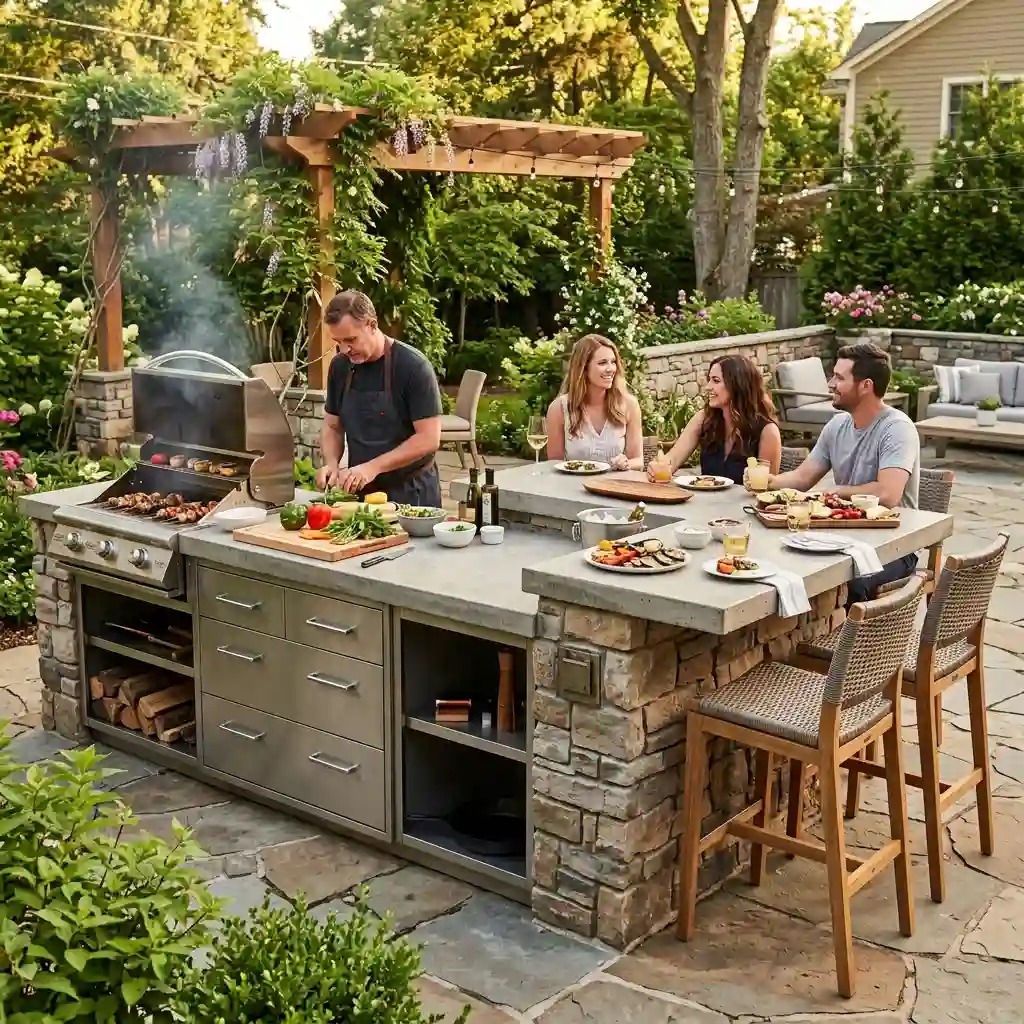
An outdoor kitchen island can turn cooking into a social activity.
Place storage and preparation space on the cook’s side. Add an overhang with stools on the guest side. This lets people talk to the cook without blocking the working area.
You can install a grill at one end of the island. Keep the center clear for food preparation. Use the other end for serving or seating.
Do not place stools directly beside the hottest part of the grill. Guests should not be exposed to smoke, grease, or sudden heat.
Add drawers below the counter for tongs, gloves, foil, and serving tools. Weather-resistant outlets may also be useful for small appliances, but they should be installed by a qualified professional.
An island needs open space on all sides. It may make a small patio feel crowded.
Test the island size with cardboard boxes before ordering cabinets or stonework.
Create a Galley Layout for Frequent Cooking
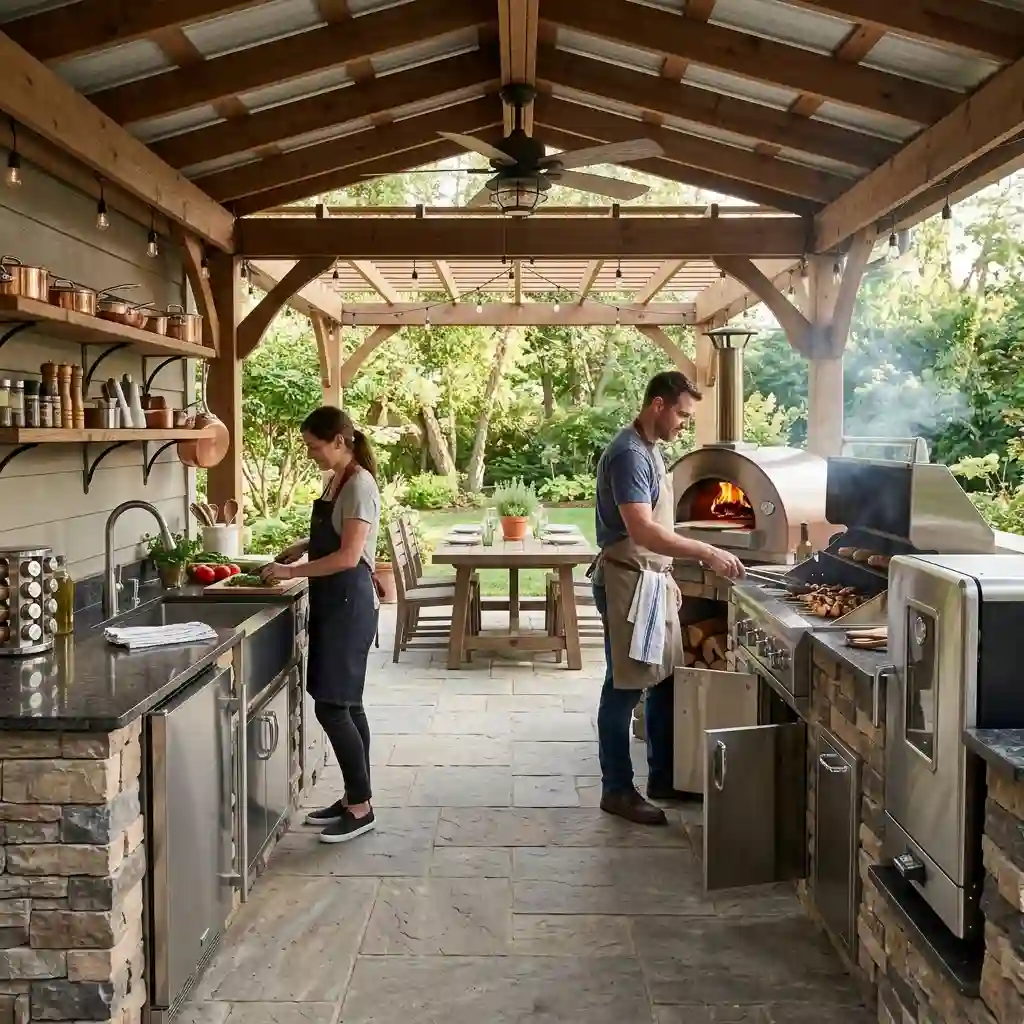
A galley layout uses two parallel counter runs.
This design works well when you want separate hot and cold zones. Place the grill, pizza oven, or smoker on one side. Put the sink, fridge, storage, and preparation counter on the other.
Keep the center path wide enough for safe movement. Cabinet doors, fridge doors, and grill lids should not block the whole walkway when opened.
A galley kitchen can support more than one cook. One person can handle the grill while another prepares side dishes across the aisle.
Place the dining area outside the working path. Guests should not need to walk between the counters to reach their seats.
This layout may suit a covered patio beside a pool or large dining area.
It uses space well, but it can feel closed in if the counters are too close together. Test the aisle before fixing the final cabinet positions.
Add a Roof for Shade and Rain Protection
Covered outdoor kitchen ideas can make cooking more comfortable during hot or wet weather.
A pergola gives partial shade while keeping the area open. A solid roof gives stronger protection from sun and rain. Adjustable louvers let you control light and airflow.
Plan the grill position before choosing the roof. Smoke should not collect above the cooking area or blow through an open window.
A hood may help manage smoke when a grill sits under a roof. However, the hood and grill must be made to work together.
Follow the installation instructions for your exact appliance. The International Code Council advises using tested appliances, checking clearances, and hiring trained professionals for fixed gas lines. Local rules may add more requirements.
Add weather-rated task lights above the preparation counter. Direct roof water away from appliances and electrical parts.
A covered kitchen costs more, but it may give you more usable cooking days each year.
Design a Small Balcony or Rooftop Kitchen
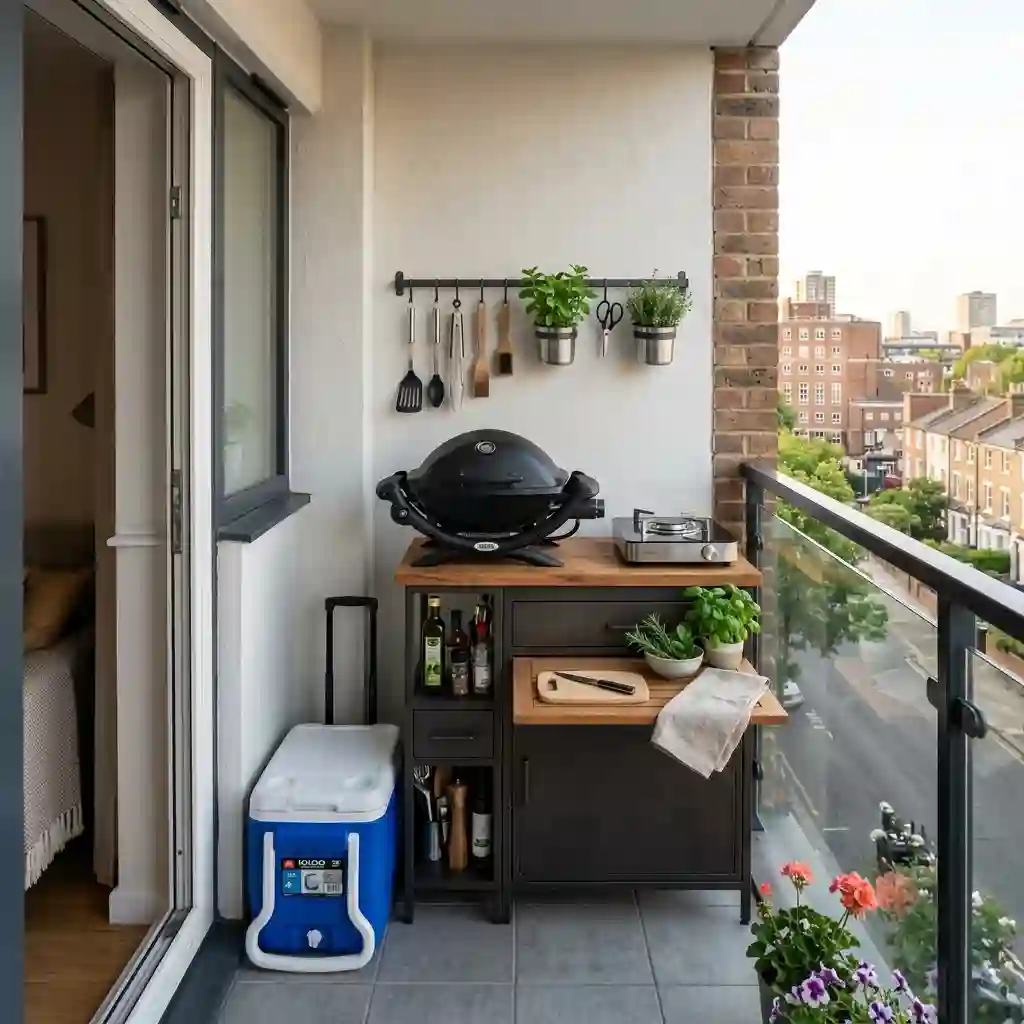
A balcony or rooftop can support a small food station, but safety rules come first.
Check your building rules before buying any cooking appliance. Some properties do not allow gas or charcoal grills on balconies. Others may limit appliance size, fuel type, or placement.
Use an approved compact appliance where cooking is allowed. Add a fold-down preparation shelf and a narrow storage cabinet. A rolling cooler can replace a built-in fridge.
Wall rails can hold light tools, but do not block exits or cover safety equipment.
The National Fire Protection Association advises keeping grills far from homes, deck railings, eaves, and hanging branches. Your building may set stricter limits.
Do not overcrowd a small space. Keep a clear path to the door.
A balcony setup should be easy to move and clean. Permanent plumbing or heavy stone counters may add more cost and weight than the space can support.
Make a Pizza Oven the Main Feature
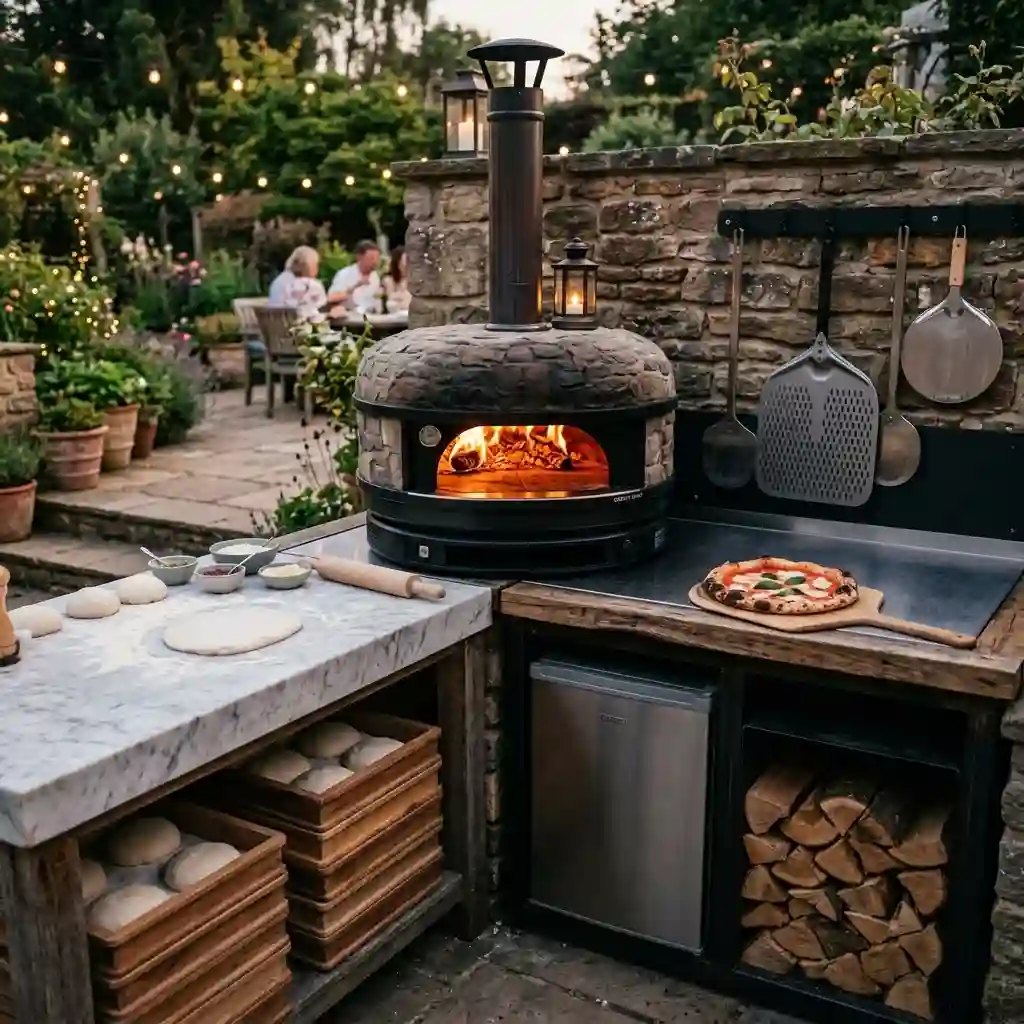
A pizza oven can become the center of your outdoor cooking area.
Portable ovens suit smaller patios and lower budgets. Built-in models create a permanent look but need more planning. You can also choose between gas and wood-fired designs.
Place a clear landing area beside the oven. You need space for hot pans, pizza peels, dough trays, and serving boards.
Keep ingredients in a fridge or covered container away from direct heat. Store wood in a dry area that is not beside the oven opening.
A full pizza station may include:
- Pizza oven
- Smooth dough preparation counter
- Ingredient fridge
- Tool storage
- Serving ledge
Think about how often you make pizza before choosing a large built-in oven. It may take up counter space that you could use every day.
A portable oven may be the better choice for occasional use.
Give Your Smoker or Kamado Its Own Zone
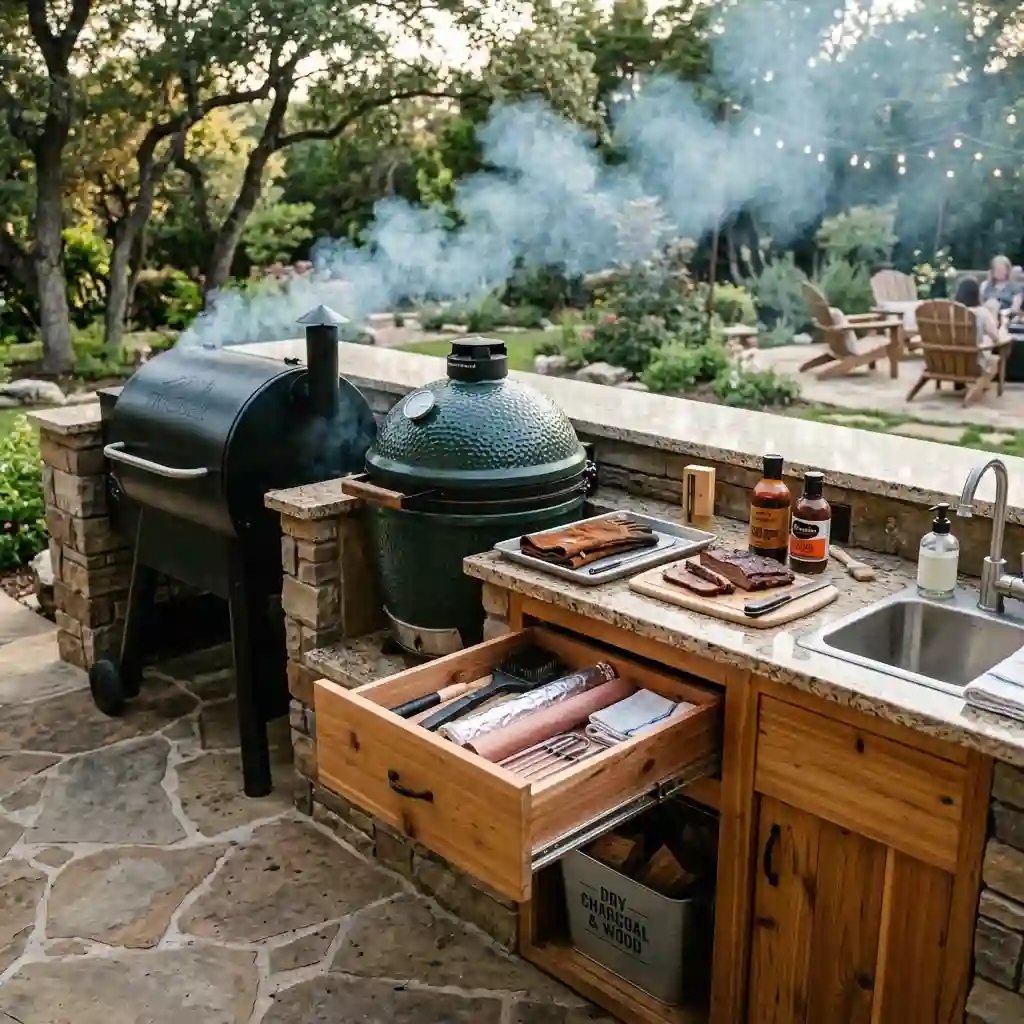
A smoker or kamado needs space for heat, smoke, tools, and fuel.
Place it near the edge of the kitchen where smoke can move away from guests and open doors. Do not squeeze it between tall cabinets unless the appliance instructions allow that setup.
Add a heat-safe counter beside it. You will need a place for trays, gloves, probes, sauces, and cooked meat.
Keep charcoal or wood in a dry storage area away from flames and hot surfaces. Closed metal storage may work, but always follow local fire rules and product instructions.
A deep drawer can hold brushes, foil, and temperature tools. A small nearby sink can also help with cleanup.
This cooking zone works well for people who prepare slow-cooked meat often. It may not be worth the space if you only use a smoker once or twice each year.
Keep dining seats out of the main smoke path.
Build a Separate Bar and Beverage Station
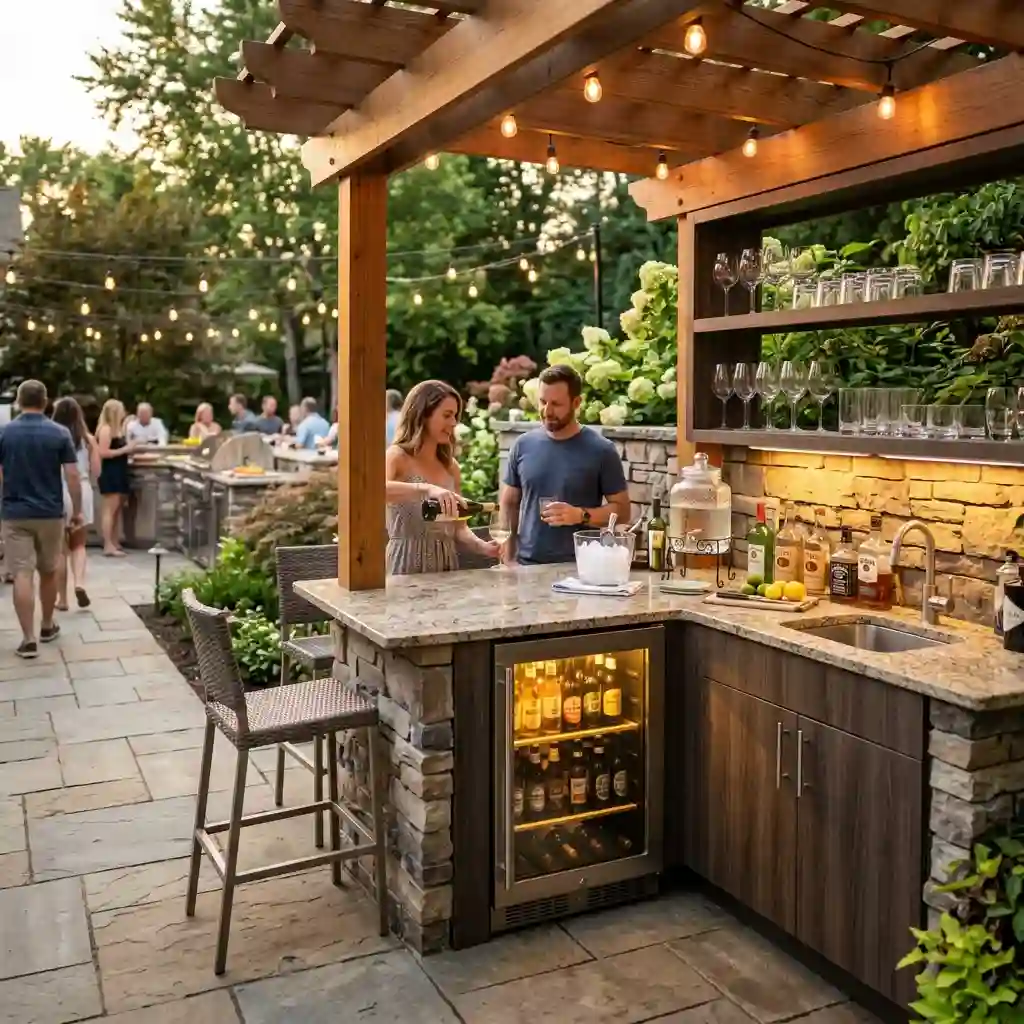
A beverage station keeps guests away from the grill and food preparation area.
Place it at the outer edge of the kitchen. Guests can refill drinks without crossing behind the cook.
A basic station may use an ice bucket, cooler, and serving counter. A larger one may include an outdoor-rated fridge, sink, glass storage, and bar seating.
Choose features based on what you serve. You may not need a fridge if you only host a few times each year.
Closed storage will protect glasses and serving items from dust. Open shelves look attractive, but they require more cleaning.
Add low task lighting for evening use. Make sure stools do not block cabinet doors or the main walkway.
A separate bar can improve the flow of a large backyard party. In a small yard, a cooler under the dining table may be a simpler and more useful choice.
Add a Sink and Food Preparation Area
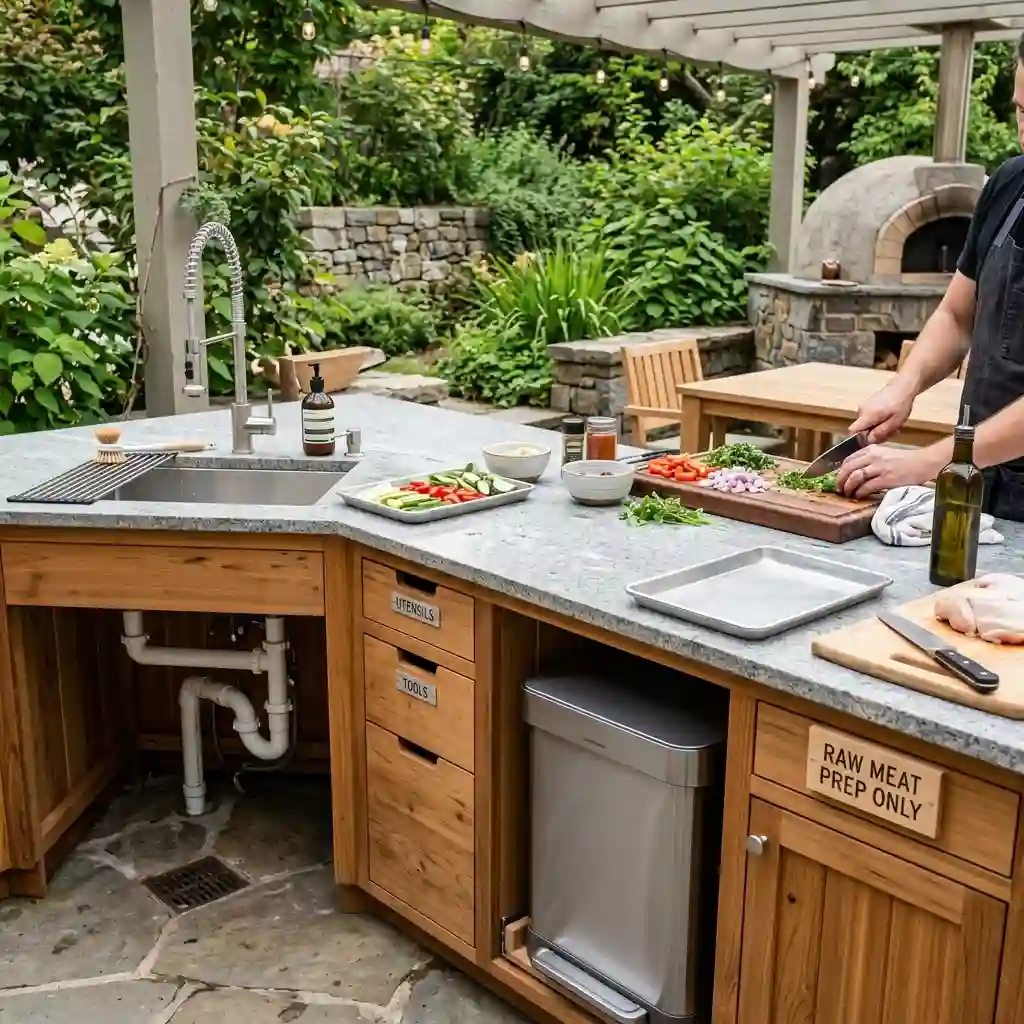
An outdoor sink can reduce the number of trips you make inside.
Place it beside your main preparation counter. Add a covered trash bin, drawer storage, and a clear space for cutting boards and trays.
Keep raw meat preparation away from finished food and drink areas. Use surfaces that are smooth and easy to wash.
A sink adds more work than many homeowners expect. You need a clean water supply, safe drainage, and protection from cold weather.
The International Code Council notes that outdoor sink rules often depend on local requirements and climate. In areas with freezing winters, outdoor water lines may need a shutoff and drainage plan.
Speak with your local building department before starting the plumbing work. A licensed plumber can help prevent leaks, frozen lines, and poor drainage.
A sink is useful for frequent outdoor cooks. It may be an extra cost for people who cook close to their indoor kitchen.
Use Rustic Stone for a Warm Built-In Look
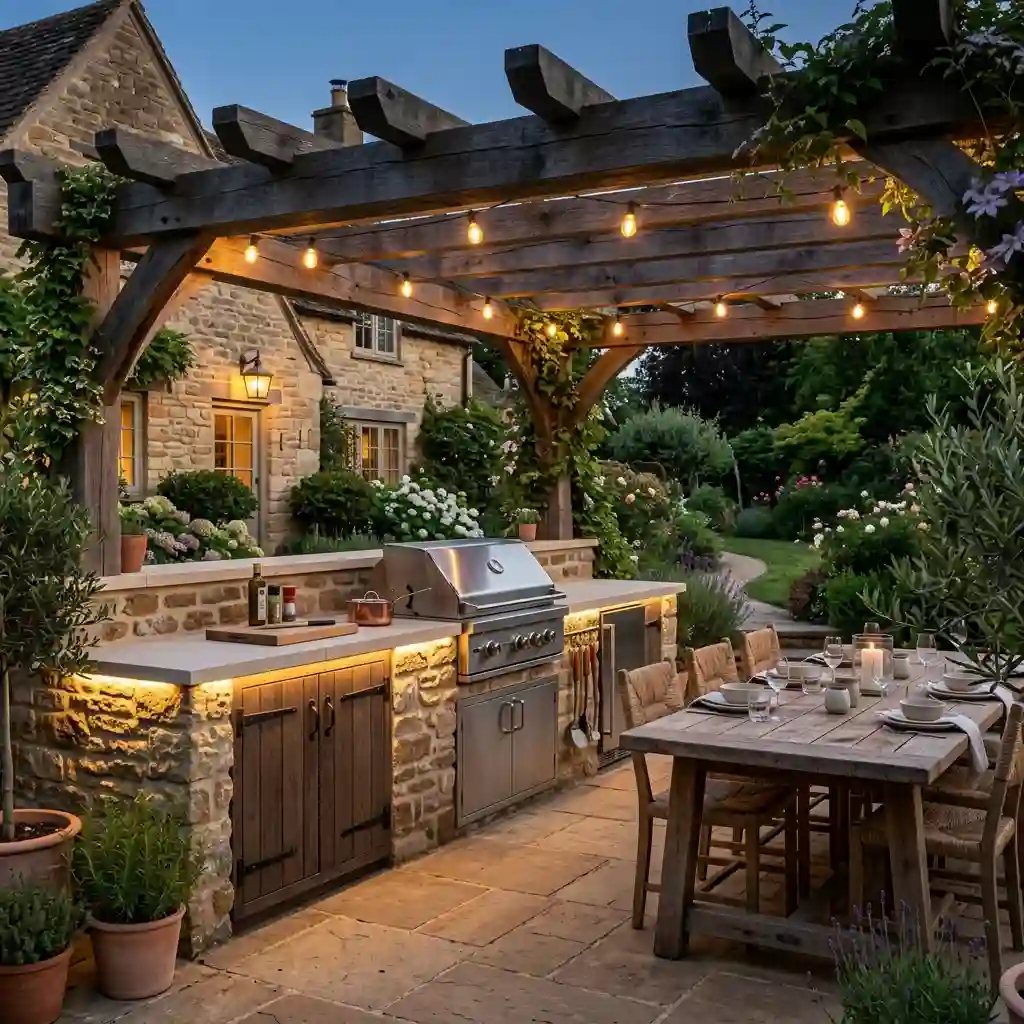
Stone can help an outdoor kitchen feel like part of the home and garden.
Match the stone color with your house, patio, or garden walls. This creates a more connected look.
Use a smooth counter above the rough stone base. Textured stone can trap grease and food, so it should not be your main preparation surface.
A rustic setup may include a built-in grill, pale stone counter, timber pergola, large dining table, and planters.
Warm lighting will bring out the stone texture at night. Wood-look cabinets or beams can add more warmth.
Use closed storage to stop the area from looking busy. Too many open shelves can collect dust and make the stonework feel heavy.
A stone kitchen looks permanent, but changes can be difficult later. Check every appliance size before the stone base is built.
Choose this style when you want the kitchen to blend with a traditional house or garden.
Mix Concrete and Steel for a Modern Kitchen
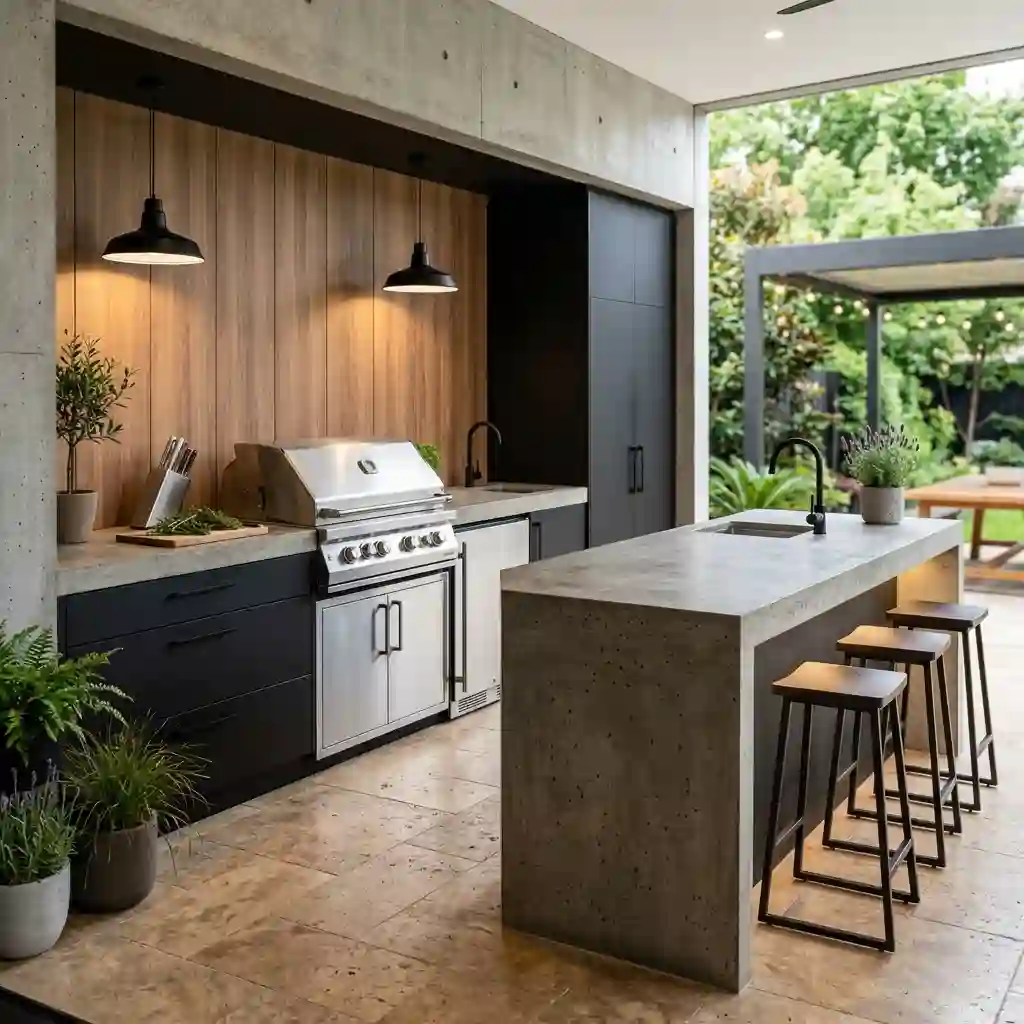
Concrete and stainless steel can give your patio a clean, modern look.
Use a limited group of materials. For example, combine a concrete-look island, dark cabinets, and stainless steel appliances.
Too much gray metal can make the area feel cold. Add wood-look panels, warm tile, or green plants to soften it.
Choose cabinets and appliances that are rated for outdoor use. Indoor products may not handle rain, heat, humidity, or cold.
Closed cabinets will keep the straight lines clean. Wide drawers work well for tools, plates, and cooking supplies.
Use more than one light source. Add task lights over the counter and softer lights around dining seats.
A modern outdoor kitchen looks best when counters are kept clear. Plan enough storage for items that would otherwise sit outside.
Concrete is strong, but stains and small cracks can happen. Ask about sealing and care before choosing the final counter material.
Connect Both Kitchens With a Pass-Through Window
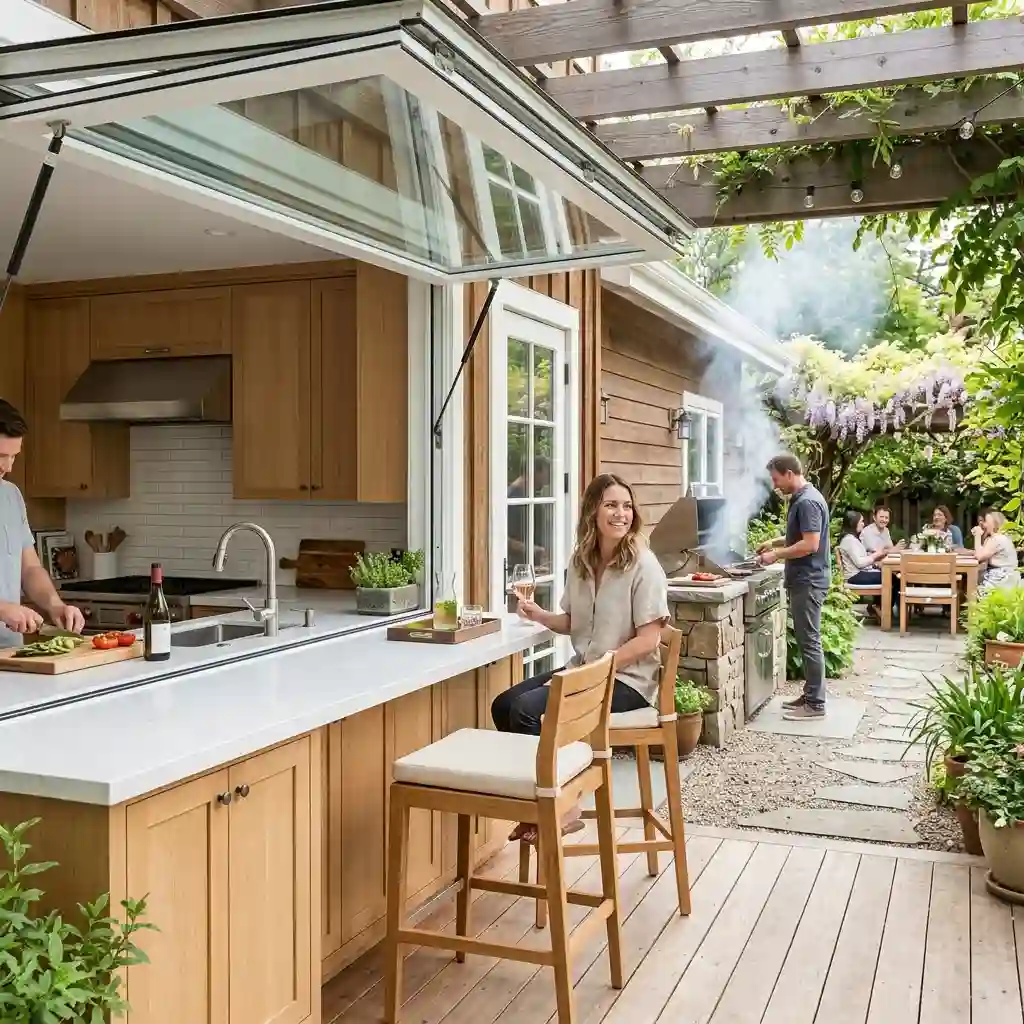
A pass-through window can make outdoor meals much easier.
It creates a direct serving point between your indoor kitchen and patio. You can pass food, plates, and drinks outside without carrying everything through a door.
Place the outdoor counter below the opening. Add stools on the patio side to create a simple eating bar.
Keep the grill a few steps away from the window. Smoke should not blow into the house. The path between the window and dining table should also stay clear.
Use matching colors or materials inside and outside. Similar counters, floors, or cabinet colors can make both areas feel connected.
This is one of the most useful backyard outdoor kitchen ideas for homes with limited patio space. You can keep the main sink and fridge indoors while adding only a grill and serving counter outside.
A pass-through may require changes to an outside wall, so ask a qualified professional to check the structure first.
5 Quick Steps Before You Build
A good-looking kitchen can still fail if the layout does not match how you cook.
Complete these steps before buying cabinets or appliances:
- Measure the full patio. Mark doors, windows, steps, posts, and roof edges.
- List the meals you cook outside. This will show whether you need a grill, burner, smoker, or pizza oven.
- Choose your must-have features. Separate them from items that would simply be nice to own.
- Mark the layout with tape. Test the grill lid, fridge door, stools, and walking paths.
- Check utilities and local rules. Do this before running gas, water, drainage, or electricity.
Carry a tray through the marked area. Pretend that cabinet doors are open. Ask another person to sit where you plan to place the stools.
This simple test can reveal layout problems before they become expensive.
Choose a Kitchen That Fits Your Real Life
Your ideal outdoor kitchen should match your space, budget, weather, and cooking habits.
A simple grill station may give you everything you need. A larger family may benefit from a covered kitchen with storage, a sink, and plenty of preparation space.
Do not choose features because they look impressive in a photo. Think about what you will use each week and how much care each item needs.
Measure the patio, mark the layout, and check all appliance instructions before building.
Use these outdoor kitchen ideas as a starting point. Then adjust the layout and features to fit how you cook, entertain, and enjoy your backyard.