15 Hillside Landscaping Ideas on a Budget
A sloped yard can feel like a costly problem. Rain may wash soil downhill. Grass can be hard or unsafe to mow. Building one large retaining wall may cost more than you planned to spend.
The good news is that you do not have to rebuild the whole yard.
These hillside landscaping ideas on a budget can help you control water, cover bare soil, improve access, and make the area look cared for. Many projects use small plants, gravel, seeds, branches, or materials you may already have.
Still, every slope is different. A gentle backyard hill may be easy to improve yourself. A steep or shifting bank may need help from a landscaper or engineer.
Start with the biggest problem. Is water cutting a path through the soil? Is the hill hard to walk on? Is it covered with weeds? Once you know the main issue, you can spend your money where it will make the biggest difference.
Check Your Hillside Before You Spend Money
A cheap project can become expensive when you place it in the wrong area.
Before buying plants or gravel, watch what happens on the hill. Walk around the yard after a steady rain. Look for small channels, wet spots, exposed roots, and piles of loose soil.
You should also check how steep the hill is.
You can estimate the slope with this simple formula:
Slope percentage = rise ÷ run × 100
For example, your hill rises 2 feet over a horizontal distance of 10 feet.
Divide 2 by 10. Then multiply the answer by 100.
The slope is about 20%.
You do not need perfect numbers for a basic garden plan. The goal is to see whether you have a mild slope, a hard-to-walk hill, or a bank that may need expert help.
Complete this quick hillside check:
- Take a photo from the top and bottom.
- Mark where rainwater flows.
- Find bare or loose soil.
- Choose the safest walking route.
- Note which areas get sun or shade.
- Check for pipes, cables, and property lines.
- Decide which parts need regular access.
Do not change a major drainage path until you know where the water will go. You should never send runoff at your house, a neighbor’s yard, or an unstable bank.
Stop Bare Soil From Washing Away With Groundcovers
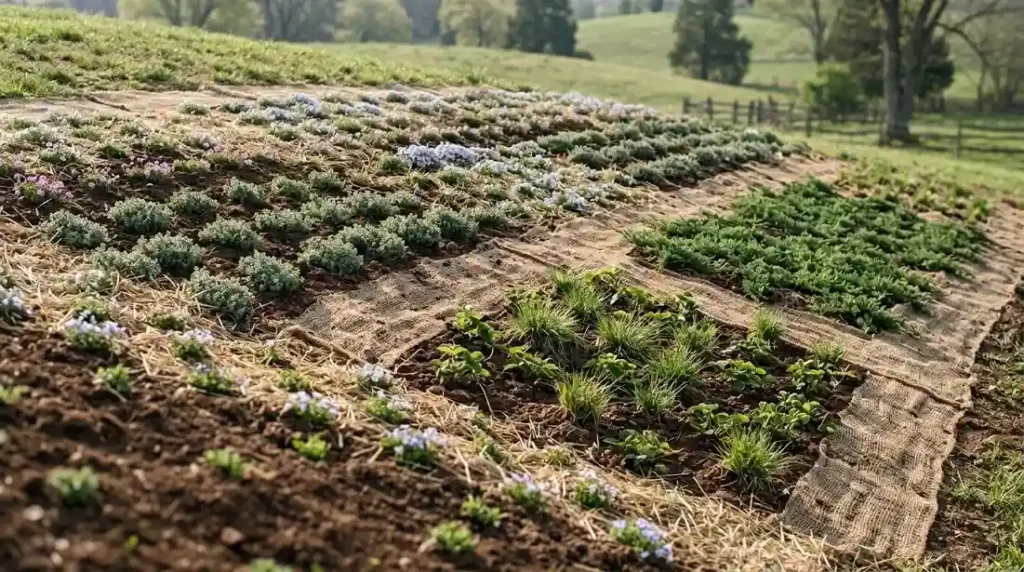
Best for: Wide areas with bare soil and mild to medium slopes
Bare soil is one of the first signs that a hillside needs help. Each rain can carry away a small layer. Over time, roots become exposed and deep channels may form.
Low-growing plants can cover the surface and soften the force of falling rain. Their roots also help hold the top layer of soil in place.
Possible groundcovers include:
- Creeping phlox
- Wild strawberry
- Native sedges
- Low-growing juniper
- Bearberry
- Sedum
- Creeping thyme in suitable areas
Do not choose a plant based on looks alone. Check how much sun the hill gets. You should also check soil moisture and your local growing zone.
Native plants are often a good place to start. They are more likely to fit the local climate. Some also need less water once their roots are settled.
Large plants can quickly raise the project cost. Buy small plugs instead. They take longer to fill the space, but they usually cost much less.
You can also divide suitable plants from another part of your yard. Start with one section and expand it each year.
Groundcovers do not fill a hillside overnight. Use mulch or erosion fabric to protect the spaces between young plants while they grow.
Keep Mulch in Place With Jute or Coir Fabric
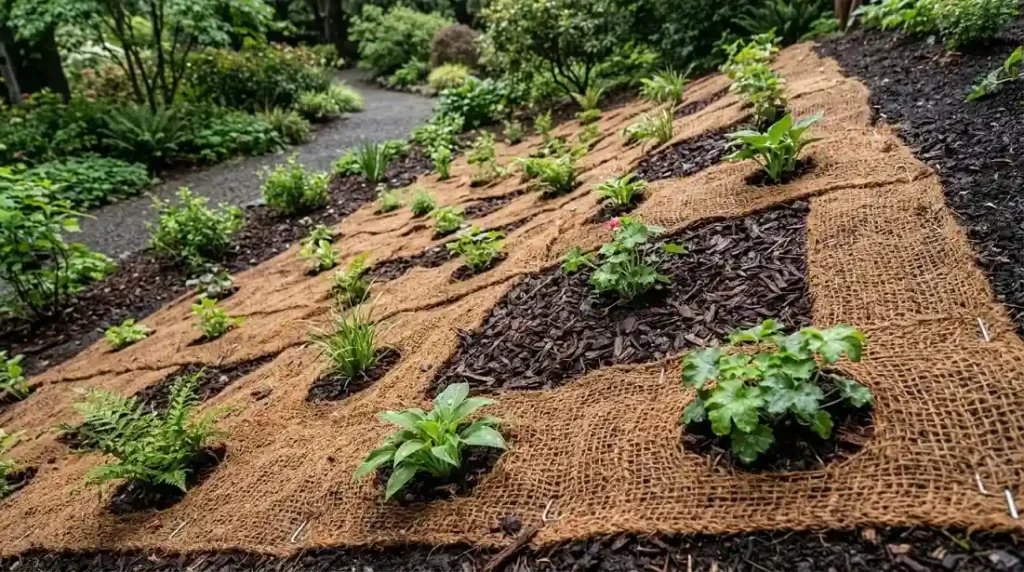
Best for: Newly planted soil that needs short-term protection
Mulch helps keep moisture in the soil. It also covers bare ground and cuts down on weeds.
But mulch has one major problem on a slope. It can slide or wash downhill.
Large bark pieces may move after heavy rain. Fine wood chips can also collect at the bottom of the hill.
Shredded bark often holds together better than round bark pieces. Pine straw may work in some areas because the needles lock together. Your local climate and fire rules may affect which material is safe.
Jute or coir fabric can help keep soil and mulch in place. These materials are often sold as rolls or blankets.
Lay the fabric across the slope. Secure it with suitable garden staples. Cut small openings where you plan to add plants.
The fabric gives the soil short-term support. Over time, it breaks down as plant roots spread.
Do not treat mulch as a full fix for serious erosion. It will not hold a steep bank that is already moving. It also will not solve water that is rushing through one deep channel.
Use this idea with plants, safe drainage, and regular checks after storms.
Cover a Large Hill With Groups of Ornamental Grass
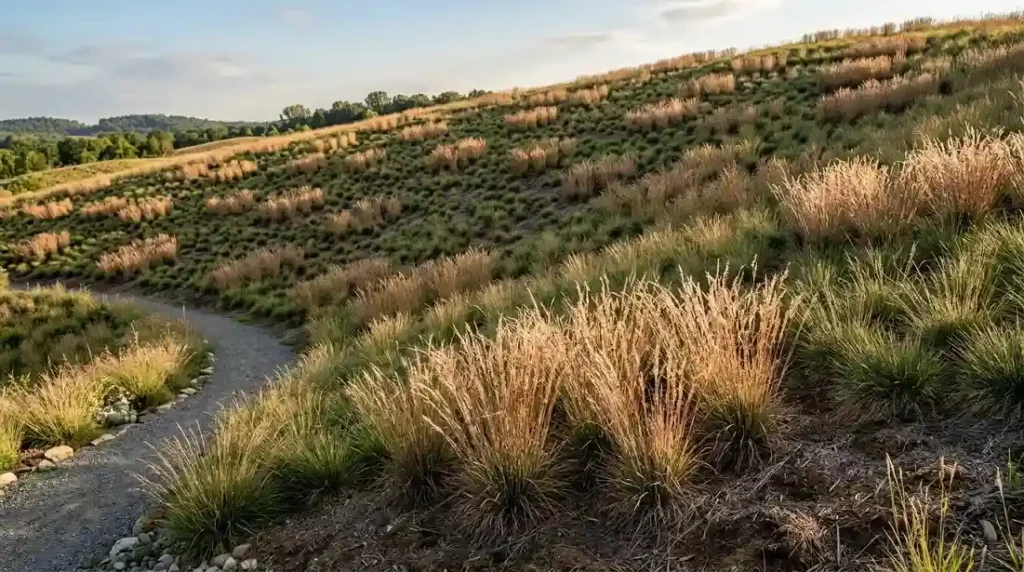
Best for: Sunny slopes that need simple planting and year-round texture
A large hillside can look empty even after you add a few plants. The problem is often spacing. Small plants placed far apart can look lost.
Ornamental grasses work better when you plant them in groups. Use clusters of three, five, or seven. Repeat the same groups across the hill.
This creates a clear pattern. It also costs less than buying many different plant types.
Some grasses have thick, fibrous roots. These roots can help protect the top layer of soil.
Possible choices include:
- Little bluestem
- Prairie dropseed
- Native fescues
- Switchgrass
- Native sedges
- Carex varieties
Check the mature height and width before buying. A small plant at the garden center may grow much larger than expected.
You should also learn whether the grass forms a clump or spreads through the soil. Spreading grasses can become hard to control. Some may be invasive in your area.
Choose one or two safe varieties. Repeat them across the slope. This gives you a planned look without filling the hill with costly plants.
Many grasses only need one main cut each year. That can make them a good choice for low-maintenance slope plants.
Replace Hard-to-Mow Grass With a Wildflower Meadow
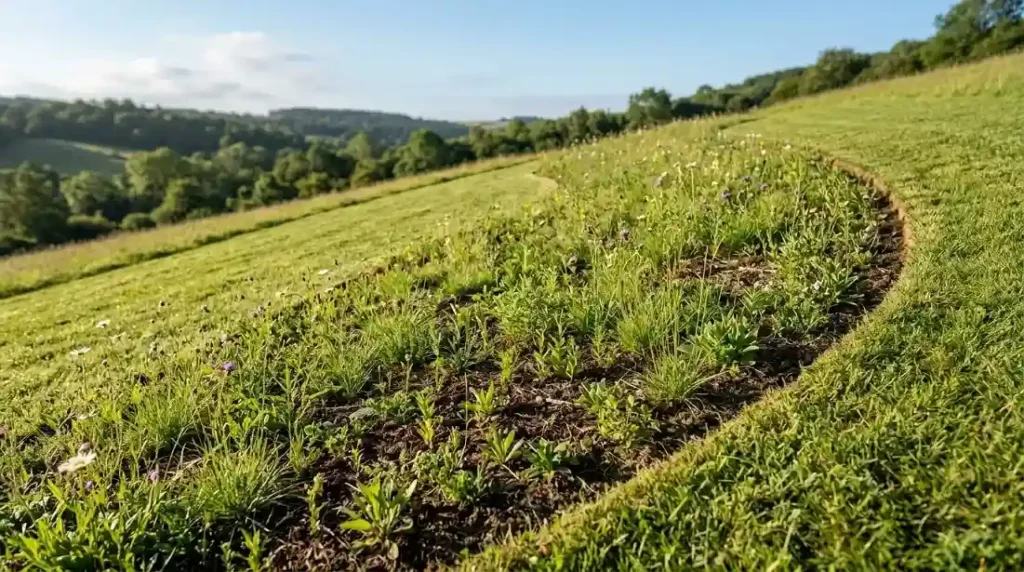
Best for: Large sunny hills where lawn mowing is difficult
Mowing a steep hill is tiring. It can also be unsafe when the grass is wet.
A wildflower or meadow area removes the need for weekly mowing. Seed also costs less than covering a large space with mature plants.
Still, you cannot throw seed over weeds and expect a healthy meadow.
Start by removing unwanted growth. Follow the seed seller’s directions for soil prep. Pick a mix made for your region, sunlight, and soil moisture.
Good options may include:
- Native wildflower mixes
- Fine fescue
- Low-growing meadow grass
- Native pollinator plants
- A mix of flowers and short grasses
A new meadow may look thin during the first season. Weeds may also appear while the wanted plants are getting started.
Plan for some early care. You may need to trim the area to stop weeds from making seed. You may also need to add seed to empty spots.
Start with one clear section instead of the full hillside. A curved meadow area can look planned, even while it is growing in.
A meadow needs less care than a lawn. But it is not a no-work garden.
Slow Rainwater With Shallow Contour Swales
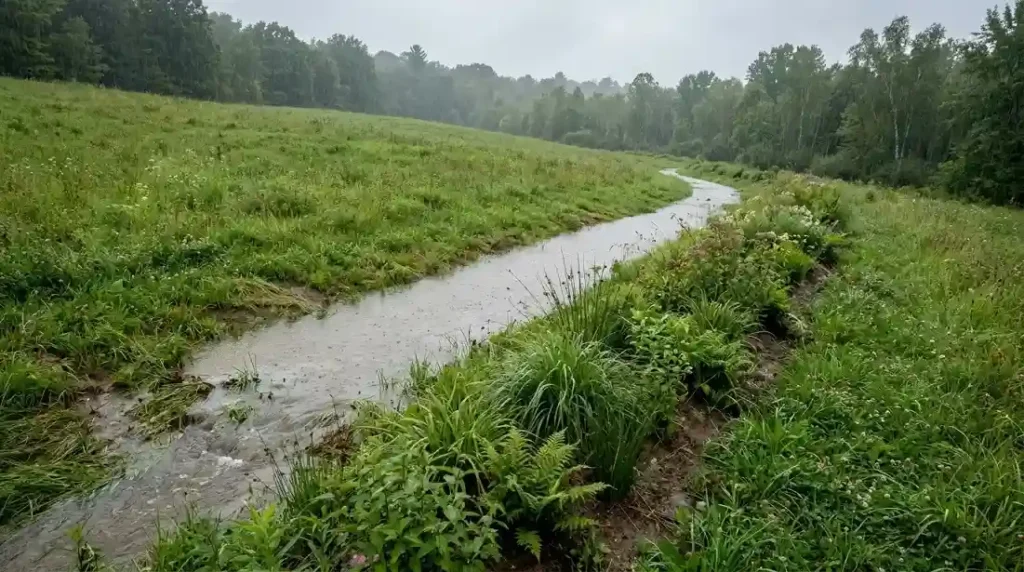
Best for: Hills where water spreads across the surface
Rainwater gains speed as it moves downhill. Fast water can carry soil, mulch, and small plants with it.
A shallow swale can slow that flow.
A swale is a wide, shallow dip in the ground. A contour swale follows a level line across the hill instead of running straight down it.
The removed soil can form a low mound on the downhill side. Plants placed near the swale can use some of the moisture.
The goal is to slow and spread water. It is not to create a deep ditch.
Watch the yard during rain before you dig. Mark where the water comes from and where it leaves the property.
Do not send water toward:
- Your home’s base
- A neighbor’s property
- A septic area
- A loose bank
- A low spot with no safe outlet
A small garden swale may be a reasonable DIY project. Major water flow is different. Get expert advice when water comes from a large roof, driveway, street, or upper property.
Drainage work can cause serious problems when it is done without a clear outlet.
Reuse Branches to Make Low-Cost Log Wattles
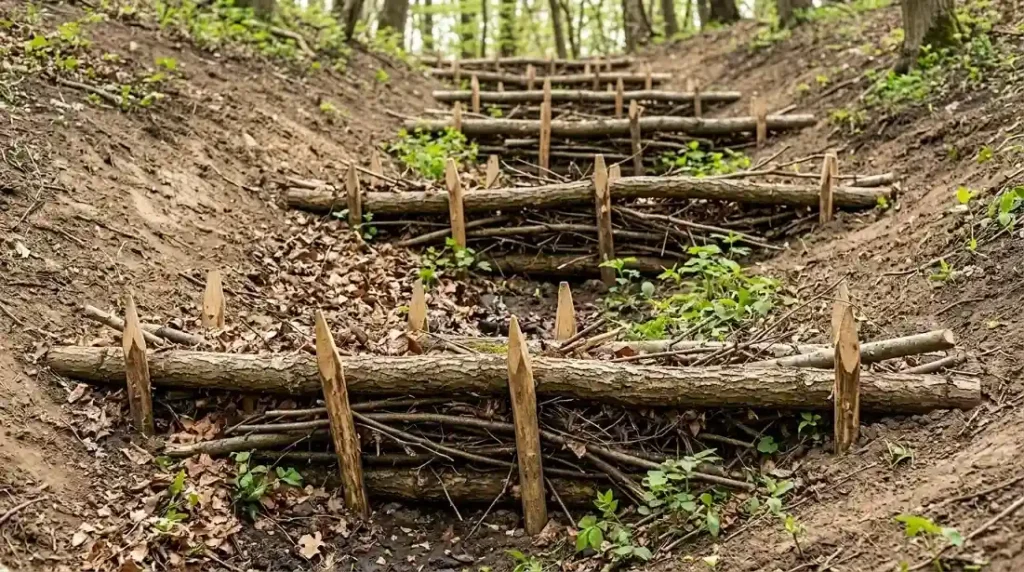
Best for: Bare sections where you need a temporary barrier
Branches and small logs can help slow surface water. They can also catch loose leaves and soil.
Place the wood across the hill. Do not point it straight downhill.
Use strong stakes to keep each piece from rolling. Fill open gaps with smaller branches when needed.
You can also bundle thin brush together. Secure each bundle before placing it on the slope.
These rows act as low barriers. They slow water and help collect loose material. Plants may later grow around them.
This method works best as a short-term or natural feature. Wood breaks down over time. It should not be used to hold back a large or heavy bank.
Use sound branches that are free from disease. Avoid rotten wood that will fall apart at once.
You should also avoid old railroad ties or wood with unknown chemical treatment. This matters even more near herbs, fruit, or vegetables.
Log wattles are one of the more useful forms of DIY hillside landscaping when you already have safe materials on the property.
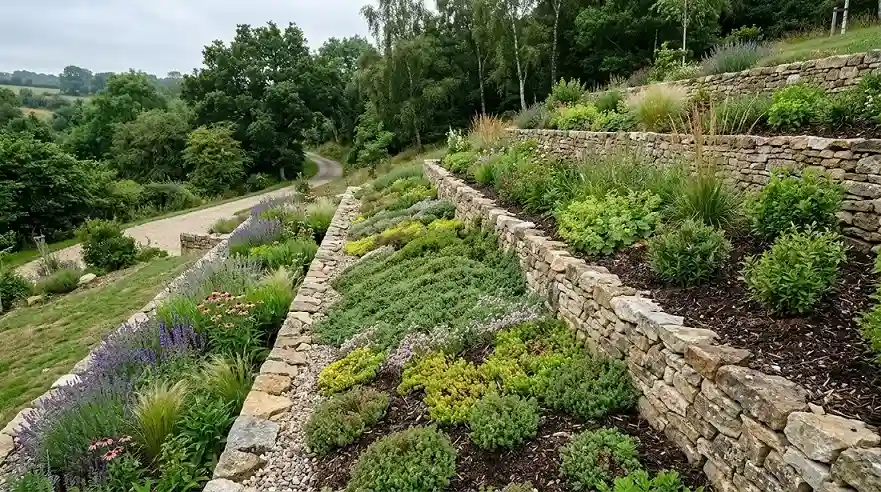
Create Small Terraces Instead of One Expensive Wall
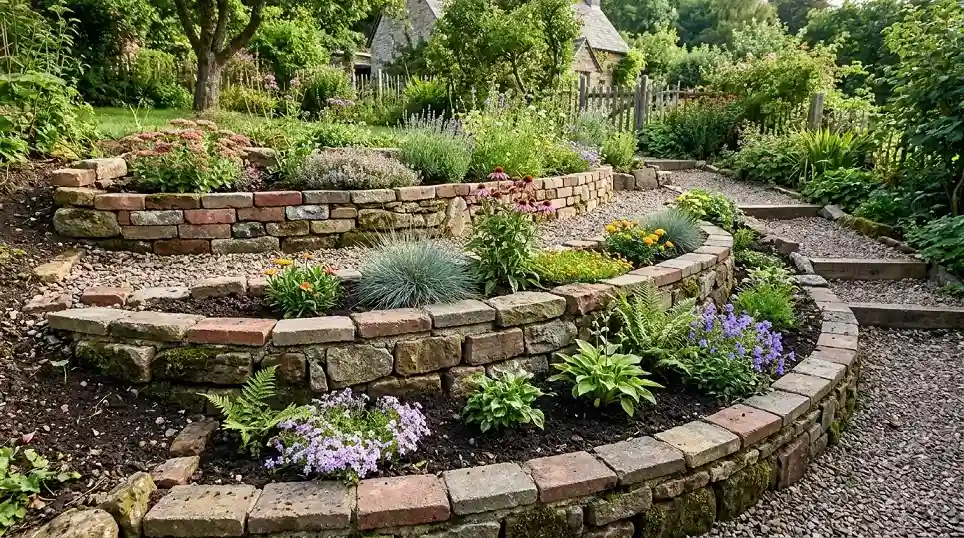
Best for: Slopes where you want flatter planting areas
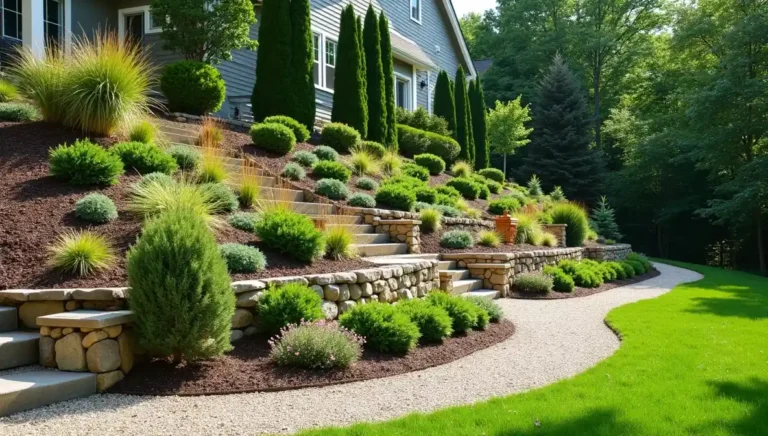
Many homeowners think a hillside needs one tall retaining wall. That is often the most expensive option.
Several small planting levels may cost less. They can also make the hill feel softer and more natural.
This is one of the most useful hillside landscaping ideas on a budget because you can complete it in stages.
Possible materials include:
- Leftover pavers
- Reclaimed garden stone
- Stackable landscape blocks
- Rocks already on the property
- Strong salvaged bricks for light edging
Use each low border to create a shallow planting pocket. Add groundcover, flowers, grasses, or small shrubs.
Prepare a stable base before placing blocks or stones. Water should also be able to drain from each level.
Do not confuse a garden border with a strong retaining wall.
A small border may hold a light planting bed. It may not be safe for a deep pile of soil. Tall walls and heavy banks need proper design and drainage.
Check local permit rules before building. Get expert help when the soil is moving, the slope is steep, or a wall could affect a building.
Saving money is useful. Building an unsafe wall is not.
Break a Long Slope Into Short Planting Zones
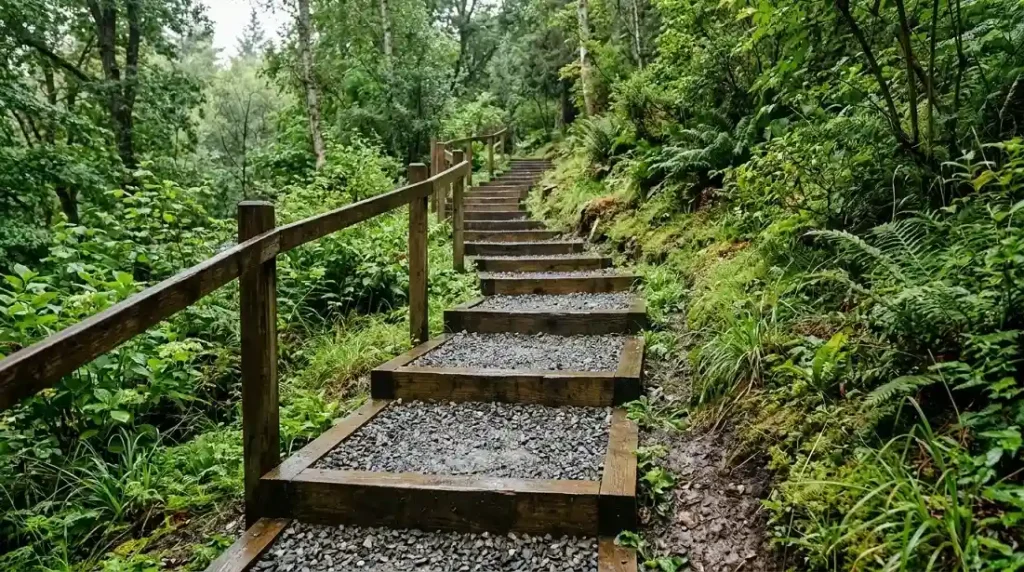
Best for: Long hills that look hard to manage
A long, open slope can make a yard feel unfinished. It can also be hard to water and weed.
Short retaining borders can divide the hill into smaller sections.
For example, place one low border near the bottom. Create a planted strip above it. Add another border farther uphill. Fill the space between the two with groundcover.
This layout gives you smaller work areas. You can finish one part this season and another part later.
Short borders may use:
- Landscape blocks
- Natural stone
- Concrete edging
- Heavy timber made for ground contact
- Gabion-style baskets in suitable settings
Each border still needs a firm base. Water must not build up behind it.
Do not copy a wall height from a photo or video. Soil, slope angle, rainfall, and local rules all affect what is safe.
Look for warning signs before you start:
- Cracks in the soil
- A leaning fence or wall
- Bulging ground
- Exposed roots
- Soil moving after rain
These signs may point to a larger problem. A professional check can save you from paying for failed work later.
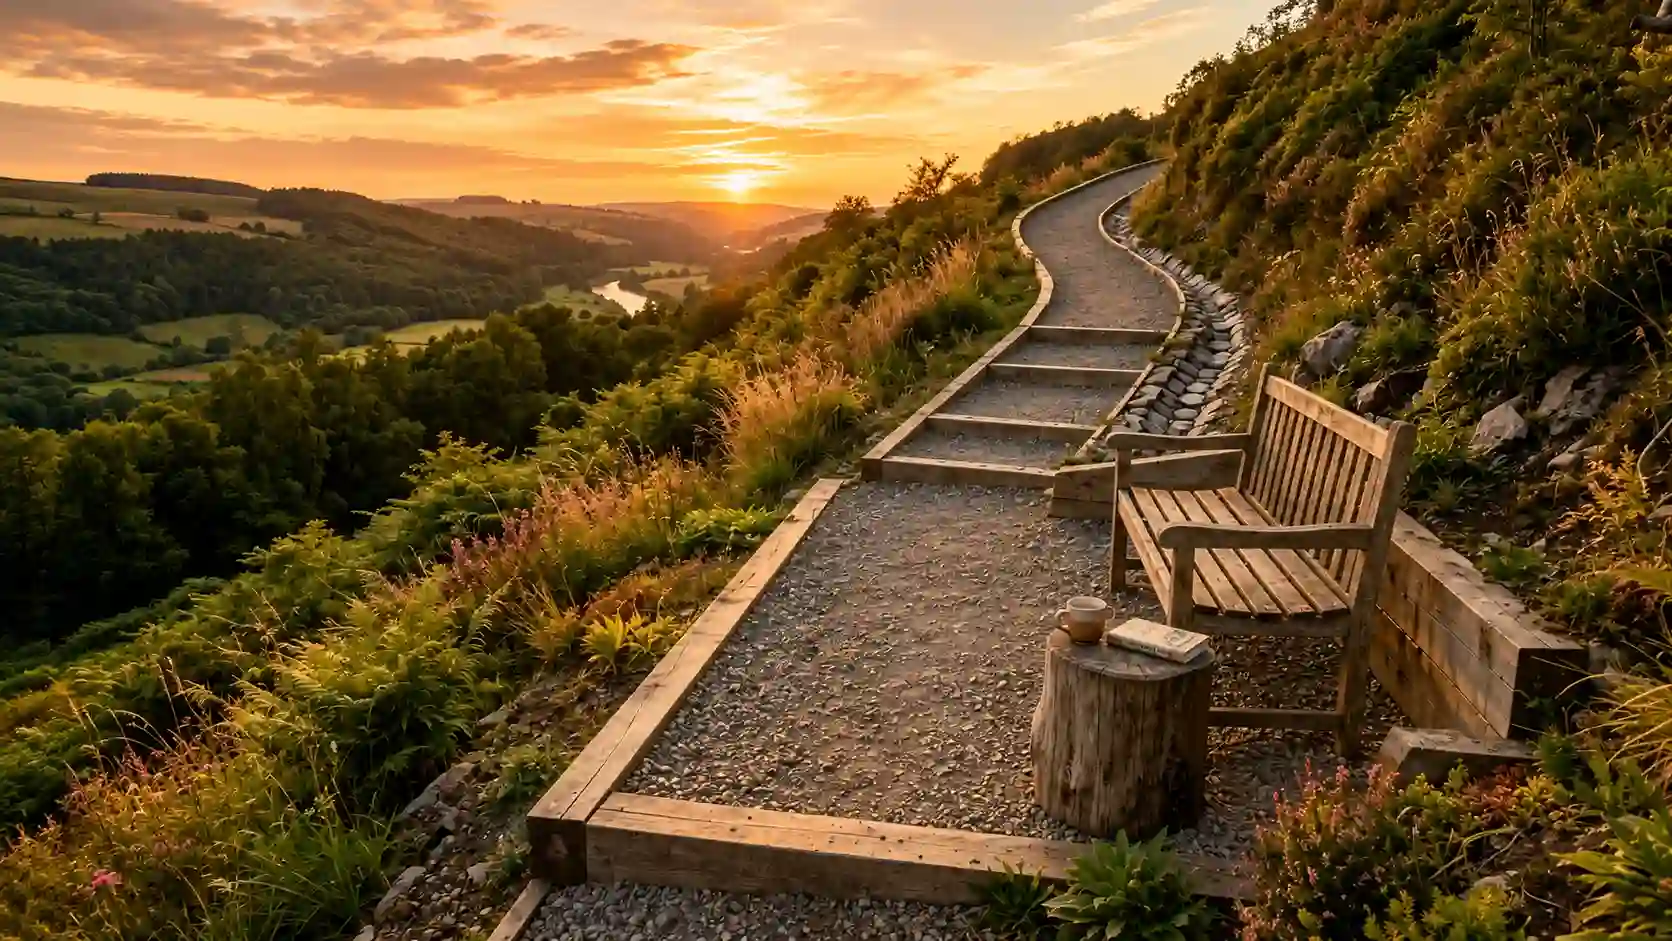
Make the Hill Easier to Walk With a Gravel Path
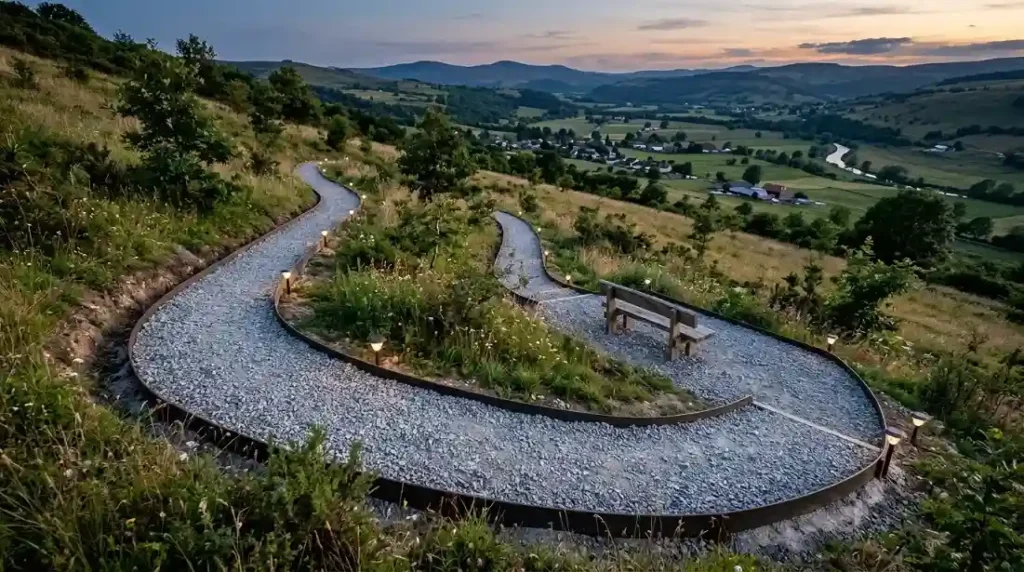
Best for: Wide hills with enough room for a gentle route
Walking straight up a hill takes more effort. It can also be risky when you are carrying tools, soil, or plants.
A switchback path crosses the slope in gentle turns. The longer route reduces the steep climb.
Do not spread decorative gravel straight over the soil. It will shift, sink, or wash away.
A basic gravel path may include:
- A marked and cleared route
- A firm, compacted soil base
- A layer of crushed base material
- Edging where the gravel may spread
- A top layer of angular gravel
Angular gravel locks together better than smooth, round stones. Pea gravel may roll under your feet, especially on a slope.
Add a wider area at each turn. This can serve as a resting point or a place for a pot, bench, or light.
Solar lights may help mark the path at night. Place them where they will not become a tripping risk.
A switchback path needs more space than steps. But it often feels easier to use and can be moved around important plants or rocks.
Add Safe Steps Where a Path Will Not Fit
Best for: Narrow slopes that need regular access
Some side yards are too narrow for a switchback path. Simple steps may work better.
Each step should feel firm and even. A sudden change in height can cause someone to trip.
Budget materials may include:
- Flat stone slabs
- Concrete pavers
- Landscape timber
- Gravel held inside timber frames
- Leftover matching blocks
Prepare the ground below each step. A compacted base helps stop pavers and stones from sinking.
Timber-framed gravel steps can work in a casual garden. Use wood rated for outdoor ground contact. Secure each frame so it cannot move downhill.
You may need a handrail when the steps are steep or close to a drop. Local rules may also set size and safety needs.
Do not guess when the stairway is tall, heavily used, or close to a wall.
Simple garden steps can be a DIY project. A major outdoor staircase is building work and may need professional help.
Spend extra care on the base. A cheap surface placed on weak ground will not stay safe for long.
Turn a Runoff Channel Into a Dry Creek Bed
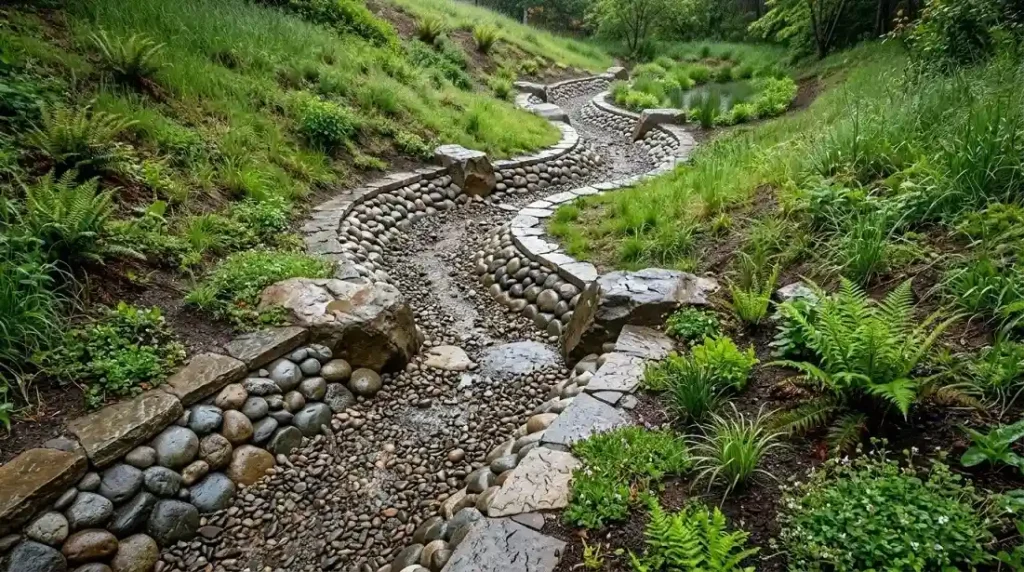
Best for: Hills where water follows one clear route
Some slopes already have a narrow channel made by rain. Covering it with soil or mulch will not stop the water. The channel may come back after the next storm.
A dry creek bed can make that water route look like part of the design.
Follow the path water already takes. Use a mix of stone sizes instead of one even layer.
You may use:
- Large anchor rocks
- Medium river stones
- Small gravel
- Flat stones along the edge
- Moisture-loving plants near the lower end
Place larger stones at bends and wider areas. This helps the creek bed look more natural.
The bottom may need proper base work to keep stones from sinking into mud. Fabric may help in some cases, but it should not block needed drainage.
The most important part is the outlet.
Where will the water go after it reaches the bottom? It needs a safe place to slow, spread, soak in, or enter an approved drain.
Call your local utility service before digging. Never assume the soil is clear of pipes or cables.
Use Existing Rocks to Make Small Planting Pockets
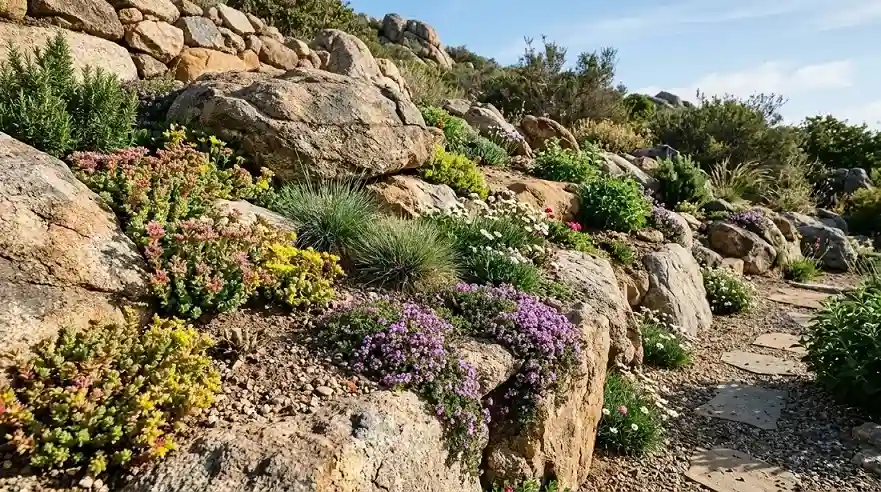
Best for: Rocky slopes with hot or dry soil
Rocks already on your hill are free landscape materials. You may be able to build the design around them instead of paying to remove them.
Small spaces between rocks can become planting pockets.
Add suitable soil where needed. Choose compact plants that can handle the light and moisture in that spot.
Possible options include:
- Sedum
- Creeping thyme
- Small native grasses
- Compact flowers
- Low-growing herbs
- Alpine-style plants in cool areas
Use plants with similar needs in each section. Do not mix a water-loving plant with one that needs dry soil.
Groups of different rock sizes look more natural than rows of stones that are all the same size.
Do not loosen a large rock that is fixed deep in the bank. It may help support the soil around it.
Work around large rocks unless a skilled contractor says they can be moved safely.
This low-cost slope landscaping idea works well because it uses the shape of the yard instead of fighting it.
Grow Herbs and Berries on a Sunny Hill
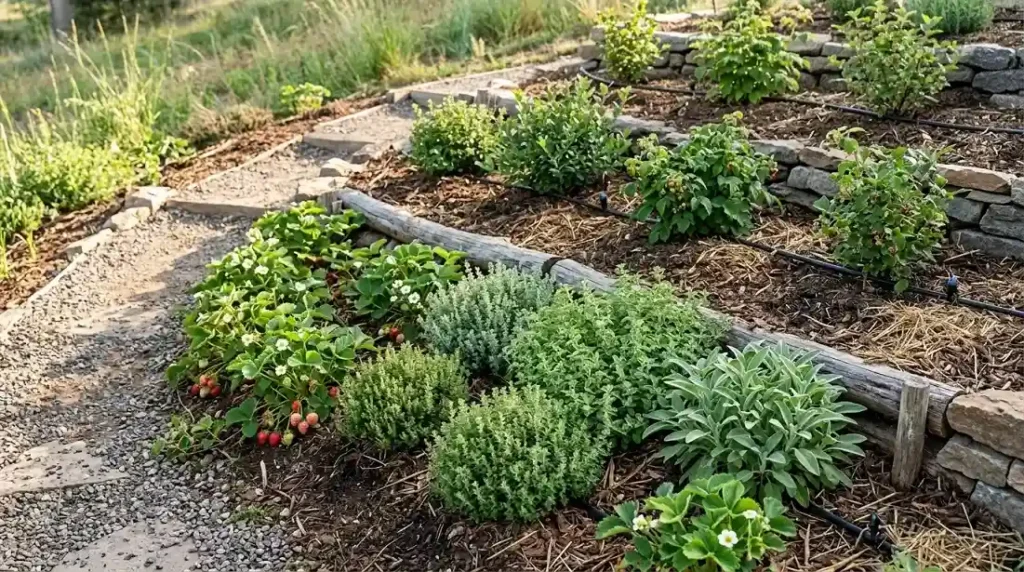
Best for: Sunny slopes with safe walking access
A sunny hillside can become useful growing space. You may be able to plant herbs, berries, or other small food plants.
The main challenge is water. Water can run past roots before it soaks into the soil.
Create small, level planting pockets. Add a path so you can reach each area without stepping on plants.
Possible choices include:
- Strawberries
- Thyme
- Sage
- Rosemary in warm areas
- Blueberries in suitable soil
- Dwarf berry shrubs
- Perennial herbs
Check which plants grow well in your area. Blueberries need the right soil conditions. Rosemary may not survive cold winters.
Place plants you pick often close to the path. Put plants that need less care farther uphill.
A simple drip line or soaker hose can deliver water near the roots. Mulch can help slow moisture loss.
Protect young plants from rabbits, deer, or other local animals when needed.
Start small. A few herb pockets are easier to care for than a full edible hillside garden.
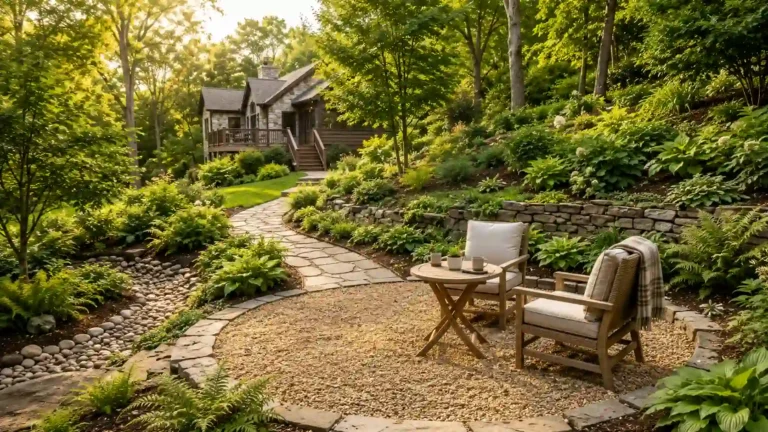
Create One Small Seating Area Instead of Leveling the Yard
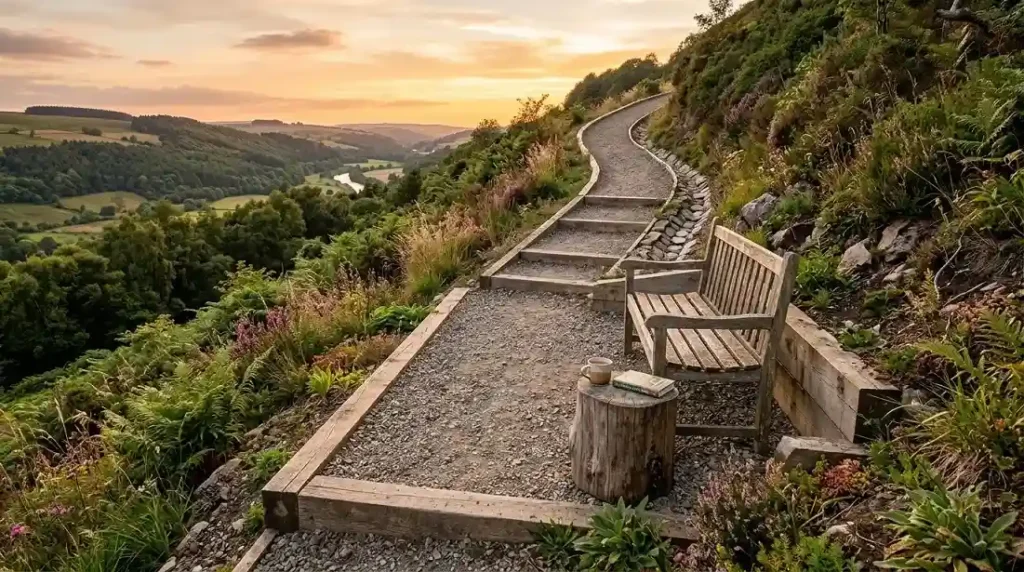
Best for: Slopes where you want a quiet place to sit
You do not need to flatten the full hill to make it useful.
Look for one area that is already close to level. It may be near the bottom, beside a path, or at a turn in a switchback route.
A small gravel pad can hold a bench or two chairs.
Prepare a firm base before adding the top gravel. Add edging if loose stone may spread downhill.
Simple seating ideas include:
- A basic garden bench
- Two outdoor chairs
- A small bistro set
- A built-in seat beside a low wall
- A safe wood stump used as a side table
Add a few plants around the space. This will help the seating area feel connected to the hill.
Choose plants that will not block the view or grow across the path.
Do not place the area in an active water route. You also need a safe way to reach it.
One small seating spot often gives you more value than paying to level a large section of the yard.
Save Water With Soaker Hoses and Separate Watering Zones
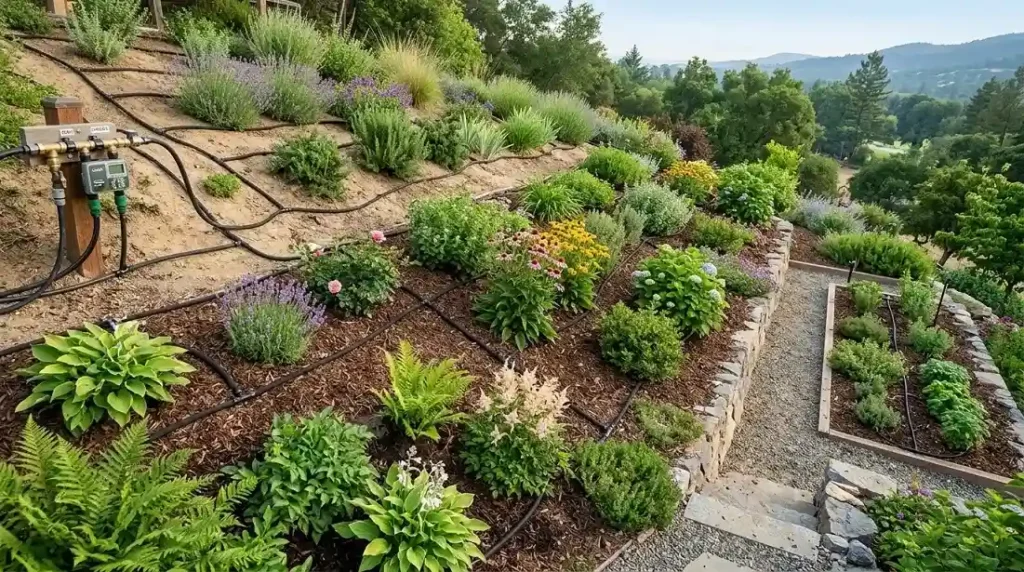
Best for: Planted hills that dry out at different rates
The top and bottom of a hillside may not need the same amount of water.
The top may dry fast. The bottom may stay wet longer because water moves downhill.
Overhead sprinklers can waste water. They may also send more runoff across bare soil.
A soaker hose or simple drip line puts water closer to the plant roots.
You can create separate lines for:
- The top of the slope
- The middle planting beds
- The lower area
- Herbs or plants that need more water
Check the hose often. A blocked or damaged line can leave part of the hill dry.
Cover the line with a light layer of mulch when the product directions allow it. Do not bury parts that need regular checks.
A rain barrel may provide some water where local rules allow it. Use a screen and secure lid. This helps keep out dirt and mosquitoes.
Do not place a leaking barrel near the base of your home.
Low-cost irrigation protects the money you already spent on plants. It can also reduce the time needed to carry a hose up and down the hill.
How to Pick the Right Budget Idea for Your Slope
The best hillside landscaping ideas on a budget fix the most serious problem first.
Do not start with a bench when soil is washing away. Do not add flowers before dealing with a heavy water channel.
Use this chart to compare your options:
| Idea | Best for | DIY level | Care needed | Main benefit |
| Groundcovers | Wide bare areas | Easy to medium | Low | Covers and protects soil |
| Jute and mulch | New planting areas | Easy | Medium at first | Holds loose surface soil |
| Ornamental grass | Large sunny slopes | Easy to medium | Low | Adds roots and texture |
| Wildflower meadow | Hard-to-mow hills | Medium | Medium in year one | Reduces lawn care |
| Shallow swale | Light surface runoff | Medium | Low to medium | Slows water |
| Log wattles | Temporary erosion control | Easy to medium | Medium | Catches loose soil |
| Mini terraces | Small planting levels | Medium to hard | Medium | Creates flatter beds |
| Gravel path | Regular walking access | Medium | Medium | Makes the hill easier to use |
| Steps | Narrow access areas | Medium to hard | Medium | Creates a direct route |
| Dry creek bed | One water channel | Medium | Low | Guides runoff |
| Seating pad | Small usable space | Medium | Low | Adds a place to relax |
| Soaker hose | Large planted slopes | Easy | Medium | Improves watering |
Ask these questions before choosing:
- Is soil moving?
- Does water follow one path?
- Do you need to walk across the hill?
- Is the area sunny or shaded?
- How much care can you give it?
- Can you complete the work safely?
- Will the project affect another property?
Choose the smallest project that fixes the largest problem. Finish it well. Then check the hill again after heavy rain.
Avoid These Costly Hillside Landscaping Mistakes
Saving money does not mean using the cheapest method in every part of the project.
Some shortcuts fail fast. Others can create a safety or drainage problem.
Fix water before adding decoration
Mistake: Adding flowers, mulch, or stone without checking water flow.
Better choice: Watch the hill during rain and mark the main runoff routes first.
Do not use loose mulch as the only erosion fix
Mistake: Covering a steep, bare hill with bark.
Better choice: Combine mulch with plants, jute fabric, or another suitable soil-control method.
Never send water at another property
Mistake: Digging a channel that moves water into a neighbor’s yard.
Better choice: Make sure every drainage feature has a safe and legal outlet.
Build walls with drainage in mind
Mistake: Stacking blocks against soil without a firm base or drainage plan.
Better choice: Follow product directions and local rules. Get help for tall or load-bearing walls.
Avoid invasive plants
Mistake: Buying a fast-spreading plant without checking local guidance.
Better choice: Use a local extension office or trusted native plant source to check the plant first.
Keep steps even
Mistake: Building steps with random heights and loose surfaces.
Better choice: Use a planned route, firm base, and even treads.
Leave room for future care
Mistake: Filling every space with plants but leaving no access path.
Better choice: Plan how you will weed, water, prune, and replace plants.
Know when the project is too large
Call a professional when:
- The bank is moving
- Deep cracks are appearing
- Soil is pushing against a building
- A wall is leaning
- The slope has a sharp drop
- Heavy water enters from another property
- The work may change a public drain
- You need a large retaining wall
A professional visit may feel like an extra cost. It can be much cheaper than rebuilding failed work.
Make Your Hillside Better One Section at a Time
You do not need to fix the whole yard in one weekend.
Start with water. Cover exposed soil next. Then add safe access, useful planting areas, or a small place to sit.
Reuse good materials when you can. Buy small plants. Complete one section before moving to the next.
Walk the hill after the next rainfall. Mark where water and soil are moving. Then choose one idea that solves that exact problem.
With careful planning, these hillside landscaping ideas on a budget can turn a hard-to-use slope into a safer, greener, and more useful part of your yard.